Tuesday, December 12, 2017

Hong Kong - Street Food in Kowloon


Hong Kong is a great place for street food. If you like eating tasty treats on a stick, you will not be disappointed. You can find street food most anywhere, but the largest density is probably in Kowloon at night.


We purchased the fried tofu above from a bustling stall a few blocks southwest of the Ladies' Market.


The outside of the tofu was crispy, the inside soft and it came with a nice spicy sauce.

Walking down farther south to the Temple Street Night Market, we had our first stick of curried fish balls:


Spicy and delicious.


Not in Kowloon this time, but just outside the Tin Hau MTR station, we had the street version of cheung fan - rolled rice noodles:


I wasn't a big fan of the sauces (too sweet), but I liked the texture of the rolls. The guy running the stall was quite the character:


We found ourselves back in Kowloon again at the tail end of our trip. Near the Mong Kok MTR stop, at the corner of Mong Kok Road and Tung Choi Street are a number of very busy street food vendors.


We got a little bowl of shiumai, which were pretty good but basically shiumai-shaped fish balls.


Just down the street was a guy grilling up skewers of various meats.


Unable to resist meat-on-a-stick, we had two lamb skewers. They were lovely - tender and full of flavor.


We still needed a little snack, so we got some fried chicken bites from one of the ubiquitous Hot Star stands. Crispy, and coated with some chili and five-spice flavor.


We rounded out the evening with soft-serve ice cream when we succumbed to the lure of a Mobile Softee truck.

Thursday, December 7, 2017

Hong Kong - Noodle Soups at Sister Wah, Wing Kee and Tsim Chai Kee


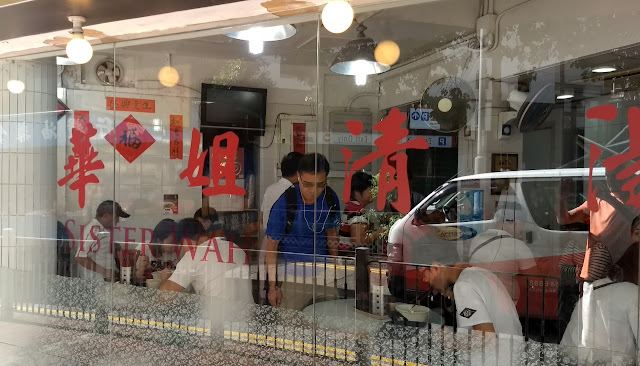
It is hard to explain why I liked Sister Wah's brisket noodle soup so much. There isn't much to it - a clear beef broth with slices of tender brisket and your choice of noodle (we preferred the wide rice noodle).


The curry version is tasty, too, but for us the simple clear soup version was the winner. When we flew back into Hong Kong at the end of our trip, the first thing we did was rush out to Sister Wah to get there before they closed at 11:00pm.


Wing Kee Noodle is a build-your-own bowl (cart noodle) joint serving up inexpensive bowls to a bustling clientele. When we arrived, there was a long line out the door, but it moved quickly and we needed the extra time to figure out what to order.


 I got brisket (called "flake" on the menu), beef ball, and radish:


Sherry got pork neck, sausage and radish:


Both bowls were very tasty.

The day we flew home from Hong Kong, we managed to fit in one more bowl of noodle soup - this time at Tsim Chai Kee:


Busy place, with friendly staff and patrons. They only have a few options on the menu - fish ball, shrimp wonton, beef, or any combination of the three. We each got a bowl of all three and wow was it overflowing! I really liked the shrimp wonton - nice, big chunks of shrimp. The fish cake was huge - we could barely lift it with our chopsticks.

Overall, a very good send-off home from Hong Kong.

Wednesday, December 6, 2017

Hong Kong - Egg Tart ("daan taat") Obsession


We ate egg tarts every single day we were in Hong Kong. Sometimes more than one. Sometimes more than two. Obsession? Maybe, but I will not apologize for our behavior.

Particularly in the morning, a warm egg tart ("daan taat" in Cantonese) snatched from the tray in a bakery storefront window is a wonderful thing.


Pictured above, the egg tarts from Violet Cake Shop in Causeway Bay were some of the prettiest we had.

My favorite egg tart in Hong Kong, though? Whichever one I currently held in my hand. Most often, it was this one from Likey Bakery:


Likey Bakery was just down the street from our hotel in Causeway bay, and as such it provided both our first egg tart and our most re-occuring.


One morning we watched with horror as the patron in front of us absconded with all but the last tart from the tray. We were forced to share, when we *really* wanted one each.


Egg tarts come in two varieties - cookie crust and fluffy puff pastry crust. I fully expected to like the puff pastry version better, but I wound up solidly in the cookie crust camp. Don't get me wrong, though - the puff pastry version is damned good, too. The above version is from Dragon Ball Bakery.


Perhaps the most "famous" egg tart we had was this one:


It was from Honolulu Coffee Shop in Wan Chai. Was it good? Yes. Better than the others? Like I said, my favorite egg tart was whichever one I currently held in my hand.


My recommendation for egg tarts in Hong Kong is eat them early and often.

Tuesday, December 5, 2017

Hong Kong - Roasted meats at Joy Hing and Hon Lok


Roasted meats (pork, duck, goose, pigeon...) are everywhere in Hong Kong. It is hard to walk very far in this city before you pass by a shop with delicious looking bronzed roast beasts hanging in the window. Fittingly, then, our first meal in Hong Kong was a roast pork feast at Joy Hing Roasted Meat in the downtown neighborhood of Wan Chai.


Joy Hing, like many well-regarded small restaurants in Hong Kong, is always busy. These places pack people in, though - you generally find yourself sharing a table with others. Even if there is a line, it usually moves quickly. You aren't expected to linger at a place like this.


Service at Joy Hing is brusk, and was less tolerant of our lack of Cantonese than most other places we visited. Despite no English menu, we managed to get a plate of bbq pork (char siu) and roast pork. It was more food than we needed and priced well above what we expected, but was undeniably delicious.

We had better ordering luck at Hon Lok Roasted Restaurant, near our Hotel in Causeway Bay.


Again, communication proved difficult, but a combination of Cantonese, English and finger pointing soon had the friendly staff plopping down plates of roast duck and pork, along with rice and the ubiquitous gai lan (Chinese broccoli) in oyster sauce. Exactly what we wanted.


Delicious, and it also cost a fraction of what we paid at Joy Hing.


A guy at the next table briefly suspended inhaling his own food to chide my inefficient use of chopsticks to eat rice with. His waving of his spoon at me made his point clear. Lesson learned, and one that stuck with me for the rest of the trip.

Friday, March 27, 2015

Street Food in Playa del Carmen

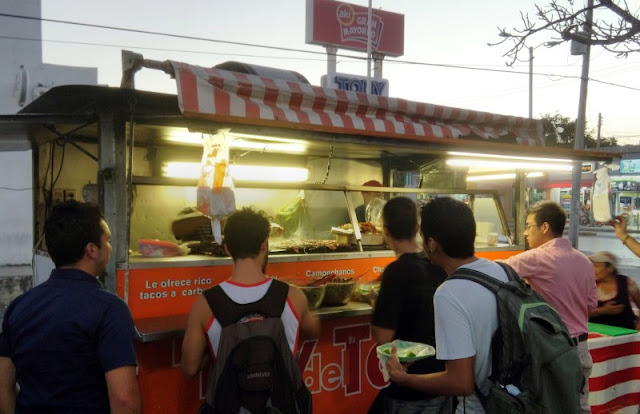
El Rey del Taco in Playa del Carmen, Mexico

We recently spent a blissful two weeks relaxing at the beach in Playa del Carmen, Mexico. When we weren't swimming in the ocean, chances were that we were getting something to eat. Playa is super touristy right by the beach, but you only have to get a few blocks inland to mostly get away from that.

We really enjoyed the street food in Playa. These are some of our favorites out of the spots we found.

El Rey del Taco
Arrachera and Campechanos El Rey del Taco in Playa del Carmen, Mexico

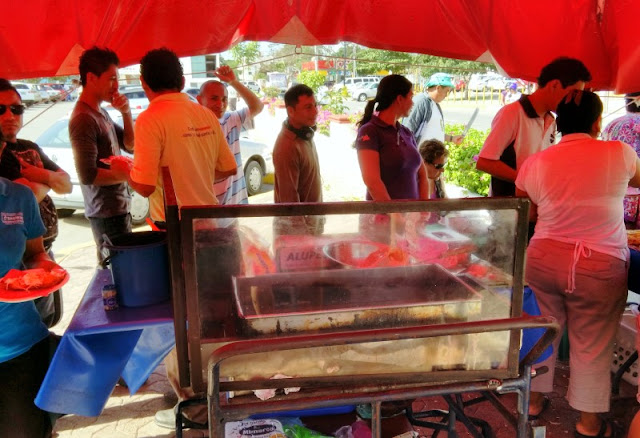
Pictured at the top of the post, El Rey del Taco serves up a variety of tacos, including arrachera (skirt steak) and campechanos (steak with chorizo). They are located on the southwest side of the parking lot of the Mega supermarket on 30th. They start business around 4pm, but there is a similar cart on the opposite side of the parking lot earlier in the day.

Kuni
Kuni in Playa del Carmen, Mexico

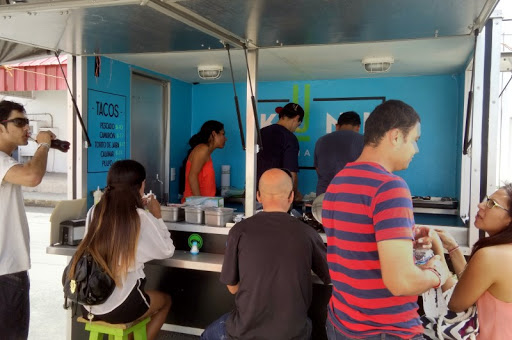
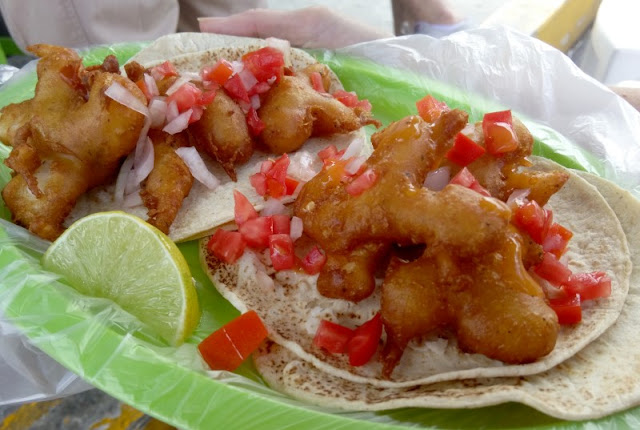
Also located on the southwest side of the Mega parking lot is Kuni, a seafood taco cart. Most of their business is making very tasty shrimp tacos:

Shrimp tacos at Kuni in Playa del Carmen, Mexico

Their fish tacos are also good. I'm not sure of their exact hours, but they were usually there around mid-day and didn't seem to go very late into the afternoon.

Salbutes
Salbutes in Playa del Carmen, Mexico

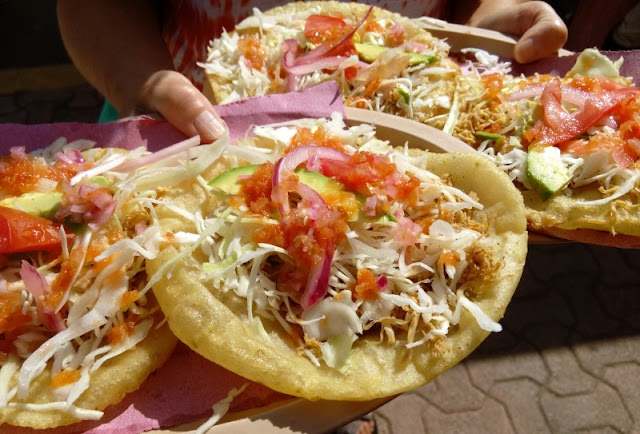
Salbutes are freshly deep-fried discs of dough (a mixture of masa and flour, I think), topped with a variety of condiments. We stumbled across a stand on Avenida 25 across from the Walmart that makes very fine examples indeed:

Salbutes in Playa del Carmen, Mexico

These ones are topped with shredded chicken (they also did ground meat and egg versions). We enjoyed these for breakfast twice - we found this place late in our stay or we would have eaten there even more. They also do empanadas - the same fried dough, but with a filling inside. We never got past the awesome salbutes, though...

Monday, April 7, 2014

Smoking a Picnic Ham

Smoked Picnic Ham

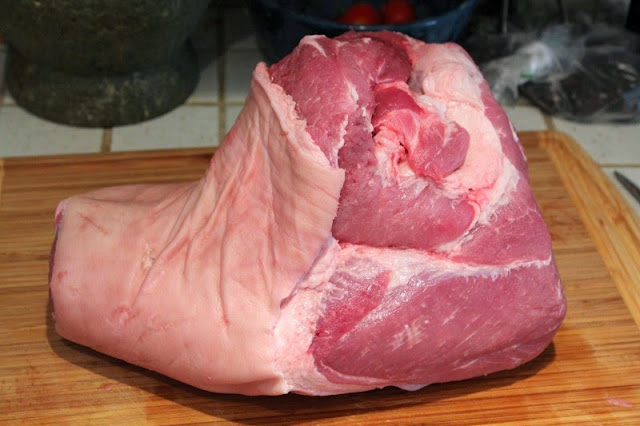
While grocery shopping this past holiday season, we found ourselves unable to resist buying a lovely, and inexpensive, fresh pork picnic "ham". I say "ham" because it wasn't ham yet, but it was soon to be.

The picnic cut is the shank end of the pork shoulder (the other half of the shoulder is the pork "butt" - the cut often used for pulled pork). The meat on the picnic is a bit darker and tighter, and is perfect for turning into ham. The picnics we've used have been around ten pounds.

Smoked Picnic Ham

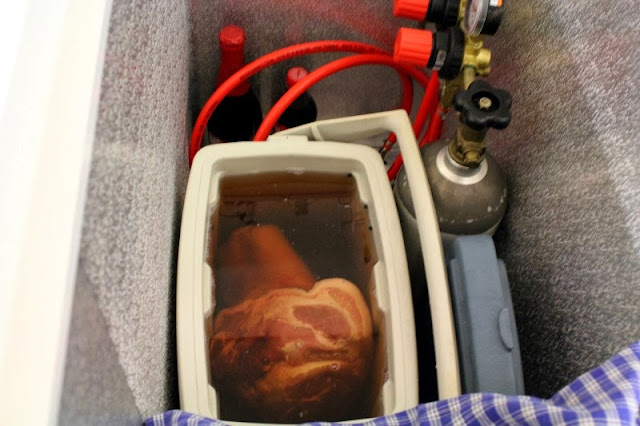
The process is actually quite simple. The first step is to put it in a salty brine in a cool place (we use a cooler in our beer-chest at about 45 degrees F).

The brine is 10 liters of water, 500g kosher salt, 100g pink salt (curing salt), 75g sugar, 75g brown sugar, 1 T black pepper corns, 2 t coriander seeds, 1 t yellow mustard seed.

We boil part of the solution for a few minutes to soften the spices, add water to reach 10 liters and cool to 40 degrees F before adding to the pork.

Smoked Picnic Ham

After six days in the brine, take it out, rinse it, dry it off well and put it into the refrigerator uncovered for two more days. This allows the skin and surface to dry a bit which allows it to take up the smoke more readily.

Smoked Picnic Ham

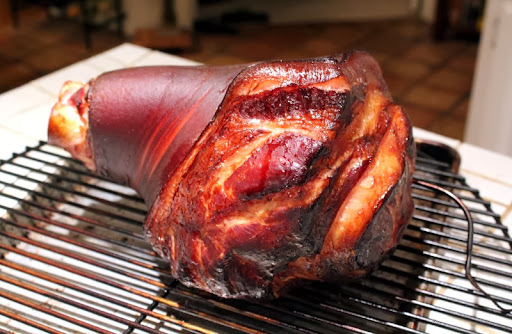
After brining and drying, it is time to smoke. We use our Weber Smokey Mountain with apple and pecan wood smoke for 7 to 8 hours. Keep the smoker at about 180 degrees F for the first couple hours, then up to 215-230 for the next four-five hours, finishing at 240-250 degrees the last hour or two until the meat reaches an internal temperature of 165 degrees.

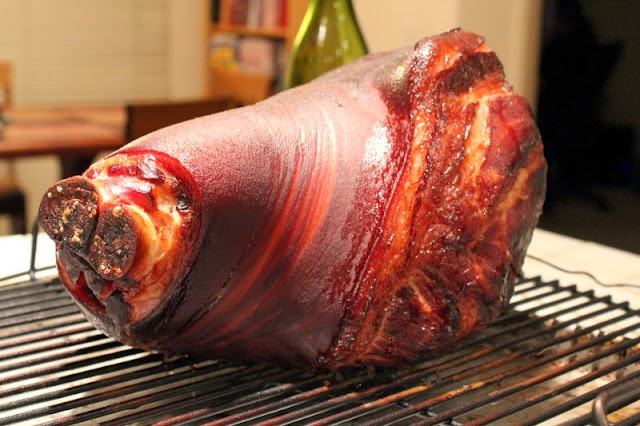
Here is what it looks like when it comes off of the smoker:

Smoked Picnic Ham

Make sure you plan to feature the ham in a meal the same day you smoke it - it is super good hot off of the smoker.

Smoked Picnic Ham

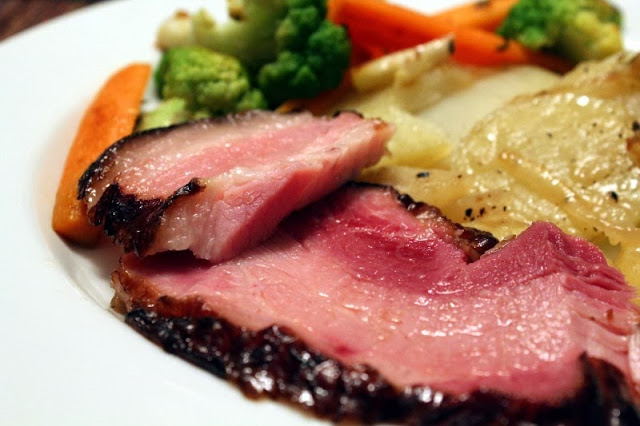
No need to do anything fancy - just slice it and eat it. Yum!

Smoked Picnic Ham

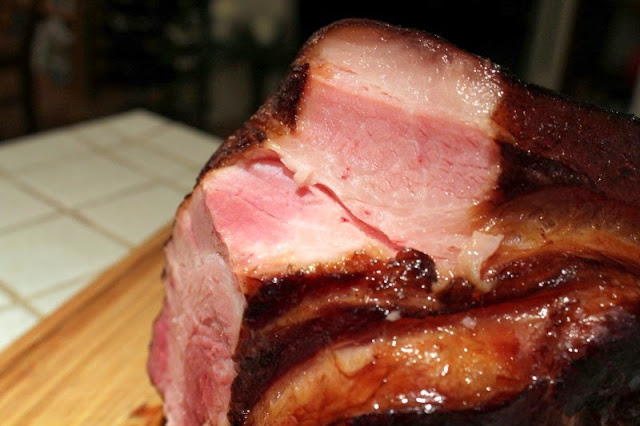
The part of the ham under the skin has a nice fat layer that is reminiscent of pork belly:

Smoked Picnic Ham

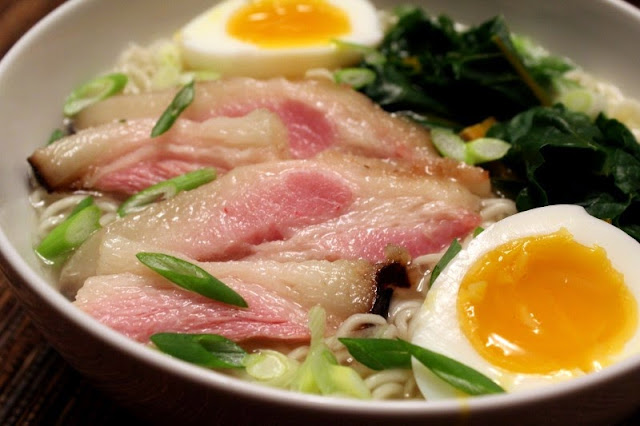
We've  found that these fattier slices make a nice substitute for chashu in ramen:

Smoked Picnic Ham

Ham is now solidly in our list of things we make instead of buy. If you've got a smoker, you owe it to yourself to give it a try.

Saturday, January 18, 2014

Homemade Fermented Rice Wine


With just a few simple ingredients and a bit of time, you can make your own homemade rice wine. It is very easy to do and it tastes delicious. All you need is glutinous rice and a special kind of yeast. The resulting wine is fruity and slightly sweet. It is nice to drink straight, and can also be used in cooking where you would use mirin or sake.

The key ingredient (apart from the rice, of course), and probably the hardest to find, is the yeast. Specifically designed for making rice wine, it come in little balls like this:


We got ours from the 99 Ranch Asian supermarket. They were sold in a package containing a few dozen individually wrapped pairs of yeast balls, and were labeled "Rice Cake".

The preferred rice to use is glutenous rice (also known as "sticky" or "sweet" rice). It gets prepared just as you would for eating - we used our rice cooker. For our 2 liter jar we started with about 650g (3 measuring cups, or 4 rice-cooker cups) of uncooked rice.

After the rice is cooked, spread it out on a sheet pan. Once it has cooled, it is time to put in a container to ferment.


Put a yeast ball in a bowl and smash it into a fine powder. Scoop a layer of rice an inch or two thick into the container and sprinkle some of the yeast powder on top. Repeat this process until the container is filled.


That's it! Now it is time to wait. After a day or so, you will begin to see signs of activity as the yeast get to work. Carbon-dioxide gas bubbles will be generated as the alcohol is produced, so don't seal it too tightly. As the yeast break down the rice, the liquid wine will begin to pool at the bottom of the container. Here is what ours looked like after two days:


Try a little taste of the wine every day or two as it progresses - it tastes good straight from the beginning and it definitely changes over time.

Here is our wine after four days - you can see how much more liquid has pooled at the bottom:


This is a taster we poured at the four day mark. The wine is fruity, slightly effervescent, and really enjoyable:


We let this batch go for a total of 14 days. At this point the wine had lost its effervescence, but remained fruity, slightly sweet and creamy, with a pleasant alcohol kick.
We poured it through a square of cheese cloth to remove the rice hulls, transferred the wine to a bottle, and refrigerated it for storing and serving. The resulting rice wine will be fairly cloudy at first, with fine rice particles mixed in. If you let it stand in the fridge, it will clarify and separate with a dense layer of white sediment at the bottom. You can pour the clarified wine off, but it isn't necessary to do so.
After our success with this first test batch, we did a much larger batch using a beer fermentation bucket. The process was the same - just with a larger volume of rice.

Cheers!