Showing posts with label recipe. Show all posts

Monday, April 7, 2014

Smoking a Picnic Ham

Smoked Picnic Ham

While grocery shopping this past holiday season, we found ourselves unable to resist buying a lovely, and inexpensive, fresh pork picnic "ham". I say "ham" because it wasn't ham yet, but it was soon to be.

The picnic cut is the shank end of the pork shoulder (the other half of the shoulder is the pork "butt" - the cut often used for pulled pork). The meat on the picnic is a bit darker and tighter, and is perfect for turning into ham. The picnics we've used have been around ten pounds.

Smoked Picnic Ham

The process is actually quite simple. The first step is to put it in a salty brine in a cool place (we use a cooler in our beer-chest at about 45 degrees F).

The brine is 10 liters of water, 500g kosher salt, 100g pink salt (curing salt), 75g sugar, 75g brown sugar, 1 T black pepper corns, 2 t coriander seeds, 1 t yellow mustard seed.

We boil part of the solution for a few minutes to soften the spices, add water to reach 10 liters and cool to 40 degrees F before adding to the pork.

Smoked Picnic Ham

After six days in the brine, take it out, rinse it, dry it off well and put it into the refrigerator uncovered for two more days. This allows the skin and surface to dry a bit which allows it to take up the smoke more readily.

Smoked Picnic Ham

After brining and drying, it is time to smoke. We use our Weber Smokey Mountain with apple and pecan wood smoke for 7 to 8 hours. Keep the smoker at about 180 degrees F for the first couple hours, then up to 215-230 for the next four-five hours, finishing at 240-250 degrees the last hour or two until the meat reaches an internal temperature of 165 degrees.

Here is what it looks like when it comes off of the smoker:

Smoked Picnic Ham

Make sure you plan to feature the ham in a meal the same day you smoke it - it is super good hot off of the smoker.

Smoked Picnic Ham

No need to do anything fancy - just slice it and eat it. Yum!

Smoked Picnic Ham

The part of the ham under the skin has a nice fat layer that is reminiscent of pork belly:

Smoked Picnic Ham

We've  found that these fattier slices make a nice substitute for chashu in ramen:

Smoked Picnic Ham

Ham is now solidly in our list of things we make instead of buy. If you've got a smoker, you owe it to yourself to give it a try.

Saturday, January 18, 2014

Homemade Fermented Rice Wine


With just a few simple ingredients and a bit of time, you can make your own homemade rice wine. It is very easy to do and it tastes delicious. All you need is glutinous rice and a special kind of yeast. The resulting wine is fruity and slightly sweet. It is nice to drink straight, and can also be used in cooking where you would use mirin or sake.

The key ingredient (apart from the rice, of course), and probably the hardest to find, is the yeast. Specifically designed for making rice wine, it come in little balls like this:


We got ours from the 99 Ranch Asian supermarket. They were sold in a package containing a few dozen individually wrapped pairs of yeast balls, and were labeled "Rice Cake".

The preferred rice to use is glutenous rice (also known as "sticky" or "sweet" rice). It gets prepared just as you would for eating - we used our rice cooker. For our 2 liter jar we started with about 650g (3 measuring cups, or 4 rice-cooker cups) of uncooked rice.

After the rice is cooked, spread it out on a sheet pan. Once it has cooled, it is time to put in a container to ferment.


Put a yeast ball in a bowl and smash it into a fine powder. Scoop a layer of rice an inch or two thick into the container and sprinkle some of the yeast powder on top. Repeat this process until the container is filled.


That's it! Now it is time to wait. After a day or so, you will begin to see signs of activity as the yeast get to work. Carbon-dioxide gas bubbles will be generated as the alcohol is produced, so don't seal it too tightly. As the yeast break down the rice, the liquid wine will begin to pool at the bottom of the container. Here is what ours looked like after two days:


Try a little taste of the wine every day or two as it progresses - it tastes good straight from the beginning and it definitely changes over time.

Here is our wine after four days - you can see how much more liquid has pooled at the bottom:


This is a taster we poured at the four day mark. The wine is fruity, slightly effervescent, and really enjoyable:


We let this batch go for a total of 14 days. At this point the wine had lost its effervescence, but remained fruity, slightly sweet and creamy, with a pleasant alcohol kick.

We poured it through a square of cheese cloth to remove the rice hulls, transferred the wine to a bottle, and refrigerated it for storing and serving. The resulting rice wine will be fairly cloudy at first, with fine rice particles mixed in. If you let it stand in the fridge, it will clarify and separate with a dense layer of white sediment at the bottom. You can pour the clarified wine off, but it isn't necessary to do so.

After our success with this first test batch, we did a much larger batch using a beer fermentation bucket. The process was the same - just with a larger volume of rice.

Cheers!

Thursday, June 27, 2013

Yeasted (Raised) Waffles

Yeasted Waffles

I don't know how it is that we weren't aware of yeasted, or raised waffles until a few years ago. I do know that we no longer make them any other way.

Adding yeast to the batter and letting it work its magic overnight decidedly improves the texture and taste of waffles. They end up airier and with a more complex flavor. And they aren't really any more difficult to make - you just need to remember to mix up the batter the night before.

Here is the recipe we use. If you've never tried it, I highly recommend you give it a go. You may well become converts like we are.

Yeasted Waffles

Serves 4. A Belgian waffle iron with deep groves works well with this batter. Recipe from Marion Cunningham's "The Breakfast Book".

Ingredients:
1/2 cup warm water
1 package active dry yeast, or 2 teaspoons instant yeast
2 cups milk, warmed
1/2 cup (1 stick) butter, melted
1 teaspoon salt
1 teaspoon sugar
2 cups all-purpose flour
2 eggs
1/4 teaspoon baking soda


The night before, find a large bowl big enough to allow the batter to expand to twice its volume (it will rise and fall overnight). Mix together all of the waffle ingredients except the eggs and baking soda (Note: if using active dry yeast, add it to the water for a few minutes before stirring in the remaining ingredients). Stir well, cover and let sit at room temperature overnight.

In the morning, crack the eggs into a small bowl and beat with a fork. Add the baking soda and eggs to the batter and stir well.

Heat a waffle iron over medium high heat. Pour in about one scant cup of batter, and close the iron. If using a stove-top waffle iron, turn after about 30 seconds, then turn every 2 to 3 minutes until the steam reduces drastically (about 8 minutes for us). Remove the waffle when the outside is golden and crisp. Keep warm in a low oven. Avoid stacking the waffles to help keep them crisp.

Leftovers can be frozen and then reheated in a 400 degree oven for about 15 minutes or until crisp and hot.


Friday, May 31, 2013

Ten recipes of ours that you should make right now


This blog is almost six (!!) years old now, and we've posted quite a few recipes along the way. Here are ten of our favorites.

Go make them right now!


Lamb Rogan Josh
Lamb Rogan Josh

While Chicken Pathia is the most popular of our reverse-engineered Indian takeaway recipes, Lamb Rogan Josh is probably the one we like the best.


Pancetta Tesa
Pancetta Tesa

Making your own Pancetta is super easy, and doesn't require any special equipment. The rolled version is a bit more involved, but still quite manageable. Using pretty much the same technique and then smoking it afterward will get you your own Homemade Bacon.


Taco Shop Hot Sauce
Taco Shop Hot Sauce

We use this hot sauce almost every day - particularly at breakfast. You should, too. The green stuff is pretty darn good as well.


Cream Cheese
Homemade Cream Cheese

Cream cheese is one of the easiest cheeses you can make. Infinitely better than the store-bought stuff.


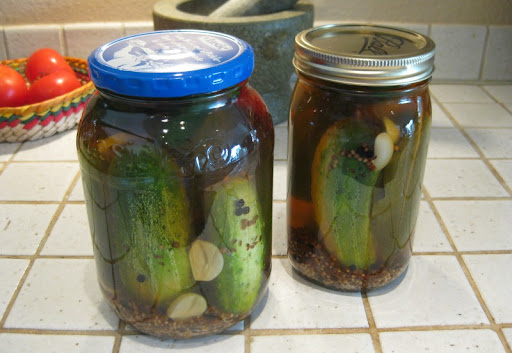
Zesty Dill Pickles
Zesty Dill Pickles

We haven't bought a jar since we started making these simple refrigerator pickles. Our version is modeled after the taste of Vlasic Zesty Dills - twangy and spicy.


Smoked Almonds
Smoked Almonds

Smoked almonds are quite possibly the perfect snack food. Once you start eating them it is very, very difficult to stop.


Chile-Lime Chicken
Chile-Lime Chicken

The salty earthiness of the soy-based marinade for this chicken works so well with the acidity and chile heat from the dipping sauce.


Fish with Spicy Lentils
Fish with Spicy Red Lentils

"Spicy" here refers to complex, intense flavors, rather than heat. It is impossible to adequately describe how delicious the lentil base for this dish is.


Cochinita Pibil
Cochinita Pibil

Cochinita Pibil is pork with a complexly flavored achiote marinade, cooked in banana leaves. Pure Yucatán flavor.


Chori-Migas
Chori-Migas

We first had chori-migas on a trip to Austin, and they've been a breakfast favorite ever since.

So, there you go - ten of our favorite recipes. Go make them right now!

Tuesday, March 19, 2013

Taco Shop Hot Sauce Recipe Revisited

Taco Shop Hot Sauce

We posted our original recipe for Taco Shop Hot Sauce almost three years ago, and since then I've been continuing to making it so that we always have it on hand.

Over the course of many, many repetitions, my technique has gradually changed. While the original recipe is perfectly fine, I now do a few things differently that I think both simplify and improve the process:

  • I no longer make the chile paste separately unless I am using it for something other than hot sauce.
  • I make a smaller batch size. The sauce can start going a bit weird after several weeks and making a smaller amount avoids having it last past its prime.
  • I broil the tomato and the garlic now, rather than cooking them in a frying pan. It is easier and works just as well.
Here is the updated recipe. Go make some right now!


Taco Shop Hot Sauce

This makes enough to fill a small (8-ounce) squeeze bottle, with a bit left over.

Ingredients:
2 medium tomatoes (approx. 8 ounces)
4 garlic cloves (skin on)
Small handful (approx. 1/4 ounce) dried chile de arbol
1 tablespoon red wine vinegar
2 pinches Mexican oregano
1 teaspoon kosher salt


Use your fingers to break off the chile stems and break larger chiles into smaller pieces. Get out as many chile seeds as you can.

In a small frying pan over medium high heat, toast the chiles while constantly stirring them around until they darken but do not burn (about
5 minutes). If your stove has an exhaust fan, you may want to use it.

Place the toasted chiles in a large bowl, discarding any seeds that fell out during the cooking process. Microwave a cup of water for 2 minutes and pour it over the chiles. Place a small plate on top of the chiles to keep them submerged. Soak for about twenty minutes.

Score both the tops and bottoms of the tomatoes with an "X" to allow the skin to peel away easily.

Put the tomatoes and garlic on a sheet pan and put them in the oven on broil until the garlic softens and the tomato skin begins to blister (5-10 minutes). You may need to take the garlic out before the tomatoes.

After cooling for a few minutes until you can safely handle them, peel the skin off of both the tomatoes and garlic. Remove any hard center bits from the tomatoes.

Put the chiles and the garlic in a blender, along with about 1/4 cup of the chile soaking liquid and blend until it forms a smooth paste.

Add the tomato and vinegar and blend until everything is well mixed.

You may need to add more soaking liquid to reach the consistency you want. The amount of water will very greatly depending on how juicy your tomatoes are.

Add oregano and salt to taste, giving a quick blend to mix.

Tuesday, September 11, 2012

IPAison - A West Coast IPA with Saison Yeast

IPAison West Coast IPA with Saison Yeast

We like IPAs and we like Saisons, so what would we get if we tried combining the two styles?

A very tasty beer, indeed.

We used a West Coast style IPA malt and hop profile, but rather than using our typical California ale yeast we used a Saison strain instead. The Saison yeast (we used White Labs WLP568) adds subtle spicy/fruity overtones that work really well with the hop profile.

We also experimented with some new (for us) hop varieties in this beer, since our go-to hops (Simcoe and Amarillo) were not available.

The "IPAison" has been a really nice summer beer. We'll definitely be putting this recipe (or variants of it) in our regular brewing rotation.

IPAison

A West Coast IPA brewed with a Saison Yeast.

Total batch size = 5 gallons; Partial Mash in 3 gallon beverage cooler; ~3 gallon 60 minute stove-top boil; late malt extract addition; dry hopped for aroma; target abv of 7%

Ingredients:
3 lb Briess Golden Light Dry Malt Extract (DME)
2 1/4 lb Briess Pilsen Dry Malt Extract (DME)
5 lb 2-Row Pale Malt
1/2 lb Carapils/Dextrin Malt
1/2 lb Wheat Malt
2 oz Centennial Hops
1 1/2 oz Zythos Hops
1 1/2 oz Summit Hops
1 1/2 oz Horizon Hops
1 tablet Whirlfloc
White Labs WLP568 Saison Ale Yeast Blend


Hop Schedule:
1 oz Centennial - 60 minutes boil
1/2 oz Horizon - 30 minutes boil
1/2 oz Zythos - 25 minutes boil
1/2 oz Summit - 15 minutes boil
1/2 oz Horizon - 2 minutes boil
1/2 oz Zythos - 2 minutes boil
1/4 oz Summit - 0 minutes boil
1 oz Centennial - Dry Hop in Secondary Fermenter
3/4 oz Summit - Dry Hop in Secondary Fermenter
1/2 oz Horizon - Dry Hop in Secondary Fermenter
1/2 oz Zythos - Dry Hop in Secondary Fermenter


Heat 8 quarts water to 165 degrees for a target mash temperature of 150 degrees. Place the 6 pounds of crushed grain (2-Row Pale, Wheat and Carapils) into a large mesh bag. Pour the hot water into the beverage cooler, then lower the grain bag into the water very slowly, pushing and prodding with a large spoon to ensure all the grain is wet (this can take several minutes). Put the lid on the cooler and allow to rest 60 minutes.

While the grains are mashing, heat another 5-6 quarts of water to 180-185 degrees for sparging (rinsing the grains). Near the end of the 60 minutes, heat 2 quarts of water to a boil in your brew pot.

After the first mash is complete, remove the cooler lid and open the spigot to draw off about 2 quarts of wort into a large pitcher. The first few draws will likely be cloudy with grain particles; pour it gently back into the cooler over the grain bag to help filter it. Draw off the remaining wort by the pitcher-full and carefully pour that wort into the boiling water in your brew pot; continue until only a trickle of wort leaves the spigot. Pour about 5 quarts of your hot sparge water over the grain bag in the cooler. Gently lift the bag up and down to thoroughly re-wet the grains (but don't slosh). Cover and let sit about 5 minutes. Use the spigot and a pitcher to draw off all of the second wort and add it to your brew pot. (Alternatively, heat the sparge water to 195 and carefully add it a pint at a time while you draw off the first wort. Keep the liquid level 1 inch over the grain bed until all sparge water has been added, then slowly draw off the remainder.)

You should have about 3 gallons of wort. Bring the wort to a boil and add hops according to the schedule. With 15-20 minutes remaining in the boil, begin adding the DME one cup at a time, stirring to dissolve. At time zero, continue adding DME off the heat until all has been added (if needed, return to low heat for a few minutes to help dissolve the extract). Stir in 1 tablet Whirlfloc. Cover and let sit 10-15 minutes.

Move brew pot to an ice bath and cool quickly to less than 80 degrees. Transfer wort to a primary fermenter (straining off the hops if desired). Add water to reach the 5 gallon mark. Swirl vigorously then pitch the yeast.

Ferment in primary for 1 week, then transfer to secondary. After 4 days, add dry hops from hop schedule. Bottle or keg after fermentation is complete (2 to 3 weeks in secondary).

Tuesday, March 6, 2012

Prawn Pathia - Indian Takeaway Recipes

Prawn Pathia

Our Chicken Pathia recipe is one of the most popular recipes on our blog, and we often get requests for additional recipes using our Curry Base Sauce.

This Prawn Pathia is almost the same recipe as our chicken version, but uses fish stock instead of chicken stock, omits the red coloring and, of course, uses shrimp instead of chicken. While the overall flavor profile remains, the shrimp take the dish in a quite different direction.

Some notes on the recipe, as questions have come up on our other curry recipe posts:

  • We use the term "Indian chilli powder" as that is what is on the label of the powder we typically use. If you can't find that, use a hot, red powdered chile (cayenne works well). Be sure not to use a spice blend - you just want straight powdered chile.
  • For the stock, you should use just the amount concentrated stock cube or granules that would be needed to make a cup of liquid - do not add the corresponding amount of water. The goal is to get the flavor of the stock without diluting the curry base.

Prawn Pathia

Serves four.

Ingredients:
4 tablespoons oil
1 medium onion, chopped small
1/2 teaspoon minced garlic
1 teaspoon minced fresh ginger
1/2 teaspoon cumin
1/2 teaspoon ground coriander
1/2 teaspoon cinnamon
1/2 teaspoon salt (to taste)
1-2 teaspoons Indian chilli powder (or other hot, red powdered chile)
1 large bunch fresh cilantro, coarsely chopped (coriander)
2 tablespoons white wine vinegar
2 tablespoons sugar
Approx. 1/3 recipe Ubiquitous Curry Base Sauce
1 pound large shrimp, peeled and deveined
Fish stock cube or granules (enough for 1 cup)


Heat the oil in a large pot over medium heat. Add cumin, ground coriander, garlic, ginger, and onion. Cook while stirring until onions are wilted.

Add "Base Sauce", fish stock, cinnamon, vinegar, and sugar. Stir to mix. Add salt to taste, and chilli powder to get the spice level you want.

Simmer for about 10 minutes to allow flavors to mix.

Add a large handful of the cilantro to the pot and mix it in. Simmer for another 10-15 minutes.

About 5 minutes before serving, add the shrimp and another small handful of cilantro. Simmer until the shrimp is opaque and just cooked through.

Serve with Pulao Rice and flat-bread.

Friday, October 21, 2011

All Grain Brewing on the Stovetop, and a "Half Nelson" IPA Recipe

Half Nelson IPA

We've been wanting to try all grain brewing for quite some time now. Moving to partial mash brewing made a huge difference in the quality of our beers, and we were curious about how much more we could gain from going all grain.

But, every time we thought about taking the plunge, we always balked at the logistics. A 5-gallon brew pot wouldn't fit on our stove top, so we'd need to get a burner for the patio. Then the hassle of getting the three-tiered set up of hot sparge water above the grain bed to be drained into a huge brew pot. And finally, trying to cool the big 5-gallon pot of wort, then lugging it into the house to transfer to the carboy for fermentation... It just seemed like too much.

Then one day a simple solution occurred to us - we could just do a half batch! Essentially, doing a standard partial mash but omitting the extract and keeping the final batch size at 2.5 gallons gets you an all grain beer.

The obvious drawback is that you only get 2.5 gallons of beer, while doing almost the same amount of work as for a 5 gallon partial mash. But still, it is all-grain brewing on the stovetop with no more equipment than you need for partial mash.

We happened to have some Nelson Sauvin hops on hand, so we decided to brew a beer featuring them. The result was a very nice, light (both in color and body - it is lighter than it looks in the photo) and clean tasting beer. Was it better than what we get with partial mash? Hard to say, since we've never worked with the Nelson hops before. We will have to give the technique a try with one of our more standard IPA recipes.

Given the half batch, and the use of the Nelson, we couldn't possibly have named the beer anything other than "Half Nelson" IPA.

Half Nelson IPA

Total batch size = 2.5 gallons; All Grain Mash in 3 gallon beverage cooler; 2.5 to 3 gallon 60 minute stove-top boil; dry hopped for aroma; target abv of 6%.

Ingredients:
6 lb 2-Row Pale Malt
1/4 lb Wheat Malt
1/4 lb Carapils/Dextrin Malt
2 oz Nelson Hops (8.0% AA)
1/2 oz Centennial Hops (8.8% AA)
3/4 oz Simcoe Hops (12.3% AA)
1 tablet Whirlfloc
White Labs WLP051 California Ale V Yeast


Hop Schedule:
1/4 oz Centennial - 60 minutes boil
1/4 oz Centennial - 45 minutes boil
1/2 oz Nelson - 45 minutes boil
1/4 oz Nelson - 30 minutes boil
1/4 oz Simcoe - 30 minutes boil
1/4 oz Simcoe - 15 minutes boil
1/4 oz Nelson - 2 minutes boil
1 oz Nelson- Dry Hop in Secondary Fermenter
1/4 oz Simcoe - Dry Hop in Secondary Fermenter


Heat 8 quarts water to 167 degrees for a target mash temperature of about 152 degrees. Place the crushed grain (2-Row Pale, Wheat and Carapils) into a large mesh bag. Pour the hot water into the beverage cooler, then lower the grain bag into the water very slowly, pushing and prodding with a large spoon to ensure all the grain is wet (this can take several minutes). Put the lid on the cooler and allow to rest 60 minutes.

While the grains are mashing, heat another 5-6 quarts of water to 180-185 degrees for sparging (rinsing the grains). Near the end of the 60 minutes, heat 2 quarts of water to a boil in your brew pot.

After the first mash is complete, remove the cooler lid and open the spigot to draw off about 2 quarts of wort into a large pitcher. The first few draws will likely be cloudy with grain particles; pour it gently back into the cooler over the grain bag to help filter it. Draw off the remaining wort by the pitcher-full and carefully pour that wort into the boiling water in your brew pot; continue until only a trickle of wort leaves the spigot. Pour about 5 quarts of your hot sparge water over the grain bag in the cooler. Gently lift the bag up and down to thoroughly re-wet the grains (but don't slosh). Cover and let sit about 5 minutes. Use the spigot and a pitcher to draw off all of the second wort and add it to your brew pot.

You should have about 3 gallons of wort. Bring the wort to a boil and add hops according to the schedule. With 15 minutes remaining in the boil, stir in 1 tablet Whirlfloc. At time zero, remove the pot from the heat, cover and let sit 10-15 minutes.

Move brew pot to an ice bath and cool quickly to less than 80 degrees. Transfer wort to a primary fermenter (straining off the hops if desired). Add water to reach the 2.5 gallon mark if necessary. Swirl vigorously then pitch the yeast.

Ferment in primary for 1 week, then transfer to secondary. After seven days, dry hop with 1 oz Nelson and 1/4 oz Simcoe. Bottle or keg after fermentation is complete (2 to 3 weeks in secondary).

Monday, September 12, 2011

Taco Shop Hot Sauce - Salsa Verde

Taco Shop Hot Sauce - Salsa Verde

Two plastic squeeze bottles of heat and flavor have pride of place in our refrigerator door. Hot sauce, red and green, is for us a condiment that sees pretty much daily use - sometimes multiple times a day.

A while back, I posted my recipe for our red, chile de arbol "Taco Shop" hot sauce. This post, however, is all about green.

And green means tomatillos from the garden:

Taco Shop Hot Sauce - Salsa Verde

Our green hot sauce is even simpler than the red one. Just tomatillos, green chiles (usually Serranos) and garlic. I put them on a sheet pan and put them under a broiler for 5 minutes or so.

Taco Shop Hot Sauce - Salsa Verde

When they are done, the garlic has roasted, the tomatillos have browned and the chiles have softened and blistered.

Taco Shop Hot Sauce - Salsa Verde

Then it is a simple matter of blitzing it all up a blender with some salt and a bit of water to loosen it.

Taco Shop Hot Sauce - Salsa Verde

We find it convenient to keep the sauce in an 8oz squeeze bottle. It makes for efficient delivery to top your food of choice. In this case, it was breakfast tacos. Yum!

Taco Shop Hot Sauce - Salsa Verde

Makes about 2 cups.

Ingredients:
14 ounces tomatillos, husked and rinsed
2 serrano chiles
3 garlic cloves
1/2 teaspoon kosher salt
1/4 cup water

Husk the tomatillos and rinse them to get rid of their stickiness.

Place tomatillos, chiles and garlic on a sheet pan and put them under the broiler. Check them after 5 minutes, and then again every minute until they soften and begin to brown.

After letting the pan cool, peel the garlic and take the skin off of the chiles. In a blender, mix everything together with the salt and water until smooth.

Tuesday, July 26, 2011

Homemade Cream Cheese

Homemade Cream Cheese

Fresh, creamy and slightly tangy - who knew cream cheese could be this good?

There are certain things we almost always keep on hand and try to make more of as soon as we run out. While Mike is in charge of keeping us supplied with his Taco Shop Hot Sauce, I'm in charge of the cream cheese. I've been making it for a few years now, and have gradually settled on a technique that's easy, reliable and delicious.

All you have to do is:

  1. Add starter culture and rennet to room temperature milk and cream.
  2. Let it sit for a day.
  3. Drain the curds in fine cheese cloth for another day.
  4. Add salt and flavorings (optional).
  5. Eat and enjoy!
Here it is after the first step - the mesophilic starter culture acidifies the milk allowing the rennet to do its magic and turn the milk into a soft gel. It's been sitting on the counter top for about 24 hours.

Homemade Cream Cheese

Next put a strainer lined with dampened cheese cloth into the sink and gently scoop in the curds. The cheese is set up almost like a yogurt at this point.

Homemade Cream Cheese

The fine cheese cloth (butter muslin) allows the solids to firm up while the whey drains away. Don't use regular cheese cloth - the weave is too loose.

Homemade Cream Cheese

Hang it up and let it drain another 18-24 hours...

Homemade Cream Cheese

Now it's cream cheese! All that's left is to add a little salt. For variety you can add fresh herbs or garlic and black pepper or whatever you choose.

Homemade Cream Cheese

I've tried other recipes which use a lot more cream and were often heated on the stove top, but they were all too solid and grainy. This one on the other hand is light and creamy - almost the texture of whipped cream when it's just made - and it sets up nicely once cooled.

Homemade Cream Cheese

We have found cream cheese to be surprisingly versatile as an ingredient in the kitchen. We often use it in place of cream, sour cream, crème fraiche or even buttermilk. It adds a tangy richness to soups, and Mike makes a great mushroom sauce with it.

Oh, and it's not bad on a homemade bagel, either...

Simple Cream Cheese
This simple cream cheese has an appealing fresh, slightly tangy flavor and it’s super easy to make.

Important: make sure your milk and cream are pasteurized and not ultra-pasteurized. If you can’t find regular pasteurized cream, decrease the milk by a cup and use 2 cups of pasteurized half-and-half instead of the cream.

Ingredients:
1 cup heavy cream (pasteurized, but not ultra-pasteurized)
1/2 gallon whole milk (pasteurized, but not ultra-pasteurized)
1 packet mesophilic direct-set starter (1/4 t)
4 drops liquid rennet
1- 1 ½ teaspoons Morton's kosher salt ( ½ - ¾ t if using regular table salt)

Stir together the milk and cream, then let it come to room temp: leave it in a warm place a few hours, or put it on the stove top on very low, or put it into a barely warm turned-off oven (do not microwave).

Sprinkle the mesophilic starter over the milk, let it sit a couple minutes, and then stir it in gently, but thoroughly. Add the rennet and stir another 60 seconds. Cover and let sit 18-24 hours.

Gently ladle the curds into a colander lined with fine cheese cloth -- I like to do this over a large bowl. Carefully lift the corners of the cheese cloth and tie them together. Hang from a cupboard knob or other convenient place and place a bowl beneath to catch the drips. Leave alone for 12-24 hours. The longer you wait, the stiffer the cheese will be.

Turn the cream cheese into a bowl and use a wooden spoon to mix in the salt. (Note - the salt will dissolve and become more uniform tasting after the cheese has rested for a few hours.) If you want to add flavorings (herbs, garlic, pepper, fruit) to portions of the cream cheese it's easiest to that now while it’s warm. Or it's great plain too.

Monday, February 21, 2011

Hot-Smoked Chicken

Smoked Chicken

While "Low and Slow" may be the rule when it comes to us using our smoker, every rule has its exceptions. We sometimes use it more like a standard barbecue, but with smoke as an added bonus.

Hot-smoking chicken is one of our favorite applications of this technique. The smoking takes less than a couple of hours, so as long as you've prepped your chicken ahead of time you can smoke it and eat it for dinner all in one evening.

We put a spice rub (see the recipe at the end of the post) on the bird either the night before or the morning of smoking. While it is better with more time, it still works fine even if you only do it a few hours before you want to start smoking the bird.

Smoked Chicken

Fire up the smoker to about 300°F and place a foil covered empty water pan into the cooker as a drip tray. Put on smoke wood (pecan and mesquite are nice), and smoke the chicken at 300-330°F for 60-75 minutes or until the temperature of the breast meat is just over 160°F.

Smoked Chicken

The result is tender and juicy, lightly smoky and packs a flavor punch and some heat from the spice rub.

Smoked Chicken

Definitely a great way to enjoy a chicken. If you've been neglecting your smoker, this is an easy way to get yourself back into the groove.


Spicy Chicken Rub

You can make any quantity: if you use teaspoons you'll get about 1/3 cup (enough for about 2 chickens). Use tablespoons and you'll end up with a little less than 1 cup.

Ingredients:
3 parts New Mexican Red Chile Powder (substitute Ancho if needed)
3 parts Mexican Oregano
2 parts Paprika
2 parts Cumin
2 parts Dried Parsley
1 part Garlic Powder
1/2 part Cayenne
1 part Kosher Salt

Mix everything except the salt together. Grind in a spice grinder until the parsley and oregano are chopped very finely. Add the salt and mix thoroughly.


Hot Smoked Chicken

Season the bird either the night before or the morning of smoking. To butterfly your chicken, simply use some kitchen shears to cut down each side of the back bone and remove it. Then turn the bird over and press on the breast bone to flatten it.

Ingredients:
1 4-5 pound Chicken, butterflied
2-3 tablespoons Spicy Chicken Rub
Kosher salt
Smoke woods such as hickory, pecan, alder or mesquite

Sprinkle kosher salt evenly over the bird, on all sides (use about 1/2 teaspoon per pound). Lay the bird on a tray, skin side down and sprinkle with some of the spice rub. Turn the bird over, skin side up and sprinkle a generous portion of spice rub evenly on the skin. Store the chicken in the refrigerator, uncovered until ready to smoke.

Heat the smoker to about 300°F, add smoke wood to the fire, and place bird on the grill (use an empty water pan covered with foil as a drip tray). Smoke at 300-330°F for 60-75 minutes or until the internal temperature of the breast reaches about 160-163°F. Remove from smoker and let rest 15 minutes before carving.

Thursday, December 23, 2010

Nam Yu Peanuts - Roasted Peanuts Glazed With Fermented Bean Curd

Nam Yu Peanuts

Around this time last year, I came across a post on eGullet describing what seemed a very intriguing snack - roasted peanuts with a sauce made from fermented red bean curd. I gave it a try and liked it so much that it instantly became a new holiday tradition.

These peanuts are completely addictive and are great to have around to nibble on during the holidays. They also make for a nice little gift.

I made this year's batch a few days ago, and thought I would share the recipe with all of you.

Nam Yu Peanuts

Pictured above is the bean curd I found at my local Asian supermarket. While it mentions "chili", it really isn't hot at all. The bean curd is in soft chunks - roughly an inch square. The smell and taste is pretty funky, but don't let that put you off - it adds a fantastically interesting flavor to the nuts.

To make the sauce, you mix up some bean curd with water, sugar and salt. You end up with something that looks like a loose chocolate pudding:

Nam Yu Peanuts

The peanuts I use also come from the Asian supermarket. They are skin-on and in 12oz packages. The are just ordinary peanuts, though, so I imagine any brand would do just fine.

Nam Yu Peanuts

The nuts get stir-fried until they start to color. I do this one package of nuts at a time to keep things manageable.

Nam Yu Peanuts

Then I drizzle in some of the bean curd mixture, stirring it through to coat the nuts.

Nam Yu Peanuts

After stir-frying, the nuts get put on a sheet pan and into a 400° oven for a few 10-minute stints - mixing them up to redistribute in between. Then they just need to cool and they are ready to eat:

Nam Yu Peanuts

These tasty little guys aren't going to last long...


Nam Yu Peanuts

An easy snack with an unusual and addictive flavor.

Ingredients:
3 12oz packages of peanuts, skin on
5-6 chunks (2 1/2 oz) fermented red bean curd
4 tablespoons water
1 teaspoon salt
3 teaspoons sugar

Preheat your oven to 400°F.

In a small bowl, mix the bean curd, water, salt and sugar together until completely smooth. If it seems too thick, add some more water.

In a wok or skillet, stir-fry one of the packages of peanuts over medium to high heat. You may want to turn on your overhead oven fan if you have one. Once the nuts are starting to color, add three tablespoons of the bean curd mixture one tablespoon at a time, mixing it through. After a few more minutes, pour the peanuts into a large sheet pan (preferably one with high enough sides to keep things from spilling over). Repeat the process with the remaining two packages of peanuts.

Spread the peanuts evenly on the sheet pan and put them in the oven. After about 10 minutes, remove them and stir them around to redistribute. If you have bean curd mixture left over, add some more and stir it through. Put the peanuts back in the oven and repeat this process two or three more times. If some of the peanuts char a bit, that is fine - but you don't want them to burn too much.

Let the peanuts cool. When they are warm, they will not seem like they are going to be crunchy, but don't worry - they will be fine after resting.