Monday, April 7, 2014

Smoking a Picnic Ham
Smoked Picnic Ham

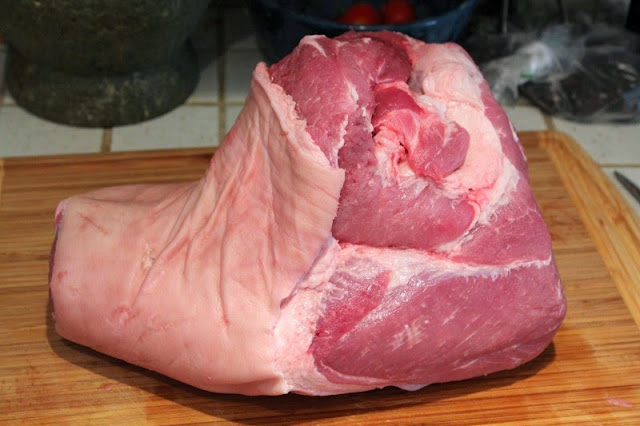
While grocery shopping this past holiday season, we found ourselves unable to resist buying a lovely, and inexpensive, fresh pork picnic "ham". I say "ham" because it wasn't ham yet, but it was soon to be.

The picnic cut is the shank end of the pork shoulder (the other half of the shoulder is the pork "butt" - the cut often used for pulled pork). The meat on the picnic is a bit darker and tighter, and is perfect for turning into ham. The picnics we've used have been around ten pounds.
Smoked Picnic Ham

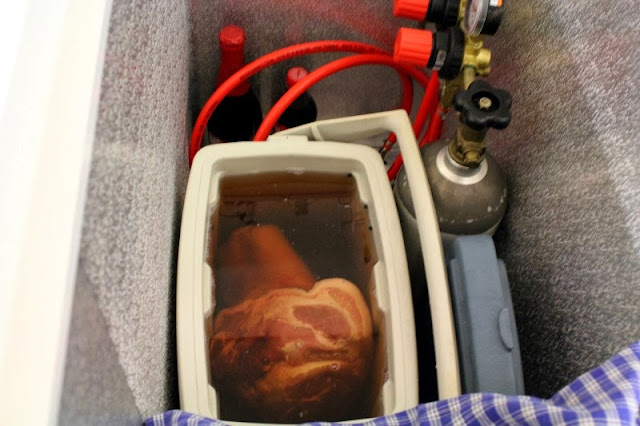
The process is actually quite simple. The first step is to put it in a salty brine in a cool place (we use a cooler in our beer-chest at about 45 degrees F).

The brine is 10 liters of water, 500g kosher salt, 100g pink salt (curing salt), 75g sugar, 75g brown sugar, 1 T black pepper corns, 2 t coriander seeds, 1 t yellow mustard seed.

We boil part of the solution for a few minutes to soften the spices, add water to reach 10 liters and cool to 40 degrees F before adding to the pork.
Smoked Picnic Ham

After six days in the brine, take it out, rinse it, dry it off well and put it into the refrigerator uncovered for two more days. This allows the skin and surface to dry a bit which allows it to take up the smoke more readily.

Smoked Picnic Ham

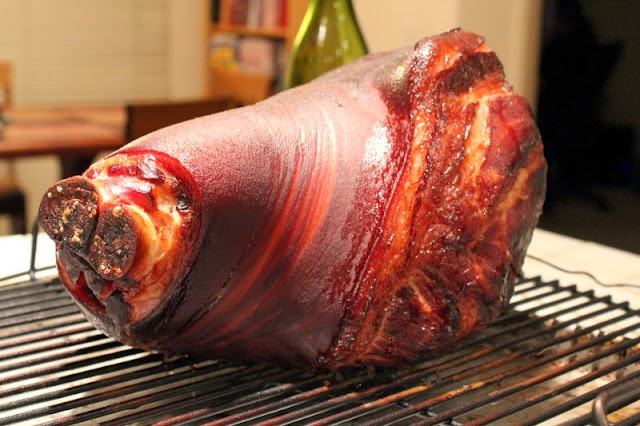
After brining and drying, it is time to smoke. We use our Weber Smokey Mountain with apple and pecan wood smoke for 7 to 8 hours. Keep the smoker at about 180 degrees F for the first couple hours, then up to 215-230 for the next four-five hours, finishing at 240-250 degrees the last hour or two until the meat reaches an internal temperature of 165 degrees.

Here is what it looks like when it comes off of the smoker:
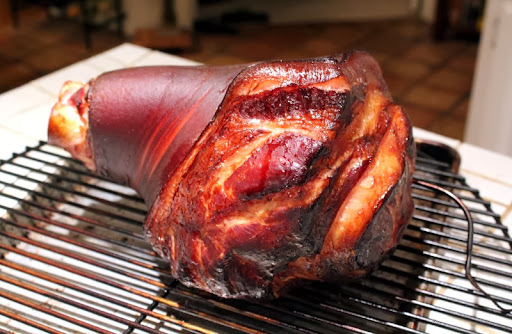
Smoked Picnic Ham

Make sure you plan to feature the ham in a meal the same day you smoke it - it is super good hot off of the smoker.

Smoked Picnic Ham

No need to do anything fancy - just slice it and eat it. Yum!
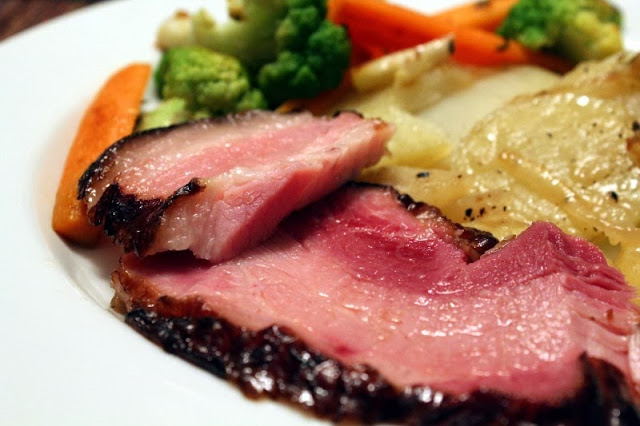
Smoked Picnic Ham

The part of the ham under the skin has a nice fat layer that is reminiscent of pork belly:
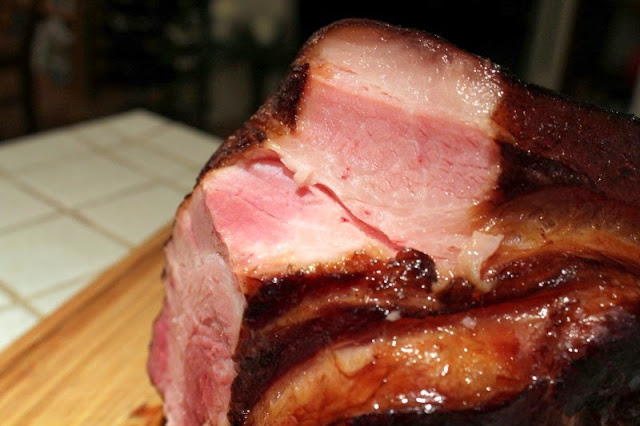
Smoked Picnic Ham

We've  found that these fattier slices make a nice substitute for chashu in ramen:
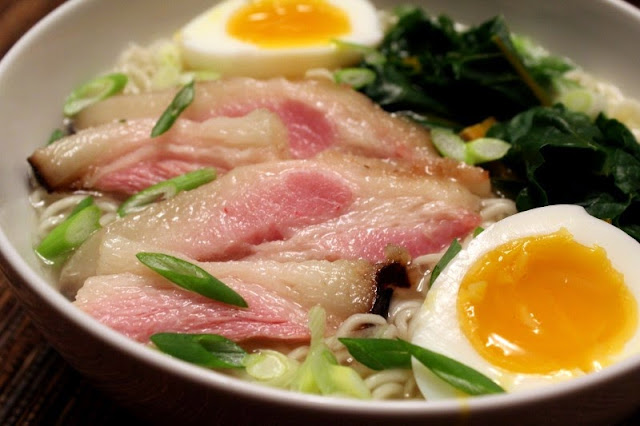
Smoked Picnic Ham

Ham is now solidly in our list of things we make instead of buy. If you've got a smoker, you owe it to yourself to give it a try.

Saturday, January 18, 2014

Homemade Fermented Rice Wine


With just a few simple ingredients and a bit of time, you can make your own homemade rice wine. It is very easy to do and it tastes delicious. All you need is glutinous rice and a special kind of yeast. The resulting wine is fruity and slightly sweet. It is nice to drink straight, and can also be used in cooking where you would use mirin or sake.

The key ingredient (apart from the rice, of course), and probably the hardest to find, is the yeast. Specifically designed for making rice wine, it come in little balls like this:


We got ours from the 99 Ranch Asian supermarket. They were sold in a package containing a few dozen individually wrapped pairs of yeast balls, and were labeled "Rice Cake".

The preferred rice to use is glutenous rice (also known as "sticky" or "sweet" rice). It gets prepared just as you would for eating - we used our rice cooker. For our 2 liter jar we started with about 650g (3 measuring cups, or 4 rice-cooker cups) of uncooked rice.

After the rice is cooked, spread it out on a sheet pan. Once it has cooled, it is time to put in a container to ferment.


Put a yeast ball in a bowl and smash it into a fine powder. Scoop a layer of rice an inch or two thick into the container and sprinkle some of the yeast powder on top. Repeat this process until the container is filled.


That's it! Now it is time to wait. After a day or so, you will begin to see signs of activity as the yeast get to work. Carbon-dioxide gas bubbles will be generated as the alcohol is produced, so don't seal it too tightly. As the yeast break down the rice, the liquid wine will begin to pool at the bottom of the container. Here is what ours looked like after two days:


Try a little taste of the wine every day or two as it progresses - it tastes good straight from the beginning and it definitely changes over time.

Here is our wine after four days - you can see how much more liquid has pooled at the bottom:


This is a taster we poured at the four day mark. The wine is fruity, slightly effervescent, and really enjoyable:


We let this batch go for a total of 14 days. At this point the wine had lost its effervescence, but remained fruity, slightly sweet and creamy, with a pleasant alcohol kick.

We poured it through a square of cheese cloth to remove the rice hulls, transferred the wine to a bottle, and refrigerated it for storing and serving. The resulting rice wine will be fairly cloudy at first, with fine rice particles mixed in. If you let it stand in the fridge, it will clarify and separate with a dense layer of white sediment at the bottom. You can pour the clarified wine off, but it isn't necessary to do so.

After our success with this first test batch, we did a much larger batch using a beer fermentation bucket. The process was the same - just with a larger volume of rice.

Cheers!