Friday, January 29, 2010

La Playa Taco Shop - Mexican Breakfast in Pacific Beach
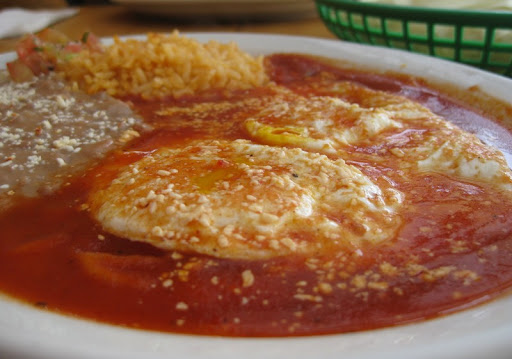
Huevos Rancheros at La Playa

We absolutely love a good Mexican breakfast. Where we live in San Diego, there are a plenty of taco shops where you can grab a bite to eat in the morning, but it generally means getting a breakfast burrito. Now, don't get me wrong - I'm a big fan of a good breakfast burrito. But I also like a more traditional, sit-down plate of food, and that can be harder to find.

Fortunately, we have La Playa Taco Shop serving up great renditions of the standards. On real plates. With silverware. Pictured above is their Huevos Rancheros - always a good way to go. I'm more likely to order Huevos Divorciados, though:
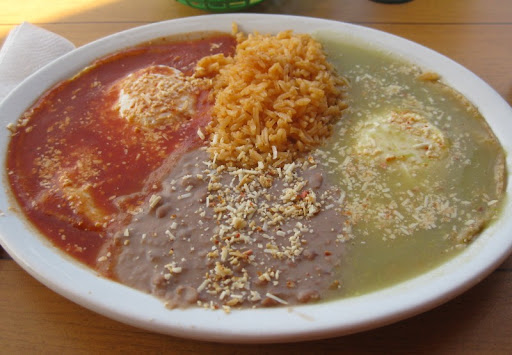
Huevos Divorciados at La Playa

Why have one sauce when you can have two? We really like both their red and green salsas. The green is the spicier of the two. Huevos Divorciados isn't on their menu, but they've been happy to oblige when I've asked for it.

Also not on the menu is Sherry's current favorite - a combo of a chile relleno and one egg ranchero style:
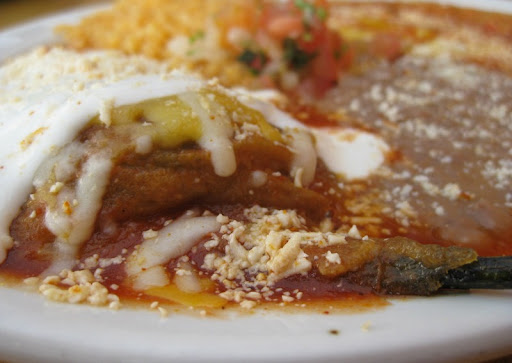
Chile Relleno at La Playa

Chile rellenos are one of those food items that are great when done well, and terrible when done poorly. In my experience, they are much more often done poorly. La Playa, however, does them perfectly - an intensely flavorful poblano chile (lots of places use Anaheim chiles, which work nowhere near as well), a thin, nicely-seasoned batter, and a molten cheese center.
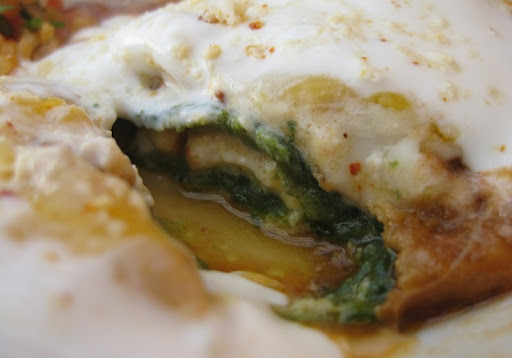
Chile Relleno at La Playa

If scrambled eggs are more your thing, you can get Huevos al Albañil (brick-layer's eggs). Their version has bacon in it:
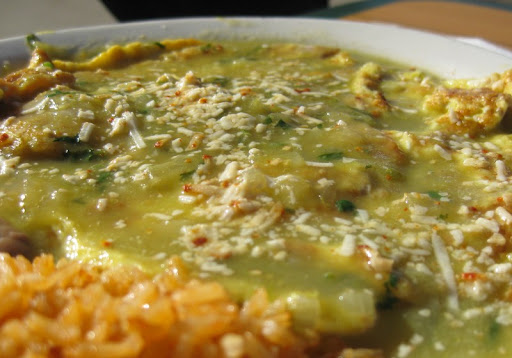
Huevos al Albañil at La Playa

Or Huevos con Chorizo:

Huevos con Chorizo at La Playa

And, of course, they also do a breakfast burrito. With all of the other great options, however, we've yet to try it.

La Playa's non-breakfast offerings are very good as well. I'm particularly partial to their al pastor and carnitas tacos (check out this post on What We're Eating for pictures of the carnitas), but we've enjoyed everything we've tried.

La Playa Taco Shop
3973 Mission Blvd.
San Diego, CA
(858) 488-7405

Friday, January 22, 2010

Imperial Stout - A Partial Mash Recipe

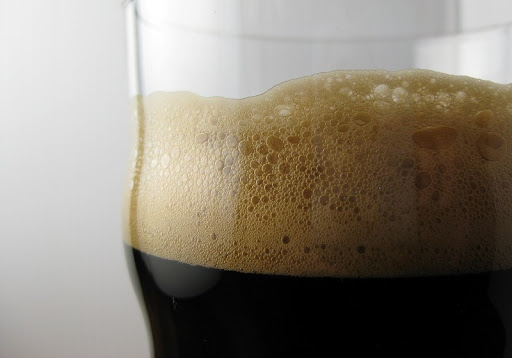
Imperial Stout

If you've followed our past beer posts, you might quite reasonably assume that all we ever drink are light-colored hop bombs and Belgians (and sometimes combinations of the two). And, for the most part, that is indeed what we like to drink. We do, however, also have a fondness for the opposite end of the beer color and body spectrum - the Imperial Stout.

Imperial (or "double") stouts are the big boys of the dark beer family. I like mine jet black, with a motor-oil-like viscosity and punch-you-in-the-face flavor. The rich toastiness and generous alcohol level make it a great winter beer style.

And the best part is that they are also comparatively easy to brew. We've spent years getting our IPAs where we want them, but this Imperial Stout came out pretty much bang-on the first time we made it. All of the effort we go through with an IPA in order to keep the color light and the malt out of the way so the hops can shine through - no need to do that here. We want it dark and malty, and that's easy to achieve.

Below is the recipe we came up with. The dark color comes from the addition of Black Patent and Chocolate Malt. It surprised us how little you need to use to get the color jet-black - only around 10% of the total malt bill. Our target alcohol level was 9%, but we ended up closer to 8% (too cold a temperature during fermentation, I think). I would have been happier with the extra 1% abv, but a little bit of residual sugar works well with this style.

Imperial Stout

Total batch size = 5 gallons; Partial Mash in 3 gallon beverage cooler; ~3 gallon 60 minute stove-top boil; late malt extract addition; target abv of 9%
(target OG: 1.090; target FG: 1.021)

Ingredients:
2 3/4 lb Pale Malt (2 row)
1 lb Roasted Barley
3/4 lb Black (Patent) Malt
3/4 lb Chocolate Malt
3/4 lb Wheat Malt
6 1/4 lb Briess Golden Light Dry Malt Extract (DME)
1 lb Briess Pilsen Dry Extract (DME)
1 1/2 oz Centennial (9.7% AA)
1 oz Simcoe (13.2% AA)
1 oz Amarillo Hops (7.5%)
1 tablet Whirlfloc
White Labs WLP007 Dry English Ale Yeast
3 oz light or pilsen DME (optional - for starter culture)
4 oz corn sugar (optional - for bottle priming)

Hop Schedule:
1 oz Centennial - 60 minute boil
1/2 oz Simcoe - 25 minute boil
1 oz Amarillo Hops - 20 minute boil
1/2 oz Centennial - 2 minute boil
1/2 oz Simcoe - 2 minute boil
(whirlfloc - 10 minute boil)

[Optional: Prepare a starter culture the day before brewing. Heat 3 cups water then add 3 oz DME. Boil 10 minutes, then cool quickly to room temperature. Put into a sanitized 1 quart jar or bottle, add yeast, seal and shake gently for 30 seconds. Loosen the lid or use an air-lock to allow gases to escape and let sit until time to pitch the following day.]

Heat 8 quarts water to 166 degrees for a target mash temperature of 154 degrees. Place the 6 pounds of crushed grain (Pale, Barley, Black, Chocolate and Wheat) into a large mesh bag. Pour the hot water into the beverage cooler, then slowly lower the grain bag into the water, pushing and prodding with a large spoon to ensure all the grain is wet (this can take several minutes). Put the lid on the cooler and allow to rest 60 minutes. (If the room is cool, preheat the cooler with hot water before starting the mash.)

While the grains are mashing, heat another 4-5 quarts of water to 190-195 degrees for sparging (rinsing the grains). Near the end of the 60 minutes, heat 2 quarts of water to a boil in your brew pot.

After the first mash is complete, remove the cooler lid and open the spigot to draw off about 1 quart of wort into a large pitcher. The first draw will likely be cloudy with grain particles; pour it gently back into the cooler over the grain bag to help filter it. Slowly draw off the wort by the pitcher-full and carefully pour that wort into the boiling water in your brew pot. As you pull off the wort through the spigot, add the hot (190 degree) water to the top of the cooler, keeping the grains submerged at about 168 degrees. Once 4 quarts have been added to the top, cover the cooler and let it sit another 10 minutes. Use the spigot and a pitcher to draw off all of the second wort and add it to your brew pot. You should have about 3.25 gallons of wort.

Bring the wort to a boil. When ready, add hops according to the schedule. With about 30 minutes remaining in the boil, begin adding the DME one cup at a time, stirring to dissolve. With 10 minutes left, stir in 1 tablet Whirlfloc. At time zero, continue adding DME off the heat until all has been added (if needed, return to low heat for a few minutes to help dissolve the extract). Cover and let sit 10-15 minutes.

Move brew pot to an ice bath and cool quickly to less than 80 degrees. Transfer wort to a primary fermenter. Add water to reach the 5 gallon mark. Swirl vigorously 2 minutes then pitch the yeast.

Ferment in primary for 1 week, then transfer to secondary. Keg or bottle after fermentation is complete (2 to 3 weeks in secondary).