Monday, August 30, 2010

Freshly Roasted Hatch Green Chiles at Bristol Farms

Roasted Hatch Green Chiles

We've been very harvest-focused the past few weeks. Two weeks ago it was picking fresh cascade and nugget hops. This week it was processing a crate of freshly roasted Hatch green chiles. Chile season is on, and you have to get them while you can.

Ours came from Bristol Farms. On Saturday they were set up to do roasting on site, with 23-26 pound crates of chiles going for $35. The chiles came in varying heat levels - we, of course, went for extra hot.

Roasted Hatch Green Chiles

You could also buy the chiles fresh for $1.79 a pound.

Roasted Hatch Green Chiles

And they had smaller batches of roasted chiles for $6.99 a pound.

Roasted Hatch Green Chiles

This is what our load of roasted chiles looked like after we spilled them out steaming onto our kitchen counter:

Roasted Hatch Green Chiles

And this was after our peeling pass:

Roasted Hatch Green Chiles

Some of the chiles were harder to peel than others. We left the troublesome ones unpeeled (in the red bowl) since we have heard that they peel easier after being frozen.

After a deseeding pass, we were left with lovely fillets of green chile.

Roasted Hatch Green Chiles

We also left some with their tops on for making chiles rellenos. Everything got divided into manageable portions and FoodSaver packaged (sealing after par-freezing to avoid juice getting vacuumed out).

Roasted Hatch Green Chiles

In the end, we had 20 8oz packages of fillets, 4 10oz packages for rellenos and 7 10oz packages of whole, unpeeled chiles.

Last night we had a go at using them for chiles rellenos. We usually use poblanos, but the Hatch chiles might just be our new favorite.

Chiles Rellenos

The obligatory interior shot:

Chiles Rellenos

The cheese is homemade queso fresco, which worked really well. It melts just enough, but doesn't ooze out all over the place. The sauce is ranchera made with our taco shop hot sauce. With substantial heat coming from both the sauce and the chiles, this was not a meal for the faint of heart. For us, it was perfect.

Given the sheer amount of roasted green chiles we now have, we'll be looking to use them in all sorts of ways. If anyone has any favorite recipes, please pass them on!

One thing is for sure, though - I see a green chile cheeseburger in my not too distant future...

Wednesday, August 25, 2010

Charcuterie Update

Homemade Charcuterie

We've been very much remiss in keeping our charcuterie index page up to date. Yesterday I gave it a much-needed face lift and added in a bunch of new links.

You can get to the index page from the sidebar on the right of the blog, or by clicking here.

Tuesday, August 17, 2010

Picking Fresh Cascade and Nugget Hops at Star B Ranch

Picking Fresh Cascade Hops at Star B Ranch

We read in the Slow Food Urban August newsletter that fresh hops were available to be picked locally at Star B Ranch. Yesterday, we headed out to their location near Ramona to get us some.

This is their second season of growing hops, and they have a nice crop of Cascade, Nugget and some Willamette. Here are Cascade hop flowers on the vine:

Cascade Hop Flowers at Star B Ranch

It smelled fantastic walking up and down the rows of vines, picking flower after flower. It took us about half an hour to bag a half pound of Nugget and two thirds of a pound of Cascade. They charged $20 per pound (although others have reported lower prices - your mileage may vary).

While we were there for the hops, Star B's primary business is raising Bison. They were scattered all around the hop vines:

Hop Vines and Bison at Star B Ranch

Star B unfortunately does not directly sell their own meat. When asked why, the response was similar to what you hear from a lot of small, local producers - USDA regulations and the lack of a local slaughtering option make it impractical. The do sell Bison meat at the ranch, though, and despite the fact that it is processed in Wisconsin we decided to pick up a pound of ground meat:

Ground Bison Meat

Since the ranch was only a few miles outside of Santa Ysabel, it was, of course, imperative that we make a stop at Dudley's Bakery:

Dudley's Bakery in Santa Ysabel

Ever since I first moved to San Diego, I've been going to Dudley's whenever I'm in the area - usually on route to Borrego. For me, Dudley's is all about their Jalepeño bread.


Very good stuff. I can happily eat it plain, but it is even better lightly toasted with a slather of butter. Oh, and it makes a killer Egg-In-Toast... If you don't want to trek out to Santa Ysabel, several places in town carry Dudley's bread. Henry's often has it.

But, back to the hops. After driving back home, our car redolent with hop, we inspected our haul:

Fresh Cascade and Nugget Hops

The Cascade is in front and the Nugget in the back. They look pretty much the same, but the Nugget flowers were noticeably denser.

We started brewing a fresh-hop IPA as soon as we got home - with the first hops hitting the wort a scant five hours or so after we picked them. The beer is happily fermenting away as I write this. We'll post an update once it is ready.

Update: Here is our post with the wet hop IPA recipe.

Star B Ranch
288428 Hwy 78
Ramona, CA 92065
(760) 789-8155

Dudley's Bakery
30218 Highway 78 (Julian Road)
Santa Ysabel, CA 92070
(760) 765-0488

Wednesday, August 11, 2010

San Diego Session Ale

San Diego Session Ale

After a pretty dodgy July, summer seems finally to have arrived in August. Sunny days and warm temperatures call for refreshing adult beverages. For us, the solution is our latest beer - a San Diego Session Ale.

So, why do we call it a "San Diego Session Ale"? Well, first off, by ale we mean IPA - no self-respecting San Diego beer drinker would tolerate a pale ale without a big hop profile. And, as is typical of the style, the hops are more focused on the aromatic than bittering. Dry hop, dry hop, dry hop.

As for the "Session" part, it refers to a lower octane beer than you can have a few of without falling on your face. This beer came in at 6.4% abv, and while this might not be considered "sessionable" in most parts of the country, it definitely qualifies here in San Diego where it is not at all unusual for a run-of-the-mill IPA to be 7.5%.

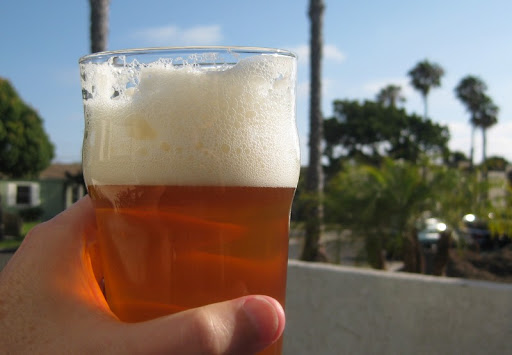
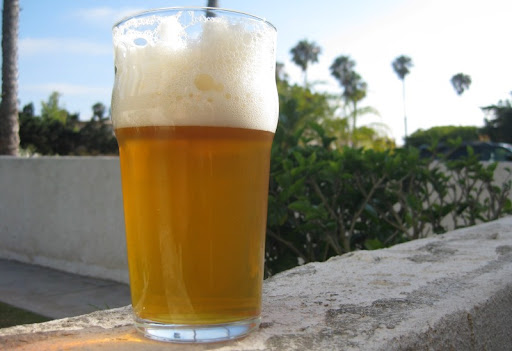
The beer is nice and light in body and color. The picture above is a bit misleading - this shot gives a better representation of the color:

San Diego Session Ale

To achieve the light color and body, we used a partial mash and late extract addition as we have been doing with most all of our beers. In this case, however, we also increased the amount of wheat malt in the mash. We usually use a half pound of wheat to help yield a nice, frothy head. This time we upped it to a pound and a half.

The result was just what we were looking for. The extra wheat we used did a great job of lightening up the beer, without going so far as to turn it into a hefeweizen. Hoppy, refreshing and (at least somewhat) sessionable. A perfect summer beer.

If you don't brew your own, but live in the San Diego area, there are an increasing number of great session beers available. Two of my current favorites are from Alpine: Hoppy Birthday and Tuatara. Port's SPA is also quite nice. Those beers are likely going to be hard to find outside of San Diego, but Alesmith X and Stone Levitation are good too and should be available farther afield.

If you do brew your own, however, here is our recipe:

San Diego Session Ale

Total batch size = 5 gallons; Partial Mash in 3 gallon beverage cooler; ~3 gallon 60 minute stove-top boil; late malt extract addition; dry hopped for aroma; target abv of 6.5%.

Ingredients:
4 lb 2-Row Pale Malt
1 1/2 lb Wheat Malt
1/2 lb Carapils/Dextrin Malt
2 1/4 lb Briess Golden Light Dry Malt Extract (DME)
2 lb Briess Pilsen Dry Malt Extract (DME)
2 1/2 oz Centennial Hops (9.2% AA)
1 1/2 oz Amarillo Hops (7.5% AA)
2 oz Simcoe Hops (12.3% AA)
1 tablet Whirlfloc
White Labs WLP051 California Ale V Yeast

Hop Schedule:
1/4 oz Simcoe - 60 minutes boil
1/2 oz Amarillo - 60 minutes boil
1 oz Centennial - 50 minutes boil
1/2 oz Simcoe - 15 minutes boil
1/4 oz Simcoe - 5 minutes boil
1/4 oz Simcoe - 2 minutes boil
1/2 oz Amarillo - 2 minutes boil
1 1/2 oz Centennial - Dry Hop in Secondary Fermenter
3/4 oz Simcoe - Dry Hop in Secondary Fermenter
1/2 oz Amarillo - Dry Hop in Secondary Fermenter

Heat 8 quarts water to 165 degrees for a target mash temperature of 150 degrees. Place the 6 pounds of crushed grain (2-Row Pale, Wheat and Carapils) into a large mesh bag. Pour the hot water into the beverage cooler, then lower the grain bag into the water very slowly, pushing and prodding with a large spoon to ensure all the grain is wet (this can take several minutes). Put the lid on the cooler and allow to rest 60 minutes.

While the grains are mashing, heat another 5-6 quarts of water to 180-185 degrees for sparging (rinsing the grains). Near the end of the 60 minutes, heat 2 quarts of water to a boil in your brew pot.

After the first mash is complete, remove the cooler lid and open the spigot to draw off about 2 quarts of wort into a large pitcher. The first few draws will likely be cloudy with grain particles; pour it gently back into the cooler over the grain bag to help filter it. Draw off the remaining wort by the pitcher-full and carefully pour that wort into the boiling water in your brew pot; continue until only a trickle of wort leaves the spigot. Pour about 5 quarts of your hot sparge water over the grain bag in the cooler. Gently lift the bag up and down to thoroughly re-wet the grains (but don't slosh). Cover and let sit about 5 minutes. Use the spigot and a pitcher to draw off all of the second wort and add it to your brew pot. (Alternatively, heat the sparge water to 195 and carefully add it a pint at a time while you draw off the first wort. Keep the liquid level 1 inch over the grain bed until all sparge water has been added, then slowly draw off the remainder.)

You should have about 3 gallons of wort. Bring the wort to a boil and add hops according to the schedule. With 15-20 minutes remaining in the boil, begin adding the DME one cup at a time, stirring to dissolve. At time zero, continue adding DME off the heat until all has been added (if needed, return to low heat for a few minutes to help dissolve the extract). Stir in 1 tablet Whirlfloc. Cover and let sit 10-15 minutes.

Move brew pot to an ice bath and cool quickly to less than 80 degrees. Transfer wort to a primary fermenter (straining off the hops if desired). Add water to reach the 5 gallon mark. Swirl vigorously then pitch the yeast.

Ferment in primary for 1 week, then transfer to secondary. After seven days, dry hop with 1 1/2 oz Centennial, 3/4 oz Simcoe and 1/5 oz Amarillo. Bottle or keg after fermentation is complete (2 to 3 weeks in secondary).

Thursday, August 5, 2010

Homemade Zesty Dill Pickles

Zesty Dill Pickles

While we're not big fans of the word "zesty", we do have to acknowledge it as an important term in world of pickles. It means they have some garlic and heat - and that's how we like them. The Vlasic zesty dill was our pickle of choice - that is until we started making our own. Pictured above is our latest batch.

Of course it all starts with the cucumbers. You need to use really firm, fresh, un-waxed cucumbers - straight from the garden or farmer's market is best. Pickling cucumbers are smaller than normal, just 3 or 4 inches long. This ends up being important when you are trying to fit them into jars.

Zesty Dill Pickles

Our pickling spice blend consists of plenty of fresh garlic, dill seeds, whole coriander seeds, mustard seeds, black peppercorns, hot chile pepper flakes and bay leaves. The first time we made pickles we didn't add the pepper flakes or dill seed and while they were good, they were mostly too sweet. Since then we have adjusted our recipe to create the kick we like.

Zesty Dill Pickles

To get things started, all the seasonings get dumped into a sauce pan along with a 50-50 mixture of water and distilled white vinegar, along with some sugar and salt.

Zesty Dill Pickles

While the pickling brine simmers for a few minutes, I pack in as many cucumbers and fresh chiles as I can into clean jars, trying to get a nice, snug fit. We throw in whatever ripe, fleshy chile peppers we have growing out on our patio. Red or green - they both work.

Zesty Dill Pickles

Finally, the hot brine gets poured into the jars along with all the spices:

Zesty Dill Pickles

After a few weeks in the refrigerator, these cucumbers will be transformed into lovely pickles - full of salt and vinegar twang, garlicky heat, and with that perfect crunch when you bite into them. And the chiles aren't just for flavoring - they are quite tasty in their own right.

Zesty Dill Pickles

Super simple - they only takes about twenty minutes of hands-on time and are well worth the effort. They are great on a burger, alongside a sandwich, or just as a quick snack:

Zesty Dill Pickles

This is the last of last summer's batch. But not to worry, we'll soon have more...

Homemade Zesty Dill Pickles and Peppers

Spice mixture makes about 5 cups of brine - more than enough for 2 quart jars filled with pickles and peppers. To decide how much you need, place your clean cucumbers and chiles snugly into your jars. Fill the jars with water, then pour off the water and measure the amount you used. Adjust the quantity of pickling brine if required.

2 1/2 cups water
2 1/2 cups distilled white vinegar
3 tablespoons sugar
3 tablespoons kosher salt
2 tablespoons dill seeds
2 tablespoons black peppercorns
1 tablespoon coriander seeds
1 tablespoon mustard seeds
1 1/2 teaspoon hot chile pepper flakes
3 cloves garlic, thickly sliced
2 bay leaves
8 to 10 3-4 inch pickling cucumbers (as many as will fit snugly into two 1-quart jars)
some jalapeño or serrano chiles

Carefully clean your cucumbers of any dirt or grit. Pack them into clean jars, filling the spaces with a few chiles. If desired, measure the amount of brine needed as described above.

Add everything else to a saucepan and bring to a boil. Simmer for 5 minutes, remove from heat and let cool 5 minutes. Pour the hot liquid and spices over the cucumbers and chiles, filling the jars nearly to the top and distributing the spices evenly.

Seal each jar with a clean lid, let cool to room temperature, then refrigerate. Pickles will be ready in about 3 weeks, but will improve after a few months.