Homemade Pancetta
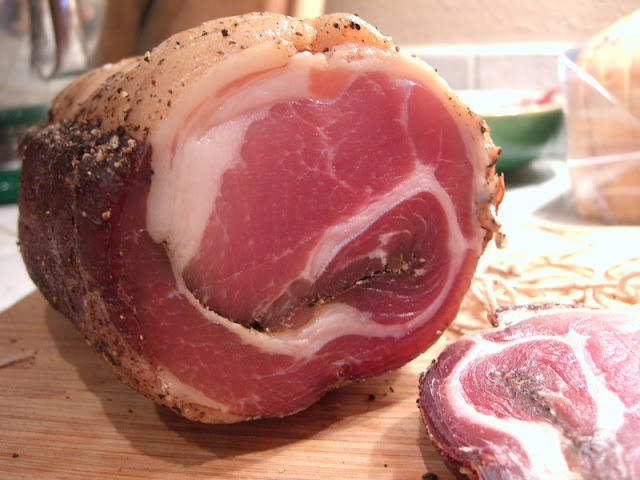
We recently bought a copy of Michael Ruhlman and Brian Polcyn's Charcuterie. We have been making our own fresh sausages for a while now, and wanted to try our hand at some cured meats. Many of the recipes require low-temperature curing, however - something difficult for the home charcutière, and completely out of reach for us given our Southern California condo lifestyle.
Enter pancetta. Pancetta is Italian bacon, and is cured but not smoked. It is one of the recipes in the book that has a short open-air drying time, and is reasonably temperature tolerant. We often run across recipes calling for pancetta cut into lardons or cubes, but the only pancetta we see in our local stores is very thinly sliced and packaged in tiny amounts (4 ounces or less). We've purchased larger chunks from specialty stores, but found only poor quality versions, without the full flavored complexity so touted by pancetta lovers. Some recipes indicate that "any good quality bacon can be substituted," but American style bacon is so characteristically smoky that it can be overpowering if that's not what you are looking for in a dish.
So, first step: Pink Salt. We ordered our pink salt (DQ Curing Salt) online from Butcher & Packer Supply Company. You can also order it from The Sausage Maker Inc. (Insta Cure #1), but shipping to California was less expensive from Butcher & Packer, so the decision was made.
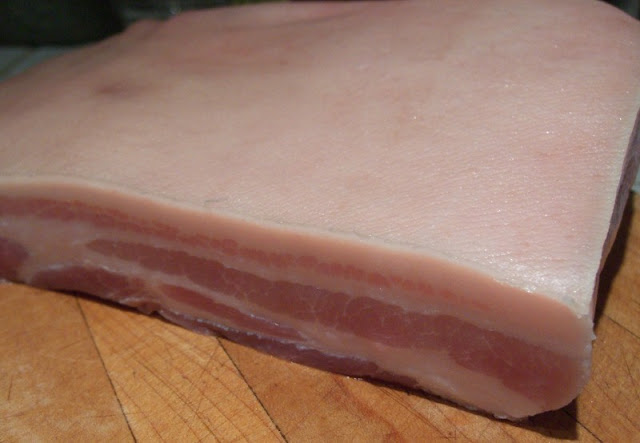
Second step: Pork Belly. While our standard supermarkets here at the beach don't readily offer slabs of pork belly at the meat counter, Ranch 99, a large Asian oriented supermarket just a few miles away does. They didn't offer any large sized slabs, but at just under 3 pounds, I determined that one belly would be plenty for our household of two.
Third step: Trimming. Our belly came "skin on" so I pulled out a sharp knife and carefully separated the skin from the fat layer. Occasionally I would accidentally cut through the skin, but I wanted to be sure to leave the fat as intact as possible. (I wish we had used the skin for something later, but unfortunately, we weren't inspired in time, so it went to waste.) Our belly was fairly neatly cut already, so I only had to trim a bit off one side to square it up.
Step four: Seasoning. Our dry cure mixture included pink salt, fresh garlic, kosher salt, light brown muscovado sugar, black pepper, crushed juniper berries, crumbled bay leaves, freshly ground nutmeg, and fresh thyme leaves. I mixed it all up and rubbed it all over the pork belly, pressing it into the flesh and fat layer as evenly as possible. Then we covered the dish with plastic wrap and popped it into the refrigerator to cure.
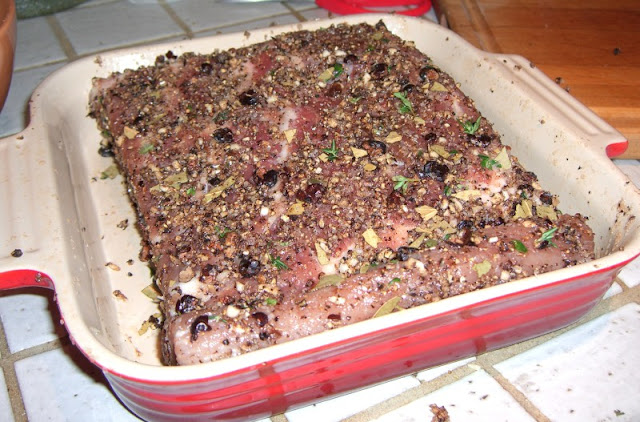
Step five: Curing and Waiting. Over the next several days, the cure caused liquid to come out of the meat and pool around the slab like a brine. We turned the belly every other day and rubbed it gently to redistribute the cure and seasonings. I checked it after a week, but decided to leave it another 24 hours to firm up a bit more. On the eighth day, the meat seemed ready -- of course this was a guess, given that neither of us had done any curing before, but we went with it. We rinsed the belly under cold water to remove the dry cure, and then pat it completely dry.
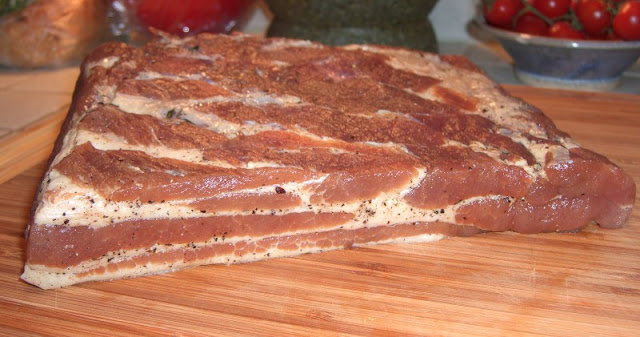
Step six (we're getting there...): Rolling and Tying. This step was a bit of a challenge. The goal is to get it tightly rolled without any air pockets inside. After sprinkling the meat side with plenty of coarsely ground black pepper, I made several attempts at rolling it up. Ultimately we found that putting the larger end of the slab inside the roll created a neater looking and more compact shape when all tied up. I may have gone overboard with my twine and knots, but as indicated in the book, "it can't be too tightly rolled."
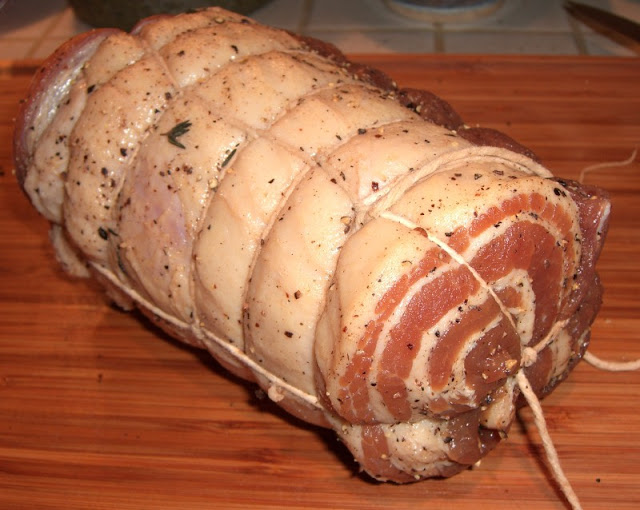
Seventh step: Hanging. When we started to dry-cure our pancetta, our temperature was 70-75 degrees and the humidity was about 57%. (Optimal is 50-60 degrees with 60% humidity.) Nonetheless, we let our pancetta hang quietly in the dark for eight days, using our guest bathroom as a dry-curing room. It probably could have gone a few days longer, but we were uncertain about the high temperature.
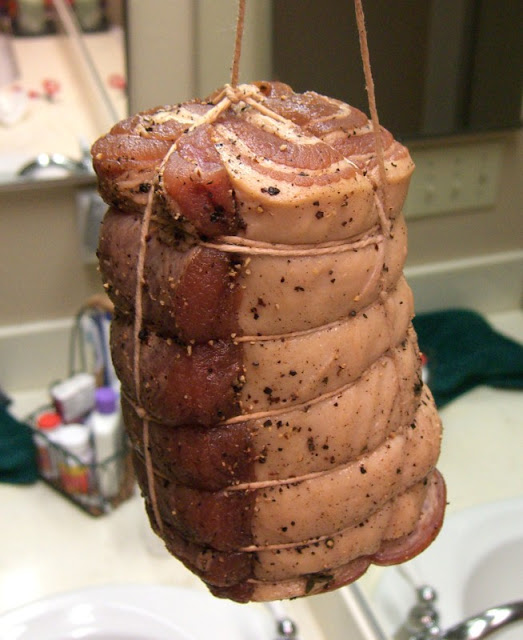
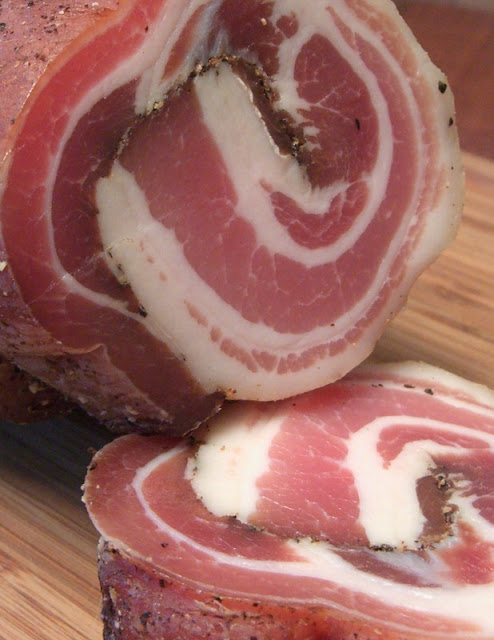
Finished! Our final product, homemade pancetta turned out perfectly. We have already used it for lardons in salad, and a carbonara is definitely on the agenda soon...




Looks amazing. Now that it has cooled off where I like, I should try this. Too bad Niman Ranch does not ship Pancetta anymore
ReplyDeleteThanks, Frank.
ReplyDeleteYou're right, Niman Ranch doesn't ship pancetta, but it looks like they do sell the whole pork belly. That's a good -- if more expensive -- method of getting started on making your own pancetta if you don't have a local Asian market.
We're starting another pancetta today. You should too! Yum.
I have raised pigs for years (for home use) and made many versions of cured bacon and always in search of something new. This recipe looks great and your post illustrates the recipe without fear. Thanks! John
ReplyDeleteI live in Florida. My son traps wild pig (boar). Can I use the belly of the boar to make pancetta? shortie
ReplyDeleteHi Shortie,
ReplyDeleteYou're really lucky to have access to fresh, wild hog meat!
Yes, I believe that you should be able to use the same technique for making Wild Boar Pancetta at home. It might be a little leaner than regular pancetta, but it should still taste great fried up into crispy, chewy lardons or cubes. (Now I'm hungry.)
Wow I'm very impressed. I've been cooking a lot lately with pancetta, so I'm inspired by your blog to give it a go. Well done. Thanks for the detailed post. I only hope I can do the knotting anywhere nearly as effectively as you did there.
ReplyDeleteHi Michael - definitely give it a try. It is surprisingly easy to make.
ReplyDeleteOhhhh me oh my. I am drooling!!!! I LOVE PANCETTA! I am adding you to my bloglist RIGHT NOW. mmmmmm!
ReplyDeleteHi Gail - glad you enjoyed the pancetta! We need to make some more -- all of our recent pork belly purchases have gone to making bacon... :-)
ReplyDeleteInspired by this post, I made my own pancetta which I'm eating for the first time right now. Just used it as an accent for some sauteed veggies. Man o man, flavour is great. I was a bit concerned about the curing, the temperature in my downstairs bathroom (i.e. don't have a curing chamber), etc. In the end, it turned out just fine. Better than fine, actually, best pancetta I've ever had.
ReplyDeleteMy heart is set on tackling gunciale next.
Rhea - that's great! I'm glad it came out well!
ReplyDeleteYou said you couldn't think of anything to do with the skin. Here is what I do with it...
ReplyDeleteI cure it and then cut it into a couple of largish strips and then let it dry.
Instant dog treats.
I sometimes to the same with the skins from the cured bacon. (I tend to smoke it skin on, and then remove it in one peice).
Trust me, I have never seen a more attentive and obedient dog than one that thinks it might get some of that smokey mapley goodness.
pleased to hear that it worked in a higher temperature. We have a temp of 30 by day and 26 by night and humidity of around 70 what are the chances.
ReplyDeleteLiz in Grenada
Liz in Grenada. Stick to your own curing methods and you can stop rubbing in details about your perfect climate!
ReplyDeleteGuy in Somerset England 7c by day -2c by night humidity 30-40.
But Pancetta is fab, air dried Hams amazing, Salami sublime and chorizo delicious! all from our own saddleback and rare breed large black pigs.
Question on proportions: I made my first pancetta a couple of weeks ago and it is aging now. The pork belly was a little less than half the weight called for in Ruhlman's book, so I scaled the curing mixture recipe down by 50% on the assumption that it should be proportional to the weight of the pork belly. I can't find any validation on whether I was right or wrong, but I thought I would ask you before I tried it. Any thoughts? Thanks for this post!
ReplyDeleteHi Anon. - Ruhlman suggests that you need enough of the cure mixture to evenly coat the outside of the meat, and make sure it's fairly firm before hanging it. I usually go with proportions like you did (erring on the side of excess cure), but we're not really experts, so I'm not sure it's right either. Sorry!
ReplyDeleteHi, I've been reading quite a bit about many taking on making their own charcuterie and pancetta is a favorite of mine. Good to know Ranch 99 has decent sized pieces of pork belly, because I was at Secil,s recently and the only had a couple of small frozen bits. With the weather as chilly as it's been lately, I'm thinking this is a project I could get my teeth into! Thanks for the great directions.
ReplyDeleteHi Kelly - we've been making pancetta for years now, and it has always been great. Siesel's doesn't generally have large belly pieces out, but they sometimes have it if you ask. They will also order it for you.
ReplyDeleteYou might also want to consider doing Pancetta Tesa, the non-rolled version. It is easier and just as tasty - if not quite as pretty.
OK, so I have been reading your webpage for over a year and finally decided to enter my own world of Charcuterie. I live on the east coast, and find it difficult to find great cured meats. I purchased the book "Charcuterie" and my addiction has begun. I seasoned and cured a fresh belly, and then tied it up and hung it in the basement. It looks amazing, I just want to know how I get it through my head that I will not consume any botulism toxins. I know my pink salt and cure were done proportionately, its just the uncooked pork aspect that i cant get out of my head. Any ideas?
ReplyDeleteHi Dale - Welcome to the wonderful world of cured meats! As for Pancetta, did you know that it's usually cooked before eating?
ReplyDeleteEven so, if your fresh belly was clean and properly handled, you shouldn't have anything to worry once it's cured. As you probably know, if it is present, botulism can grow and produce toxins under anaerobic conditions (no oxygen) -- but the pink salt will prevent that!
If you're really concerned, but do want to eat the Pancetta without cooking, you could make Pancetta Tesa next time. It's not rolled up, so there's not really any place where anaerobic growth can take place.
It sounds like you've done all the right things and I'm sure you'll be happy with the result - Enjoy it!
My pancetta has been hanging for 7 days at 63 degrees / 52 % humidity. I noticed some liquid dripping that seems to be coming from inside the pancetta. Could there be air pockets in there?
ReplyDeleteAll smells good and there is no green mold.
Suggestions?
Hi - Sorry for not getting back sooner.
ReplyDeleteYour pancetta sounds like it was doing beautifully. A bit of liquid coming out of the meat shouldn't be a problem as the primary idea of the hanging time is to reduce its moisture content (and let the flavors meld). It's possible that it could have used a little longer in the initial cure where a lot of liquid is released and the meat firms up quite a bit.
Just keep an eye on it and remember to cook it before eating. The a nice aroma and lack of colored mold are both good signs!
Thanks. I took my pancetta down this past weekend and when I cut it open there was an air pocket with a good amount of slimy liquid on one end and the other was rolled nice and tight.
ReplyDeleteEverything smelled fine and there was no mold but being cautious I threw away the side with the slime. Do you think it would have been ok once cooked?
Thanks for letting us know how things looked on the inside. Sounds like your guess about the air pocket was right on.
ReplyDeleteWith these home cured meats, it's always best to err on the side of caution if you've got any real concern. Slimy liquid sounds suspicious to me too, and I would have tossed that part just as you did. I hope the remainder turned out well.
I saw that you did not know how long was correct for the dry rub cure in your story. I am a meat scientist and we teach "an inch per week" rule of thumb to ensure that the meat is thoroughly cured. For instance, a 2 inch thick belly, rubbing both sides, it would need to set for a week for the cure to be throughout the whole product. The cure would travel 1 inch from each side per week. Hopefully this will be helpful in future endeavors of curing your own meat!
ReplyDeletethank you - your straight forward approach in the instructions has inspired me to get started! Many thanks!
ReplyDeleteCan anyone give the recipe for this pancetta?
ReplyDeleteI would really like to try and make this pancetta. Could someone please give me a recipe for it. Thanks
ReplyDeleteHere is the basic recipe we follow:
ReplyDelete1 (4 or 5 pound) slab pork belly, skin removed
2 tablespoons (20 grams) coarsely ground black pepper, reserved for drying period
The Dry Cure:
1/4 cup (50 grams) kosher salt
2 tablespoons (26 grams) brown sugar
2 teaspoons (12 grams) pink salt
4 garlic cloves, minced
2 tablespoons (20 grams) coarsely ground black pepper
2 tablespoons (10 grams) juniper berries, crushed
4 bay leaves, crumbled
1/2 teaspoon (2 grams) freshly grated nutmeg
4-5 fresh thyme sprigs (leaves only)
Follow steps 4 through 7 for a standard rolled Pancetta.
Alternatively, you can try Pancetta Tesa which is somewhat easier since it is not rolled, and is finished entirely in the refrigerator. See our post for Pancetta Tesa for more info.