Friday, March 11, 2011

The Balthazar Cookbook

The Balthazar Cookbook

The Balthazar Cookbook is perhaps our single favorite cookbook for fish recipes. Named after the well-respected restaurant in Manhattan, it is certainly not specifically about fish, but for us it is those dishes that really shine.

It also happens to be one of the best written cookbooks we have. By that I don't mean it is full of witty banter (not that I am at all averse to color commentary in a cookbook), but rather that the recipes themselves are superbly detailed and easy to follow. Not the hurriedly mal-adapted and underspecified instructions you often get in a restaurant cookbook.

When making fish dishes from these recipes and others, we do not generally worry about using the precise fish specified. Instead, we use what we can get locally that fits the style of the dish.

Favorite Recipes:

Cod MitonneeCod Mitonnée

This was our first go-to dish from the book. The rich broth is what makes it - reduced until it is very intense, full of flavor and reminiscent of a French onion soup.

It is like getting a soup and a main course all in one.
Roasted Halibut with Crushed Potatoes, Almonds and TomatoesRoasted Halibut with Crushed Potatoes, Almonds and Tomatoes

A dish we keep coming back to.

There is something super-satisfying about the way the potatoes, tomatoes and almonds taste together and how they accent a perfectly cooked piece of fish.
Cod and Cockles with ParsleyCod and Cockles with Parsley

As tasty as it is beautiful.

The intense green from the parsley dominates visually, but doesn't overpower the other flavors.
Black Bass with Caramelized Onions and CornBlack Bass with Caramelized Onions and Corn

The sweetness of the corn and caramelized onion is wonderful. We are looking forward to corn season to again be able to make this dish with freshly-picked corn.

Maybe from our own garden, this year?
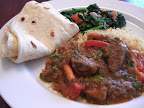
Braised Short RibsBraised Short Ribs

Just to prove that there are non-fish dishes in the book. Short ribs may be a bit cliché these days the way they seem to be strewn across most every restaurant menu. This is for a reason, though - they are fantastic.

They also make for a very good short rib pot pie...

Monday, February 21, 2011

Hot-Smoked Chicken

Smoked Chicken

While "Low and Slow" may be the rule when it comes to us using our smoker, every rule has its exceptions. We sometimes use it more like a standard barbecue, but with smoke as an added bonus.

Hot-smoking chicken is one of our favorite applications of this technique. The smoking takes less than a couple of hours, so as long as you've prepped your chicken ahead of time you can smoke it and eat it for dinner all in one evening.

We put a spice rub (see the recipe at the end of the post) on the bird either the night before or the morning of smoking. While it is better with more time, it still works fine even if you only do it a few hours before you want to start smoking the bird.

Smoked Chicken

Fire up the smoker to about 300°F and place a foil covered empty water pan into the cooker as a drip tray. Put on smoke wood (pecan and mesquite are nice), and smoke the chicken at 300-330°F for 60-75 minutes or until the temperature of the breast meat is just over 160°F.

Smoked Chicken

The result is tender and juicy, lightly smoky and packs a flavor punch and some heat from the spice rub.

Smoked Chicken

Definitely a great way to enjoy a chicken. If you've been neglecting your smoker, this is an easy way to get yourself back into the groove.


Spicy Chicken Rub

You can make any quantity: if you use teaspoons you'll get about 1/3 cup (enough for about 2 chickens). Use tablespoons and you'll end up with a little less than 1 cup.

Ingredients:
3 parts New Mexican Red Chile Powder (substitute Ancho if needed)
3 parts Mexican Oregano
2 parts Paprika
2 parts Cumin
2 parts Dried Parsley
1 part Garlic Powder
1/2 part Cayenne
1 part Kosher Salt

Mix everything except the salt together. Grind in a spice grinder until the parsley and oregano are chopped very finely. Add the salt and mix thoroughly.


Hot Smoked Chicken

Season the bird either the night before or the morning of smoking. To butterfly your chicken, simply use some kitchen shears to cut down each side of the back bone and remove it. Then turn the bird over and press on the breast bone to flatten it.

Ingredients:
1 4-5 pound Chicken, butterflied
2-3 tablespoons Spicy Chicken Rub
Kosher salt
Smoke woods such as hickory, pecan, alder or mesquite

Sprinkle kosher salt evenly over the bird, on all sides (use about 1/2 teaspoon per pound). Lay the bird on a tray, skin side down and sprinkle with some of the spice rub. Turn the bird over, skin side up and sprinkle a generous portion of spice rub evenly on the skin. Store the chicken in the refrigerator, uncovered until ready to smoke.

Heat the smoker to about 300°F, add smoke wood to the fire, and place bird on the grill (use an empty water pan covered with foil as a drip tray). Smoke at 300-330°F for 60-75 minutes or until the internal temperature of the breast reaches about 160-163°F. Remove from smoker and let rest 15 minutes before carving.

Tuesday, February 8, 2011

Curds and Wine - Making Wine and Cheese in San Diego


Interested in making your own wine? Want to try your had at making cheese? Here in San Diego, you need look no further than Curds and Wine, a wine and cheese-making supply shop that friends of ours opened this past November.

Conveniently located on Clairemont Mesa Blvd. just off of the 805, they carry everything you need to get started. They have all kinds of wine kits:


and all of the required wine-making equipment (those red things are corkers):


The also have everything you need to make your own homemade cheese. Rennet and assorted cultures for all types of fresh and aged cheeses are stored in the fridge or freezer and there is plenty of equipment like thermometers, curd knives, cheese molds and books.


In addition to stocking equipment and supplies, Curds and Wine is also set up for people to do wine-making on premises under their guidance and using their equipment.

Soon after they opened, Sherry got a couple of kits started - an Italian Pinot Grigio and an unoaked Sonoma Chardonnay.

The process is quite simple. First, you stir in a little bentonite, a fining agent which will help achieve a clear wine:


Pour in the concentrated grape juice:


Then you top it up with water, pitch the yeast, cover it, and let the yeast do their thing.

After about a week, the wine is ready to be racked off the sediment and into a secondary fermenter:


After racking, you need to wait until fermentation is complete (usually another 10 days) at which point you'll stir in some stabilizers and another fining agent. Then, once again you wait. Depending upon the kit, the wine is ready to bottle in as little as two weeks or as long as five.


Before bottling, the wine gets run through a filter to clarify it. Filtration is optional, but can really make a wine sparkle.


Then it is time to bottle. They have a fantastic bottle filling machine that makes the process a breeze. Corking is also a snap. We had friends visiting on bottling day, so we were happy to get them to do most of the work allow them to participate in the wine-making experience.


To finish the bottling process, Curds and Wine has a label printer for creating your own custom look. We went pretty simple with ours, but you can use any image that you like.

Homemade Pinot Grigio and Chardonnay

With thirty bottles of each, I think we're set for a while...

Friday, January 14, 2011

Feast of the Seven Fishes 2010 - A Video


I finally got around to putting together a video from the footage I took during our Feast of the Seven Fishes this past Christmas Eve.

It was the first time I've done video editing like this - it was frustrating at first, but fun once I familiarized myself with the editing software (Sony Vegas).

Monday, January 3, 2011

Time Off

Guest Photographer

We recently had a great visit with our friends Tom and Elise, who came out west from Boulder for a few days between Christmas and New Year.

Elise is the proud new owner of the same camera I recently gifted myself (the Canon Rebel T2i), so I took a welcome rest from photography (I needed one after our seven-fish feast) and she documented the food during their stay.

Other than the "meta" shot above, I did take a picture to document our first whole octopus experience (from Catalina Offshore, naturally):

Octopus

For the rest of the savory details, head on over to Elise and Tom's blog.

Monday, December 27, 2010

Feast of the Seven Fishes 2010 - Locavore Edition

Smoked Fish Duo with Peas and Quick-Pickled Breakfast Radish and Beet

Update: Check out our video of this Feast of the Seven Fishes.

Another year, another crazy multi-course Feast of the Seven Fishes dinner for two on Christmas Eve. Since we've been eating so much great local fish and seafood this year, we decided to keep with that theme and source everything as locally as we could.

The produce came from our garden, the oysters were from Carlsbad Aqua Farm, and the rest is local fish (primarily Baja caught) from Catalina Offshore Products.

We started early in the afternoon and cooked and ate through the evening. Here are the dishes in the order we had them:

Halibut Clementine Ceviche

We picked clementines from the communal tree at our garden, and used the juice (along with some lime) to make a simple Halibut ceviche. Some finely chopped onion and fresh chiles (used to marinate, but not served) accentuated the delicate flavor of the fish.

Rock Cod and Potato Ravioli with Marjoram Tomato Sauce

Based on one of our favorite dishes from Mario Batali's Holiday Food - Ravioli alla Spigola, with Rock Cod replacing Sea Bass. The marjoram (picked fresh from our patio) tomato sauce is what really makes this dish. The freshly made pasta doesn't hurt, either...

Smoked Fish Duo - Quick-Pickled Breakfast Radish and Beet - Snap Peas
Smoked Fish Duo with Peas and Quick-Pickled Breakfast Radish and Beet

Each year there seems to be one dish where we spend way too much time messing with silly plating. Last year it was our Niçoise Tuna Skewers. This year it was this smoked fish dish. The fish is Opah (in front) and local Sea Bass (in back). Both fish were nice, but the Opah was particularly good.

Pacific Oysters
Pacific Oysters

We kept the oysters simple this year. Pacific Oysters from Carlsbad Aqua Farm that we slurped down with a little bit of classic mignonette.

Shrimp al Mojo de Ajo

I can't fathom why we've never done a mojo de ajo dish before. We'll certainly be doing it again, as this may have been my favorite dish of the meal. The Mexican White Shrimp from Catalina Offshore are so good that you don't need to do much to them. Soft, sweet garlic from the mojo, some cilantro and a squeeze of lime. Perfect.

Sculpin with Roasted Golden Beets and Beet Greens
Sculpin with Golden Beets and Beet Greens

Simply prepared with a little bit of vermouth-tinged pan sauce. The Sculpin was good, but the beets were even better. We love golden beets - all of that rich beet flavor without the crimson mess of a red beet.

So there you have it - this year's seven-fish feast. Six dishes, seven fishes, two very content diners.

Happy Holidays!

Thursday, December 23, 2010

Nam Yu Peanuts - Roasted Peanuts Glazed With Fermented Bean Curd

Nam Yu Peanuts

Around this time last year, I came across a post on eGullet describing what seemed a very intriguing snack - roasted peanuts with a sauce made from fermented red bean curd. I gave it a try and liked it so much that it instantly became a new holiday tradition.

These peanuts are completely addictive and are great to have around to nibble on during the holidays. They also make for a nice little gift.

I made this year's batch a few days ago, and thought I would share the recipe with all of you.

Nam Yu Peanuts

Pictured above is the bean curd I found at my local Asian supermarket. While it mentions "chili", it really isn't hot at all. The bean curd is in soft chunks - roughly an inch square. The smell and taste is pretty funky, but don't let that put you off - it adds a fantastically interesting flavor to the nuts.

To make the sauce, you mix up some bean curd with water, sugar and salt. You end up with something that looks like a loose chocolate pudding:

Nam Yu Peanuts

The peanuts I use also come from the Asian supermarket. They are skin-on and in 12oz packages. The are just ordinary peanuts, though, so I imagine any brand would do just fine.

Nam Yu Peanuts

The nuts get stir-fried until they start to color. I do this one package of nuts at a time to keep things manageable.

Nam Yu Peanuts

Then I drizzle in some of the bean curd mixture, stirring it through to coat the nuts.

Nam Yu Peanuts

After stir-frying, the nuts get put on a sheet pan and into a 400° oven for a few 10-minute stints - mixing them up to redistribute in between. Then they just need to cool and they are ready to eat:

Nam Yu Peanuts

These tasty little guys aren't going to last long...


Nam Yu Peanuts

An easy snack with an unusual and addictive flavor.

Ingredients:
3 12oz packages of peanuts, skin on
5-6 chunks (2 1/2 oz) fermented red bean curd
4 tablespoons water
1 teaspoon salt
3 teaspoons sugar

Preheat your oven to 400°F.

In a small bowl, mix the bean curd, water, salt and sugar together until completely smooth. If it seems too thick, add some more water.

In a wok or skillet, stir-fry one of the packages of peanuts over medium to high heat. You may want to turn on your overhead oven fan if you have one. Once the nuts are starting to color, add three tablespoons of the bean curd mixture one tablespoon at a time, mixing it through. After a few more minutes, pour the peanuts into a large sheet pan (preferably one with high enough sides to keep things from spilling over). Repeat the process with the remaining two packages of peanuts.

Spread the peanuts evenly on the sheet pan and put them in the oven. After about 10 minutes, remove them and stir them around to redistribute. If you have bean curd mixture left over, add some more and stir it through. Put the peanuts back in the oven and repeat this process two or three more times. If some of the peanuts char a bit, that is fine - but you don't want them to burn too much.

Let the peanuts cool. When they are warm, they will not seem like they are going to be crunchy, but don't worry - they will be fine after resting.