Homemade Coppa / Capicola

It goes by a number of names - Coppa, Capicola, Capocollo... Whatever you call it, it might just be my favorite cured meat. We first had this tasty cured pork treat from Boccalone Salumeria in San Francisco, and have been big fans ever since.
Given our love of Coppa, I am overjoyed that we have now been able to successfully make it ourselves. Seeing the entire process whereby a humble piece of pork shoulder is transformed into a beautiful piece of cured meat was a very satisfying experience.
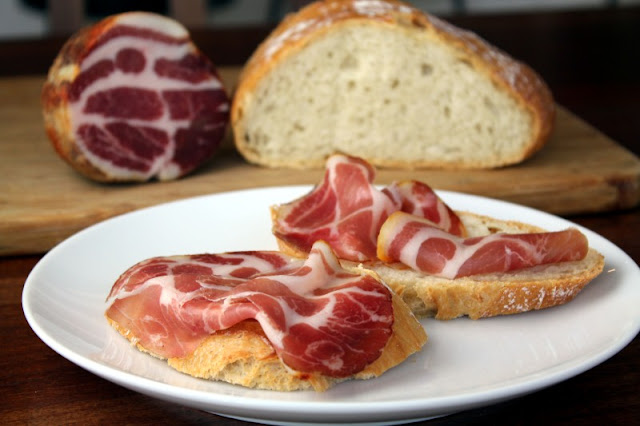
As I mentioned above, coppa is made from pork shoulder. More specifically - and where the name comes from - it uses the coppa muscle of the shoulder.
Here is the shoulder that we started with:
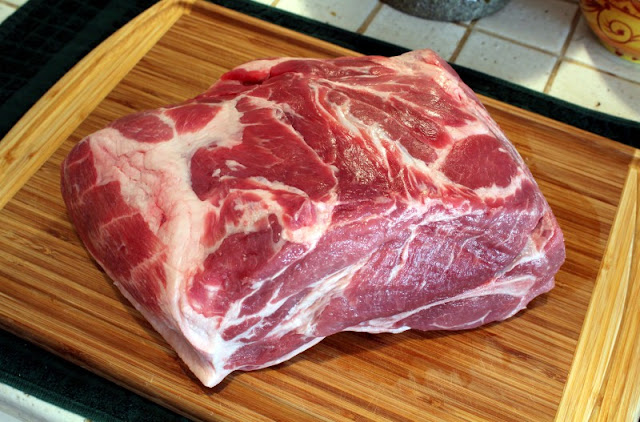
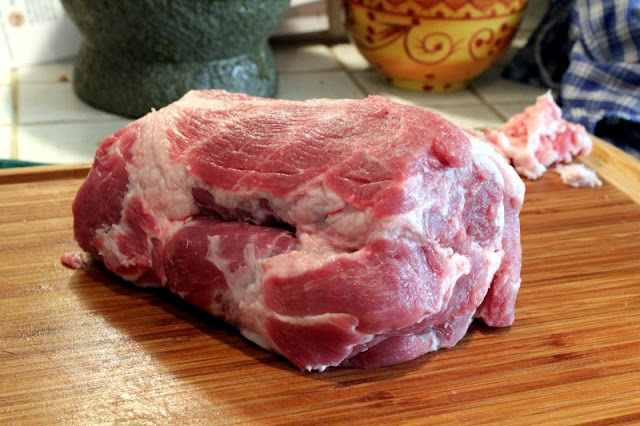
The coppa muscle is on the left, on the side of the shoulder away from the bone. Here you can see it after it has been removed from the rest of the shoulder:
The first step is a dry brining process - much like you would do for pancetta or homemade bacon. The dry brine is a simple mixture of kosher salt, cracked white peppercorns and curing salt #2:
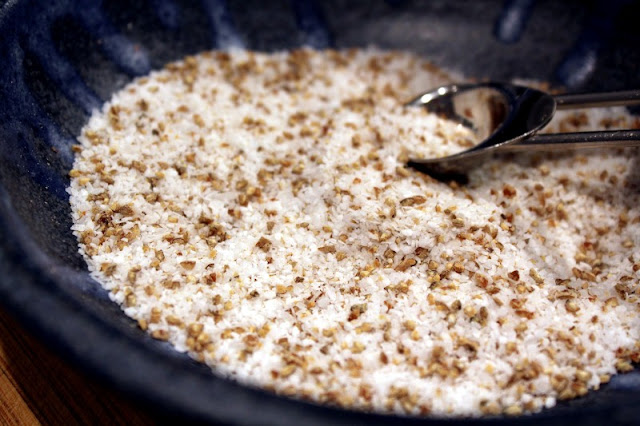
which gets rubbed onto the coppa:
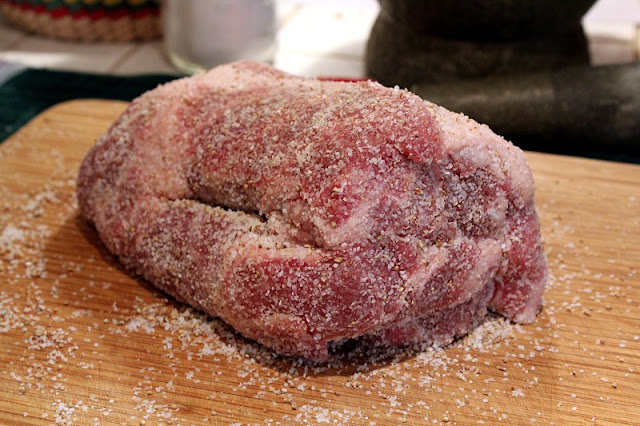
Then it gets wrapped in plastic wrap and refrigerated for about two weeks, or until the meat feels a bit more firm (this one took 16 days). The dry-brine is then rinsed off:
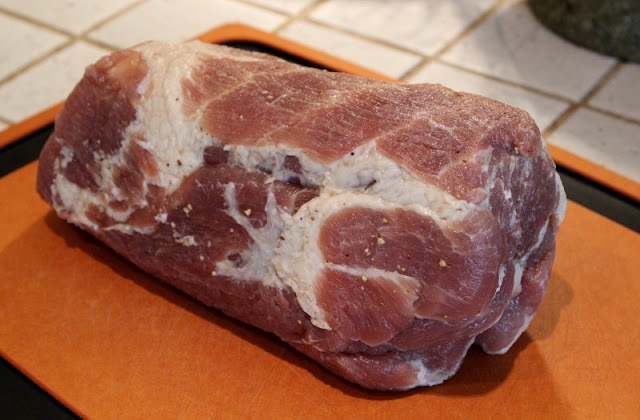
After drying at room temperature a couple hours, the surface is evenly coated with a mild blend of ground chile: Piment d'Espelette, sweet Hungarian paprika and a little cayenne.

Then the meat is ready to hang. We encased ours #10 elastic netting from Butcher&Packer. This helps keep its shape and makes hanging easier.
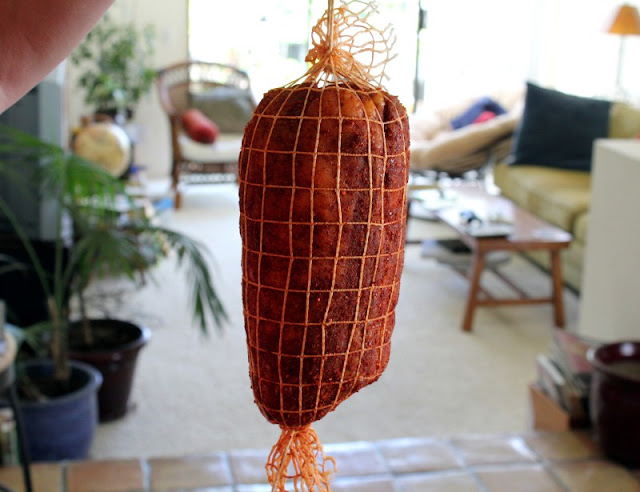
Nicely trussed up, it went into our curing chamber / beer fridge set at 52-55 degrees fahrenheit.

The biggest challenge was keeping the humidity where it needed to be.
We used a Sunpentown Mini-Humidifier (the white plastic doo-dad in the upper right), which was helpful, but not problem-free. It would probably work well in a large space, but even at the lowest setting it put the humidity at 90%. It would also run out of water very quickly at which point the humidity dropped to less than 50%.
We solved the problem by plugging the unit into an appliance timer and setting it to turn off and on every 15 minutes.This way we were able to start at about 80% humidity for the first couple weeks, then slowly drop it down to 65-70% over the remainder of the curing period.
After 7 weeks, the coppa had dropped from a starting weight of 2 pounds, 13 ounces to a final weight of just over two pounds - a loss of just under 30%.
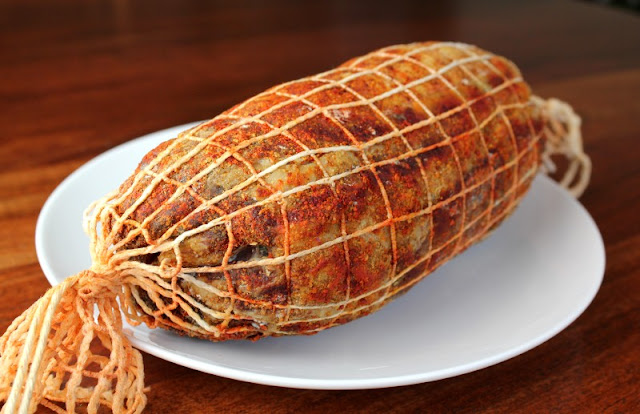
It wasn't quite ready yet, though. We put it back in the fridge for another two weeks (patience is a necessary virtue in meat curing!) to let the moisture content even out.
Then, finally, it was time! From the outside it was hard to tell how we had done, but once we cut into it we knew we had something special on our hands:

Ruby red meat. Clean, white fat. And it tastes as good as it looks. Incredible aroma and depth of flavor.
Thinly sliced using our EdgeCraft Food Slicer, it makes a great snack on crackers or a slice of bread.

We'll pull together our notes and write up a detailed recipe soon.




Oh, this coppa is such a jewel! It's really impressjve & inspiring; I'm particularly admiring the second picture down, where the slices adorn the bread so prettily, and I can only imagine how tasty it is. Kudos!
ReplyDeleteThanks, Mosaica! We were really pleased with how it turned out. We will definitely be making it again.
ReplyDeleteYou've inspired me to convert my beer fridge into a curing chamber.
ReplyDeleteThat is one beautiful piece of meat! Wow.
ReplyDeleteMark - definitely go for it. It really isn't hard to do.
ReplyDeleteCAB - thanks! It is amazing what the process of curing can do.
Nicely detailed, as always, beautiful!
ReplyDeleteThanks, Dave!
ReplyDeleteWow that looks incredible! My husband and I think of experimenting and curing pork but have not done it yet. Your photos are great!
ReplyDeleteHi Apple - definitely give curing a try. I would recommend Pancetta or Pancetta Tesa as good starting points.
ReplyDeleteBeautiful. I think this will be next on my list, since I have a deli slicer to do it justice. Nice trick with the humidifier and timer.
ReplyDeleteHi Peter - I highly recommend giving it a go. I'm sure there are better humidifying techniques than what we came up with, but I certainly can't complain about the result.
ReplyDeleteMike,
ReplyDeleteHow much Cure #2 do you use for a 2 lb pork butt?
-Bill
Hi Bill... Not very much! We targeted 0.25% by weight, so for 2 pounds (~900gm), you'd need just over 2 grams. It's fluffy stuff, so about 1/4-1/2 teaspoon should do it.
ReplyDeletewhat is the amount of kosher salt and white pepper corn for dry rub using 1/2 tea spoon # 2 cure for 2 lbs meat
DeleteI'd suggest about 2 1/2 tablespoons (36gm) of kosher salt and a tablespoon (9gm) of white peppercorns. Good luck with the cure!
DeleteHi after the 2 months or 3 months of curing how do I store the capicola to stay fresh
DeleteThanks Sherry! let's say 4, 2 lb butts... does this mean 8 grams of cure?
ReplyDelete-Bill
Hi Bill - More like 9 grams since it's a little over 2 for each two-pounder. Good luck with your curing!
ReplyDeleteLooks and sounds great! I have a pancetta getting ready to hang, and once I get back from vacation, I think I might have to give this a try. What all do you use on the last rub, I doubt I will be able to find the piment d'espellete, and suggested substitutes?
ReplyDeleteThanks - Jon
Hi Jon - if you can't get Piment d'Espelette, you could just leave it out. You'll lose a bit of complexity, but I don't think it will be a big issue.
DeleteI see you're a fellow hop head, I'm digging it!
ReplyDeleteDid you remove the coppa muscle from the pork shoulder or did you cure the entire shoulder/butt?
ReplyDeleteHi Steve - you just use the coppa muscle.
Delete"We'll pull together our notes and write up a detailed recipe soon." Were you able to do this? Maybe I missed it. Would love to duplicate your results!
ReplyDeleteHi John - sorry we've been so slow getting more details out. We want to replicate it a few times to make sure the recipe is solid, and just haven't gotten around to it yet. Hopefully soon!
DeleteHi Mike... It looks great and I have one going using the same recipe. Just curious if you got any mold on yours during the process? I have a little going about 3 weeks in. Thanks- Seth
ReplyDeleteWe did have a few small spots. They got wiped off with red wine vinegar. A bit of mold grew in a fold of meat near one end too, and we had to carefully cut that out before and/or after slicing.
DeleteHello,
ReplyDeleteI just came across your site and it is fantastic. Any chance you put together the recipe for the capo yet?
Not yet, sorry!
DeleteThanks for the reply. I'll keep checking back.
Deletehello mike can i hang my meat in my refrigrater
ReplyDeleteI wouldn't recommend using a regular refrigerator. They have two major problems - they are too cold and too dry.
Deletehello mike i live in wisconsin will my capicola be ok if i hang at- temp50-humidity 40
DeleteHi Darlene - The temperature is fine, but the humidity is way too low. At that level the outside of the meat will dry out quickly and prevent the inside of the meat from loosing moisture and curing properly (it's called 'case hardening'). You might be able to place the meat in a fairly airtight box along with a dish of water, or at least put it into a loose plastic bag to keep the humidity level high enough, but it'll be a bit tricky.
DeleteHi Mike,
ReplyDeleteWhat happened before meat curing chambers where around? I live in South Africa, the Africa heat is relentless, what do I do? Can I hang the Coppa in a cool room at 16C(60F).
Regards
Stefan
Hi Stefan, From what I've read, the whole cuts of meat (like the coppa) are more forgiving than things like sausages, and anything below 60 degrees should work. It'll be really important to keep the humidity high enough though. Just watch out for inappropriate (colorful) molds, and use your good judgement.
ReplyDeleteI am green with envy
ReplyDelete