Wednesday, December 30, 2009

Feast of the Seven Fishes 2009
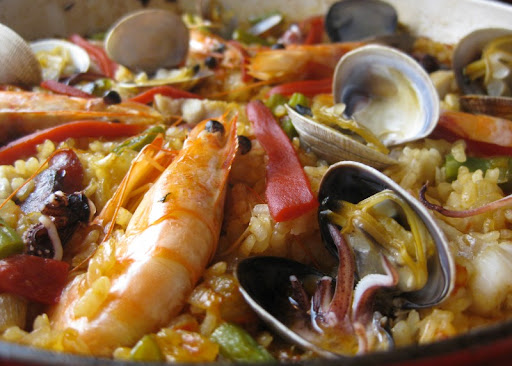
Seafood Paella

This Christmas Eve, we continued our yearly tradition based loosely on the Italian Feast of the Seven Fishes. We don't worry about the exact number of fishes, and we don't limit ourselves to Italian dishes. We just use the holiday as an inspiration to create a multi-course meal centered around fish and shellfish.

We had no real unifying theme this year. Our initial thoughts revolved around a "Mediterranean (both sides)" idea, but we ended up throwing in a bit of the new world as well.

Here's how it played out:

Oysters with Chile de Arbol and Cilantro
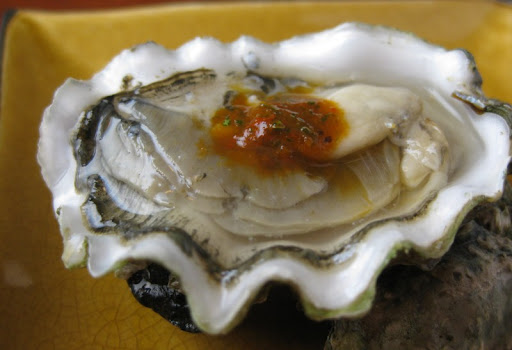

Our Christmas Eve feasts have always started out with oysters, and we weren't about to change that this year. This guy is a local Olympia oyster, grown by Carlsbad Aqua Farm and purchased from Bay Park Fish Company. The sauce was made from chile de arbol - whole dried chiles, soaked and then blended with garlic, cilantro and a bit of red wine vinegar.

This is what the oysters looked like pre-shucking (the one pictured above is on the left below, sporting his big barnacle):
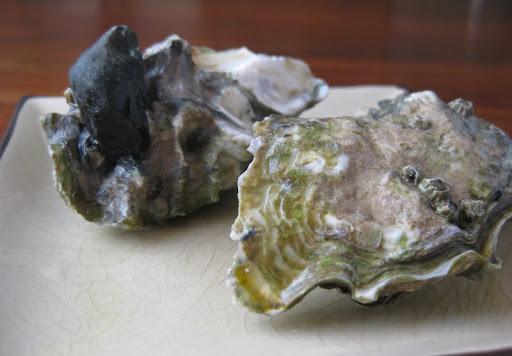
Oysters with Chile de Arbol and Cilantro

The flavor of the oyster was clean and briny, and went well with the hot punch from the chile de arbol. In addition to the Olympia oysters, we also had some Conway Cup and St. Simon oysters for good measure.

Niçoise Tuna Skewers

Kind of a play on a Niçoise Salad. The tuna (Ahi) was salted and then poached confit-style in olive oil that was flavored with garlic, bay leaf and peppercorns. We skewered it with potato and green bean, served it over a bed of lettuce and chopped egg and sauced everything with a vinaigrette. The tuna had fantastic flavor all by itself, and was made even better by the other ingredients.

As you can see, we had fun playing with various platings:
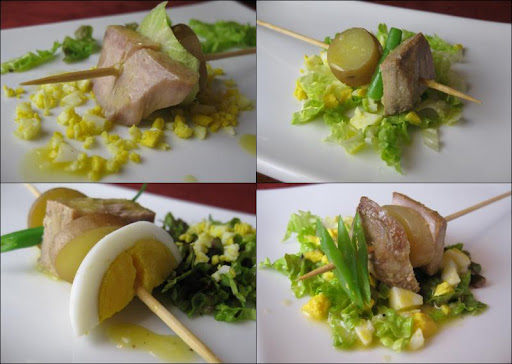
Niçoise Tuna Skewers

The vinaigrette consisted of oil, white wine vinegar, lemon, Dijon mustard, anchovy and minced shallot and garlic. We don't often make emulsified dressings, but we really enjoyed this one and found ourselves scraping every last morsel of salad from the plate.

Seared Scallops with Spicy Lentils

I was really pleased at how the half-moon presentation of the dish turned out. To be honest, though, I have to credit it more to affordance than inspiration. The simple fact was that the scallops we picked up (also from Bay Park Fish Company) were absolutely massive:
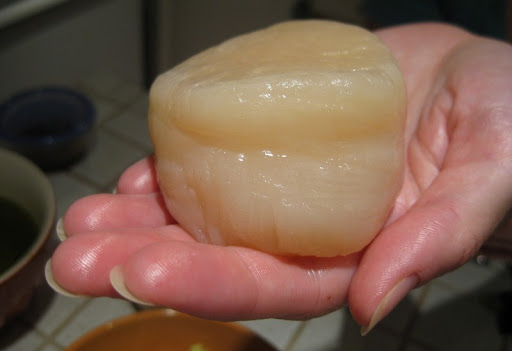
Massive Scallop

Cutting them up seemed the only sensible way to serve them (although we did sear them whole).

In addition, we did a sliced version that also worked really well. There was a great textural contrast between the harder-cooked and caramelized outer slices and the pristine inner slices:

Seared Scallops with Spicy Lentils

The bright-yellow base underneath the scallop is a hugely aromatic and tasty mixture of red lentils and yellow split peas we often use with fish (you can find the recipe here). The flavoring is turmeric, cumin, ginger, lemon and cilantro.

Seafood Paella
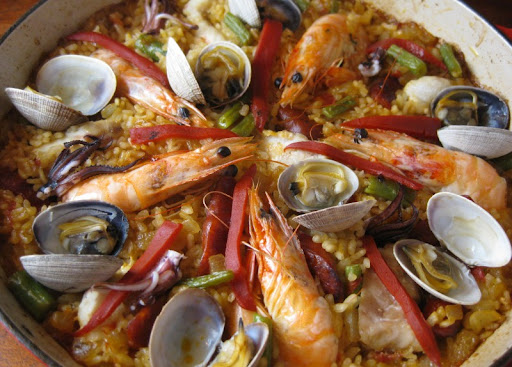
Seafood Paella

This year's way of getting maximum fishes out of a reasonable number of dishes. The fish were shrimp, squid, asari clams, rock cod and lingcod. Some green beans and piquillo peppers rounded out the mix.

We initially under-measured the amount water in the rice which resulted in a longer than ideal cooking time for the seafood. Despite the mishap, it came out looking beautiful and tasting great. It was the first time we've made a seafood paella, but it certainly won't be the last.

Seafood Paella

So ends another fun, if a bit exhausting, "seven" fish feast. The final tally for this this year was 4 dishes and 8 fishes (10, if you count the varieties of oysters separately).


If you enjoyed reading this, you may want to check out the posts on our previous Feast of the Seven Fishes meals:

2008 Feast of the Seven Fishes - Oysters with Vietnamese Ginger-Chili Mignonette. Cured Salmon Four Ways. Thai Steamed Mussels. Vietnamese Salad with Smoked Trout and Bitter Greens. Ginger Fish. Squid in Caramel Sauce. Napa Cabbage Soup with Shrimp Dumplings.

2007 Feast of the Seven Fishes -  Oysters with a Thai mignonette. Crispy Fish and Lentil Balls. Sardines on Toast. Yucatecan Squid Salad. Fish and Shellfish Stew.

Wednesday, December 23, 2009

The Sazerac Cocktail

Sazerac Cocktail

The Sazerac is my hands-down favorite winter cocktail. Created in New Orleans in the 1830's, it is a delightful concoction of rye whiskey spiked with the complex aromatic flavors of anise liqueur and Peychaud's bitters (named for apothecary Antoine Peychaud who came up with both the recipe for the bitters and the cocktail itself).
I first discovered the Sazerac while doing research for a visit to New Orleans. We planned to try the cocktail at Napoleon House, but it was closed for a private party and we didn't quite manage to try the drink in its city of origin. In the end, I finally had my first Sazerac later on the same trip at City House in Nashville. I was an instant fan.

Sazerac Cocktail

Originally made with cognac, the Sazerac is now made with rye whiskey. I generally use the appropriately named Sazerac Rye which is produced by Buffalo Trace Distillery (whose parent conglomerate now also control the Herbsaint and Peychaud's brands). I quite like the stuff, and enjoy it on its own when I'm too lazy to make a cocktail.

My version of the Sazerac is a bit stripped down from the official recipe. I omit the sugar, and I do not like to use a chilled glass (I have the same preference when making a Manhattan).

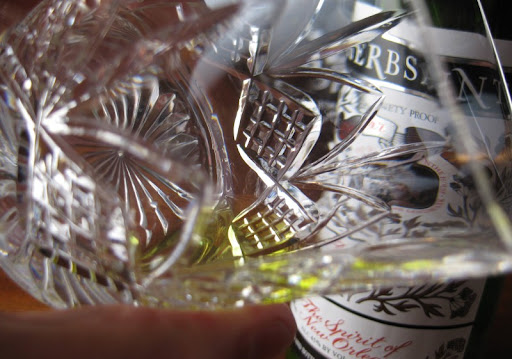
First up is the Herbsaint, an anise-flavored liqueur. I add just enough so that I can roll it around to create a coating on the inside of a whiskey glass.

Sazerac Cocktail

I love the smell of the Herbsaint, and coating the glass with it brings out the aroma and helps it persist after the whiskey is added.

Next, a few drops of Peychaud's bitters:

Sazerac Cocktail

The ruby-red color of the bitters instantly turn the color of the glass from lime-green to a burnished orange.

Sazerac Cocktail

Then it is time for the whiskey. I generally pour in around two fingers worth, but I'm not at all fussy about the exact measure. The more whiskey, the less dominant the flavors of the Herbsaint and Peychaud's will be - I use more or less depending on my mood.

Then, it's down the hatch - tongue-tingling and belly-warming.

Sazerac Cocktail

Cheers, and Happy Holidays!

Wednesday, December 16, 2009

Beef Short Rib Pot Pie

Beef Short Rib Pot Pie

Who says pot pies have to be made with chicken? We love to take all sorts of savory fillings and encase them in flaky pastry. Most commonly, the filling is leftovers from some sort of braised dish.

A few days ago, we had short ribs for dinner, using Daniel Boulud's recipe from the excellent Café Boulud Cookbook (we also love the version in The Balthazar Cookbook). After a fantastic meal, we still had some of the rich sauce and lovely meat left over. Time for pot pies!

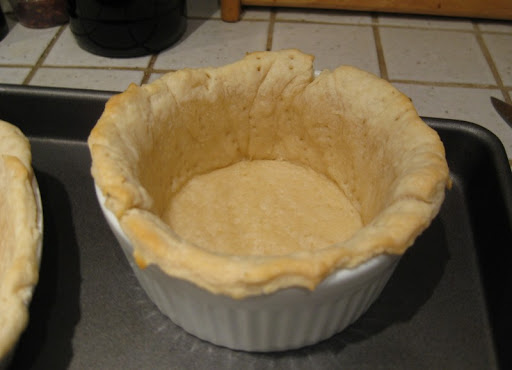
They start with savory shortcrust pastry (we like a mixture of butter and lard for the fat). The bottom crust gets pricked with a fork and par-baked in a 450°F oven for about 10 minutes:

Beef Short Rib Pot Pie

For the filling, we took the already super-flavorful sauce from our leftover short ribs and added in some finely-diced and sautéed onion, carrot, mushroom and celery (with the leaves - don't leave out the leaves). We separately cooked a potato until just tender, and cut it into chunky pieces about the same size as our leftover bits of rib meat.

Beef Short Rib Pot Pie

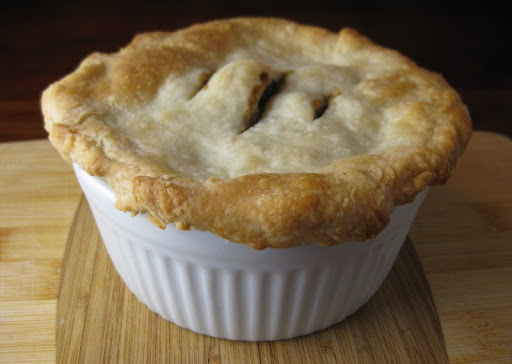
Then it was on with the pastry top and back into the same 450°F oven for about 15 minutes - until the crust was a beautiful golden brown.

Beef Short Rib Pot Pie

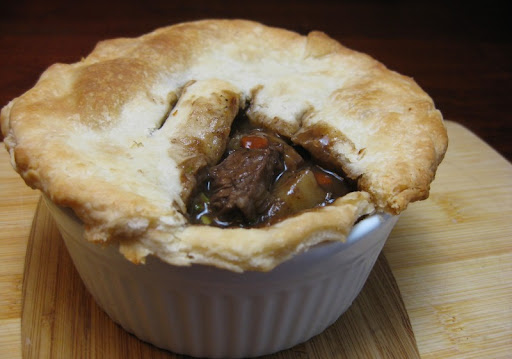
And finally time to dig in:

Beef Short Rib Pot Pie

The contents are always way too hot eat at first, but fortunately you have the top layer of pastry already cooling nicely so that you can flake off bits and dip them in the gravy.

Perfect, decadent winter meal.

Thursday, December 3, 2009

Thanksgiving Stuffing Croquettes with a Gravy Center

Thanksgiving Stuffing Croquettes with a Gravy Center

While we often make a non-standard Thanksgiving meal, this year we did it pretty much straight-up traditional. The leftovers, on the other hand, we've been playing around with a bit.

Case in point, these stuffing croquettes. Think of them as Thanksgiving in a ball. A crispy, fried ball.

We took some leftover stuffing, mixed in some small bits of turkey and formed them into balls.

Thanksgiving Stuffing Croquettes with a Gravy Center

The gravy center was added to each ball by poking a hole, inserting a gravy "cube" (the gravy was set up well enough at fridge temperatures to be easy to work with) and then re-forming the ball.

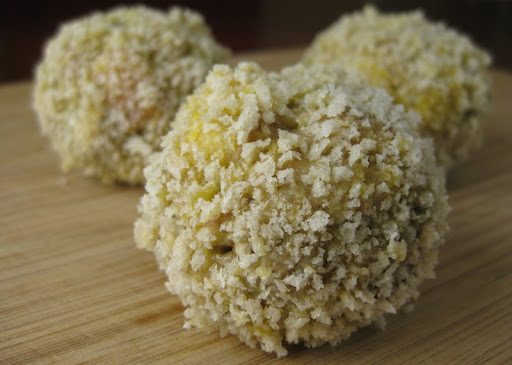
They were then  coated in panko:

Thanksgiving Stuffing Croquettes with a Gravy Center

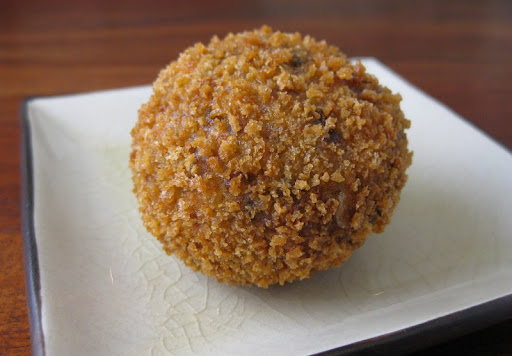
And fried in oil at a temperature of about 350°F until they were golden brown.

Thanksgiving Stuffing Croquettes with a Gravy Center

We initially tried a higher temperature, but the outside cooked before the gravy in the middle had time to melt. Although it was difficult to restrain ourselves from eating them straight out of the fryer, we found that it helped to let them rest for a few minutes to let the heat penetrate through.

This is what they came out looking like:

Thanksgiving Stuffing Croquettes with a Gravy Center

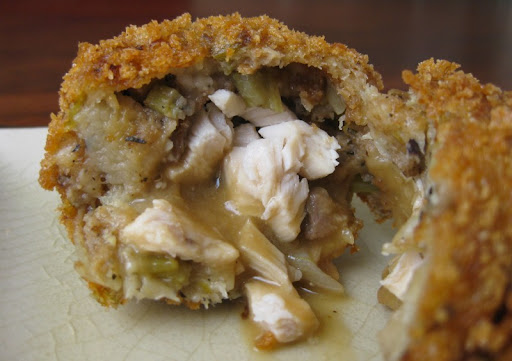
After being cut in half, the gravy oozes out of the center - like a savory take on a molten chocolate cake...

Thanksgiving Stuffing Croquettes with a Gravy Center

I think we've definitely got a fun new addition to our Thanksgiving leftover repertoire.

Wednesday, November 18, 2009

Hopped Wine

Hopped Wine

When Sherry was bottling her second batch of wine (a South-African Chenin Blanc), a crazy idea occurred to me - what if we added some hops? We had a plug of Centennial hops left over from our last batch of beer, so we put some in two of the bottles.

We had no idea what to expect, but it actually turned out pretty well. As is the case with dry-hopping beer, the hops added aroma and flavor, but no bitterness. The taste was intense enough, however, that it was hard to drink too much of it. Rather than drink it as a wine, it is probably better used as a aperitif.

Wednesday, November 4, 2009

Chori-Migas

Chori-Migas

We first experienced migas when we road-tripped through Austin last summer. I'd never heard of migas before, but I was an instant convert. Migas are very much like, but intriguingly different from the chilaquiles we enjoy here in San Diego.

Migas, as American food at least, seem to be pretty Austin-specific. Historically, though, the dish is Spanish/Portuguese in origin. The key elements seem to be leftover stale bread and pork product of some kind.

In Austin, the bread is replaced with corn tortillas, the the pork product is likely to be chorizo, and eggs make it a breakfast dish (hence the likeness to chilaquiles). Regardless of the origin and the transformation, chori-migas are awesome!

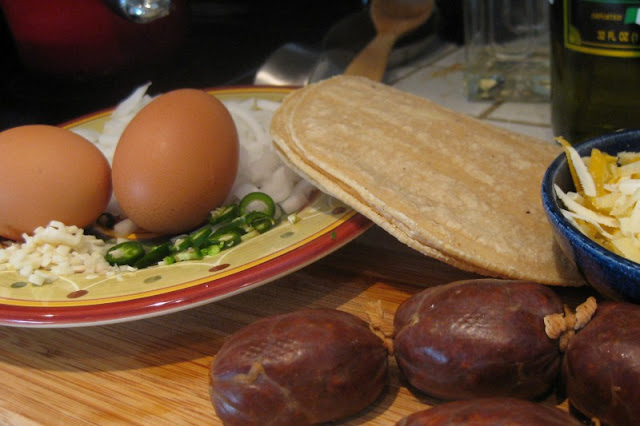
Ingredients:

Chori-Migas

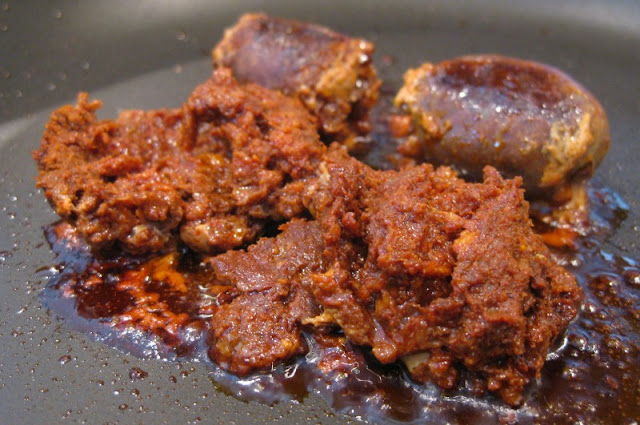
First, fry up your chorizo. We use our homemade Oaxacan-style chorizo bolitas:

Chorizo

Here, I just want to add a frustrated photographer mini-rant. I have found it to be *very* hard to get a good picture of chorizo cooking. The darkness of the chorizo against the black background of frying pan is very unforgiving. Add in that this is all happening on our stove, which is not the best lit environment, and you have a very non-photographer-friendly environment.

The plus side is that, while it might not be very photogenic, it does taste really, really good!

Chori-Migas

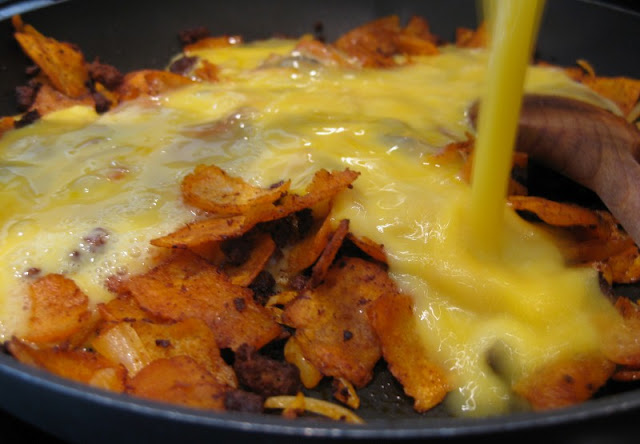
Once your chorizo has bust open and nicely cooked down, tear up some corn tortillas into small to mid-sized bits (we like a hodgepodge of mixed sizes) and toss them in. Once they have taken on the amazing rust-orange color of the chorizo, pour in your scrambled egg mixture:

Chori-Migas

From there, you are very much in your just-making-scrambled-eggs-comfort-zone. It can be done better or worse, but it is hard to truly mess up. If you must ask, however, I do like my scrambled eggs on the soft-set-up side.

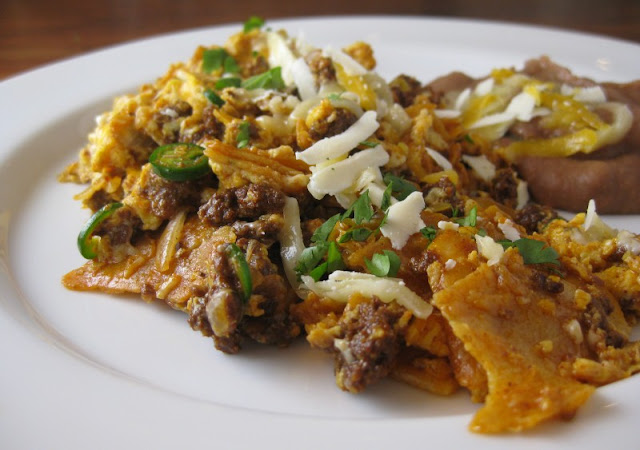
Then it is to the plate. We garnish with sliced jalapeños and some shredded cheese. We keep the cheese simple - mild jack or cheddar - since the flavor complexity is coming from elsewhere. Plus, Austin might just be the epicenter of unapologetic use of yellow cheese, so don't you worry.

Chori-Migas

Chori-migas eaten straight-up are pretty damn good, but our favorite breakfast delivery vehicle is the chori-miga-taco. We like to use flour tortillas, since we already have corn tortillas in the filling.

Pop your migas in, add some salsa if you like (I like a bit of pico-de-gallo, not yet added in the picture above) and enjoy your breakfast!

Chori-Migas
Serves 2.

We start by cooking the chorizo whole and removing the casing once the sausage is cooked through. This results in decent sized chunks of meat in the end product. If you like, you can remove the sausage from its casing prior to cooking, however you will end up with smaller, finer pieces of cooked chorizo.
1 tablespoon canola oil
3 oz Mexican Chorizo, preferably Oaxacan
3 corn tortillas, torn into rough 1-2 inch pieces
1/2 onion, sliced or chopped
1 garlic clove, minced
4 eggs, lightly scrambled
Kosher salt
1 jalapeño or serano chile, thinly sliced
A bit of queso fresco or monterey jack cheese for garnish

Heat the oil in a non-stick frying pan until medium hot. Add the chorizo and cook, turning frequently until the sausage is bursting from its casings. Use scissors or a small knife to slit the casings and tongs or a fork to remove them from the pan, leaving the meat and oil behind.

Add the tortillas and stir well to coat them in the flavored oil. Cook a minute or two, then add the onion and cook for another couple of minutes until some of the tortillas begin to crisp and the onion has softened. Sprinkle everything with salt, then stir in the garlic and cook another 30 seconds.

Pour the eggs over the chorizo-tortilla mixture, and use a rubber spatula to stir gently until the eggs are set, but still moist. Fold in some of the chile slices, then serve on warmed plates. Garnish with a little cheese, more chile slices and some finely chopped cilantro if desired.

Thursday, October 22, 2009

Homemade Guanciale

Guanciale

We've been remiss in following up on the Guanciale we made earlier this year. We just recently cooked the last few remaining bits of it, so I figure now is a good time to revisit it.

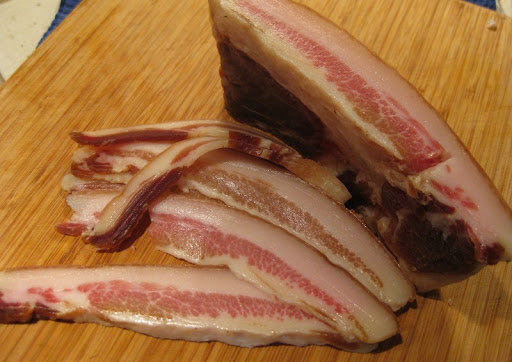
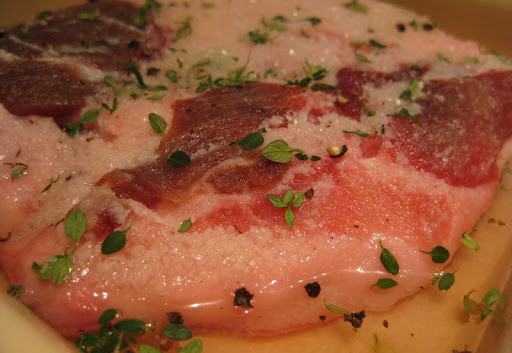
Guanciale is a cured meat that is much like Pancetta, except that it is made with jowl instead of belly. We cured ours with a mixture of kosher salt, sugar, cracked black peppercorns and fresh thyme. This is what it looked like after about a week:

Guanciale

Then it was hung in the meat fridge until it was quite firm, but not too dried out  - a little over three weeks. When it was done, it came out looking like this:

Guanciale

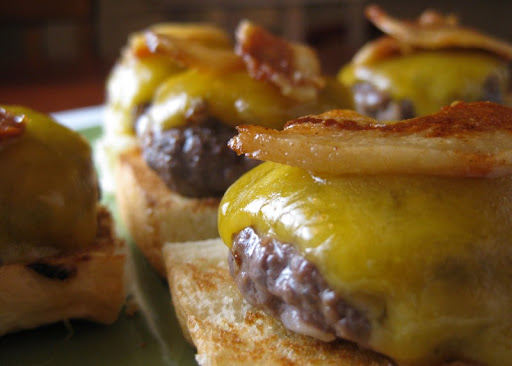
We've used it in a number of dishes, but I want to highlight a couple. First, some Guanciale and Smoked Cheddar Sliders we made this summer:

Guanciale and Smoked Cheddar Sliders

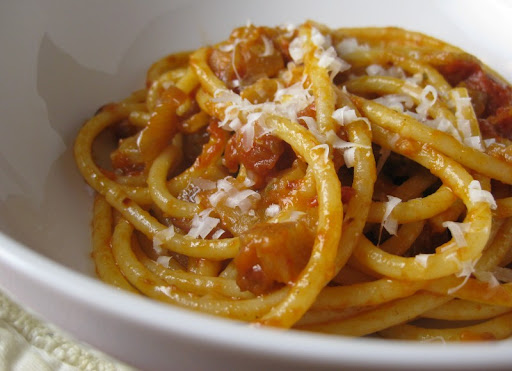
And, of course, perhaps the most classic guanciale dish - Bucatini all'Amatriciana. We've been wanting to make this for a while, but we hadn't been able to find bucatini locally. We finally broke down and ordered some online.

The dish is extremely simple. We rendered down diced guanciale with some red onion and olive oil, added in some of Mario Batali's Basic Tomato Sauce, tossed it with cooked bucatini and served it with some grated Pecorino Romano:

Bucatini all'Amatriciana

Lovely, rich dish.

Thursday, October 15, 2009

Cabeza

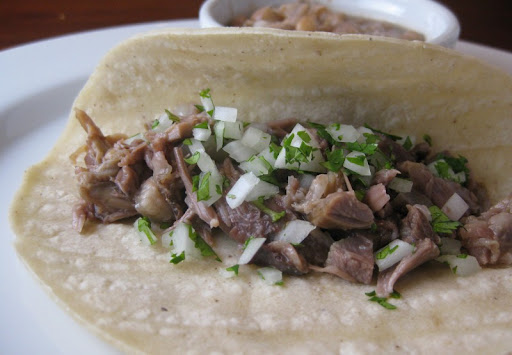
Carnitas Taco

Sherry did a run out to Northgate Market recently, and came back with a bounty of pork products, including half a head. We popped the head in a pot, and slowly simmered it along with some tongues and trotters. Part of the results went into tacos, which were rich, sticky and very satisfying.

The rest went into a small batch of Testa (head cheese):

Coppa di Testa

We had warmed Testa on toast for breakfast this morning, and it really hit the spot.

Warm Testa on Toast

You can find more details on making Testa, along with our recipe for it here: Coppa di Testa.

Friday, October 9, 2009

Homemade Chorizo - Oaxacan Style

Oaxacan Chorizo

While we were in Oaxaca, we fell head-over-heels in love with the chorizo there. Here in San Diego, despite the wide availability of Mexican food products in general, we've been unable to find a chorizo that tastes as good.

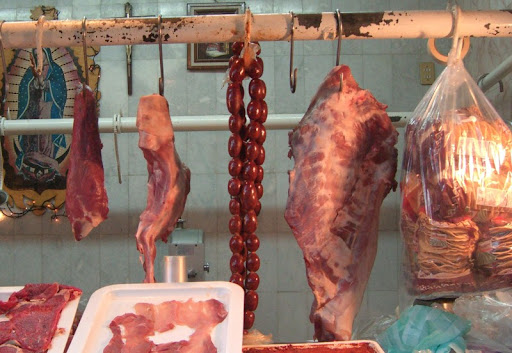
The chorizo we bought from our local carniceria in Oaxaca had a deeper color to it and a more complex and tangy flavor. Plus, we missed the pretty bolitas of chorizo we would see hanging amongst other lovely bits of meat:

Oaxacan Chorizo

Our solution to this problem (which will come as no surprise to regular readers of this blog) was that we would have to try to make it ourselves.

After a bit of experimentation, our recipe is something of a combination of a version from The Food and Life of Oaxaca, by Zarela Martínez and one from Rick Bayless' Authentic Mexican.

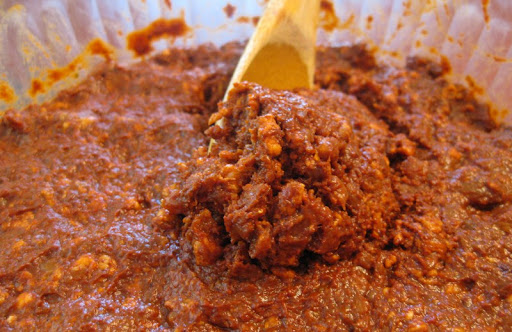
At its base, this chorizo starts like most pork sausages: a mixture of ground pork meat and fat (we use shoulder and belly). Where it differentiates itself is in the seasoning. The dark color comes from lots of chile - in both amount and variety. For this batch we used ancho, paprika, chipotle, guajillo and cayenne. Most of it is for depth of flavor, but it also adds a nice bit of heat.

Oaxacan Chorizo

The taste gets an acid kick from some cider vinegar and is rounded out with herbs (thyme and oregano) and spices (peppercorns, cinnamon, clove and nutmeg).

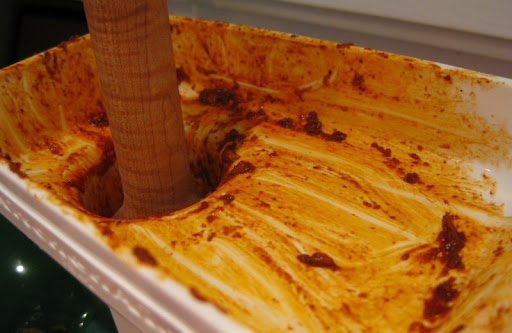
Into the sausage stuffer it goes:

Oaxacan Chorizo

And the "after" shot, with the lovely, fatty, burnished-orange afterglow from the chorizo meat.

Oaxacan Chorizo

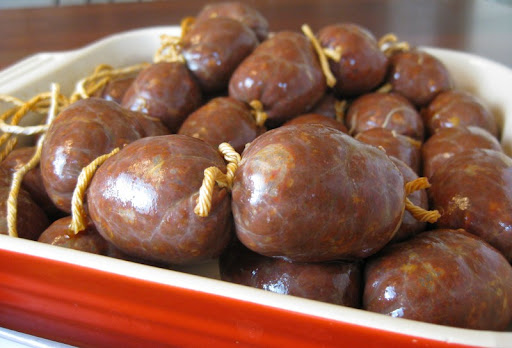
We were very pleased at how the bolitas of chorizo turned out:

Oaxacan Chorizo

After stuffing it was into the magic fridge to hang for a couple of days (that's some saucisson sec hanging in the background).

Oaxacan Chorizo

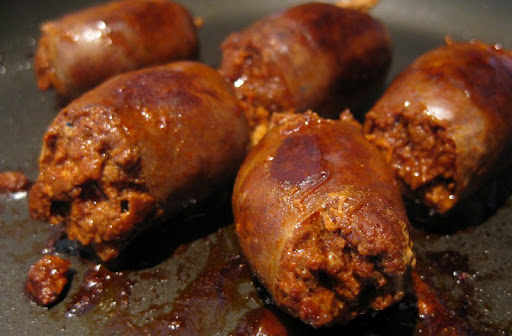
After it has tightened up a bit it is ready to go. The uses are endless. Just grab a few bolitas, toss them in a frying pan and cook them until they burst and spill out.

Oaxacan Chorizo

Then add it to your dish of choice. We have a growing number (such as our recipe for Chori-Migas), but one of the simplest and most satisfying is to use it as a topping for some breakfast memelitas:

Memelitas with Chorizo

The day just starts off better when it starts off with some chorizo.


Oxacan-style Chorizo

You'll want about 2 1/2 oz of whole dried chiles (anchos, guajillo, chipotle or another mixure of fairly mild chiles). If using ground chile, substitute with about 1 1/2 oz. Keep the meat very cold at all times to improve the grinding and stuffing process.

6-7 ounces pork belly
9-10 ounces pork shoulder
2 or 3 medium ancho chiles, seeded and stemmed
1 guajillo chile, seeded and stemmed
1 to 2 dried chipotle chiles, seeded and stemmed
1/2 teaspoon black peppercorns
2 whole cloves
1/2 inch cinnamon stick (preferably canela)
3/4 teaspoon mexican oregano or marjoram
1/4 teaspoon thyme
generous pinch ground nutmeg
2 teaspoons paprika
1/2 teaspoon cayenne pepper
2 1/4 teaspoons kosher salt (mortons)
1 garlic clove, whole
1 garlic clove, minced
1/3 cup cider vinegar
water for soaking chiles
Hog casings
Kitchen twine

Cut the pork belly and shoulder into finger shaped pieces 2 to 3 inches long (remove any tough or stringy gristle). Coarsely grind the meat with a meat grinder. Place into the refrigerator to chill while you prepare the seasonings.

Tear the chiles into large, flat pieces. In a hot, dry pan, quickly toast the chiles a few pieces at a time, just until they start to change color and/or blister. This will only take a few seconds - do not over cook or burn. Place the toasted chiles into a bowl, cover with hot water and soak until softened, about 20 minutes.

Place the peppercorns, cloves, cinnamon, oregano and thyme into a spice grinder and grind finely. If you do not have a spice grinder, add these to the blender in the next step, but run it much longer.

Drain the chiles (reserving the liquid) and place into a blender along with the ground spice mixture, the nutmeg, paprika, cayenne, salt, and 1 garlic clove. Add the cider vinegar and 5 tablespoons of the reserved chile soaking liquid, then blend until smooth.

Using a large spoon, thoroughly mix the seasoning and minced garlic into the ground meats. It will be quite loose. Cover and refrigerate overnight.

Prepare hog casings for stuffing by soaking in warm water at least 30 minutes. Change the soaking water and run fresh water through them to remove traces of salt. Stuff the meat into the casings, but leave each piece of casing unstuffed at least 6 inches at each end. Keep the long sausage link quite loose rather than densly packed (if too tight, the casing may burst while creating the small links). Starting in the center and working toward the ends, use kitchen twine to tie the sausage into short, tight rounds the size of a golf ball.

Hang the links in a cool airy place (50-60 degrees) for 36-48 hours or until they have firmed up and are dry to the touch. Be sure to put a baking tray lined with paper towels underneath the sausage to catch the drips. Cut the finished sausage into shorter sets of links, then wrap in plastic and refrigerate or freeze until ready to use.