Queso Fresco - Home Cheesemaking

This Queso Fresco was our very first attempt at a pressed cheese, and it came out very well. Pictured above the day after it was made, it is completely ready to use. How awesome is that?
Our first test was to use it how we normally use queso fresco when we have it on hand: crumbled atop something. In this case, it is gracing a simple breakfast of memelitas:

The cheese added a very nice lactic and salty element to the salsa atop freshly cooked corn tortillas.
In addition to our traditional uses, this cheese has surprised us with its versatility. It melts much better than we expected, and makes for a very nice quesadilla. Given this, we decided to give it a shot as a pizza cheese. We made a simple Pizza "Margarita" (no, not Margherita - this a Mexican, not Italian cheese after all...)
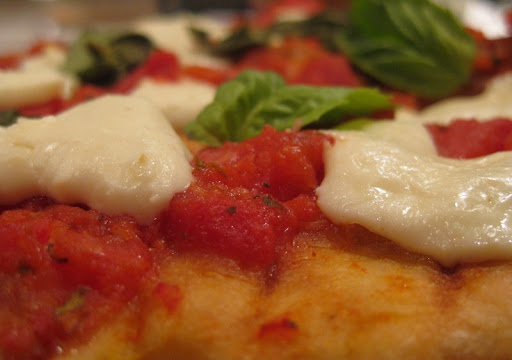
The result was quite nice indeed.
The cheese-making process is actually quite simple - like many artisanal products, it mostly takes time and a little attention to detail. For recipe guidance I've been using the book Home Cheese Making: Recipes for 75 Delicious Cheeses by Ricki Carroll. It's been a very helpful resource.
For my queso fresco I started with two gallons of organic whole milk. The thing that gives many cheeses their characteristic twang is an active culture that produces lactic acid. I used a freeze-dried version (Mesophilic A) from Leeners.com that you add directly to the milk. Since my milk was homogenized I also added a little calcium chloride to avoid an overly soft curd.
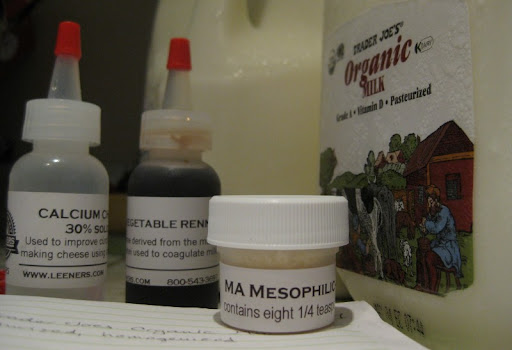
After letting the milk ripen at 90°F for 20 minutes, I stirred in some diluted rennet and let it form a reasonably solid curd - it sets up rather like a custard. Next the curd gets sliced into little cubes and the solids start to release a lot of liquid (the whey).

The cubes release even more whey and shrink significantly while you slowly increase the temperature to 95°F and gently stir them. I was surprised to learn that many cheeses use almost identical ingredients and preparation techniques, but that a few degrees of temperature variation makes the results quite different.

After pouring off as much whey as possible, it's time to salt the curd. The simplest method for ensuring an even distribution is to gently stir it and break up clumps using your fingers.

Because queso fresco is a "pressed cheese", you then need to press it. The compression requires weight, which I improvised like so:

Upon reflection, I like to think of this press as representing my three careers thus far - Microbiology, Epidemiology, and now making good food. The press worked well, apart from a few loud, startling tumbles - one of which sent the cheese flying. Fortunately, no damage was done - we do need a real press, though...
Now that I'm comfortable with the cheese-making process I'm anxious to try my hand at some hard, aged cheeses like cheddar, gouda and maybe a parmesan. But since those take several months to mature, I'm sure we'll be eating lots of tasty queso fresco in the meantime.


