Sunday, September 27, 2009

Belgian Tripel IPA Partial Mash Recipe
Belgian IPA Trippel

There is a long history of American brewers being influenced by their Belgian counterparts, but lately the flow of ideas has been going the other way as well. In 2005, Hildegard van Ostaden was inspired by American IPAs and decided to brew a Tripel with an American IPA hop profile. The result was Urthel Hop-It, and it was very good indeed.

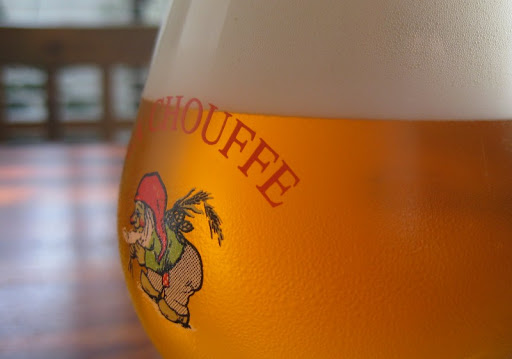
Our first exposure to this style was a Houblon Chouffe Dobbelen IPA Tripel at the Liars' Club, and we were instantly fans. Two of our favorite beer styles are the IPA and the Belgian Tripel, so it is no surprise that a combination of the two is right up our alley.

In the past few years, American brewers have begun to adopt the style as well. Here in San Diego, Green Flash's excellent Le Freak has been getting better with each year they brew it. We decided it was time to get in the game and try to brew one of our own, so we scoured the internet for information and cobbled together a recipe.

Tripels are generally higher octane than IPAs (and most double-IPAs). For our Tripel IPA we were shooting for an original gravity of about 1.082, which a lot of fermentable sugars. Going with the Tripel style, we used Pilsner malt supplemented with clear candi sugar to get the high gravity while keeping a light color and body.

Candi sugar has very large, nearly half-inch crystals. This is what it looks like:

Belgian Candi Sugar

Given the amount of fermentables, we decided to get things going with a two-cup yeast starter culture to give things a kick-start. And man did it ever kick-start. The next morning the wort was moving around like crazy and bubbling so hard it sounded like a motor running.


Fortunately, it didn't quite overflow the air-lock, so we didn't have a mess to clean up.

The resulting ale turned out very well - golden in color and full of flavor. The distinctive Belgian yeast character is balanced very nicely by the aroma and bitterness of the hops. Apparently our yeast was very happy since we achieved a higher level of conversion than expected - with an ABV of 9.2%, it packs quite a punch. Definitely not a session beer...

Belgian IPA Trippel

Belgian Tripel IPA

Total batch size = 5 gallons; Partial Mash in 3 gallon beverage cooler; ~3 gallon 60 minute stove-top boil; late malt extract addition; dry hopped for aroma; target abv of 8.5%

Ingredients:

5 1/2 lb Pilsner Malt (Belgian)
1/2 lb Wheat Malt
5 lb Briess Pilsen Dry Malt Extract (DME)
1 1/2 lb Candi Sugar, Clear
2 oz Columbus Hops (12.3% AA)
1 1/2 oz Saaz Hops (4.0% AA)
1 oz Amarillo Hops (8.5%)
1 tablet Whirlfloc
White Labs WLP550 Belgian Ale Yeast
4 oz corn sugar (optional - for bottle priming)
2 1/2 oz light or pilsen DME, plus 1 T cane sugar (optional - for starter culture)

Hop Schedule:

1/2 oz Columbus - 60 minutes boil
1/4 oz Columbus - 45 minutes boil
1 1/2 oz Saaz - 15 minutes boil
1/4 oz Columbus - 10 minutes boil
1/2 oz Columbus - 0 minutes boil
1/2 oz Columbus - Dry Hop in Secondary Fermenter
1 oz Amarillo - Dry Hop in Secondary Fermenter

[Optional: Prepare a starter culture the day before brewing. Heat 2 cups water then add 2 1/2 oz DME and 1 tablespoon sugar. Boil 10 minutes, then cool quickly to room temperature. Put into a sanitized 1 quart jar or bottle, add yeast, seal and shake gently for 30 seconds. Loosen the lid or use an air-lock to allow gases to escape and let sit until time to pitch the following day.]

Heat 8.25 quarts water to 165 degrees for a target mash temperature of 150-153 degrees. Place the 6 pounds of crushed grain (Pilsner and Wheat) into a large mesh bag. Pour the hot water into the beverage cooler, then lower the grain bag into the water very slowly, pushing and prodding with a large spoon to ensure all the grain is wet (this can take several minutes). Put the lid on the cooler and allow to rest 60 minutes.

While the grains are mashing, heat another 4-5 quarts of water to 180-185 degrees for sparging (rinsing the grains). Near the end of the 60 minutes, heat 2 quarts of water to a boil in your brew pot.

After the first mash is complete, remove the cooler lid and open the spigot to draw off about 2 quarts of wort into a large pitcher. The first draw will likely be cloudy with grain particles; pour it gently back into the cooler over the grain bag to help filter it. Draw off the remaining wort by the pitcher-full and carefully pour that wort into the boiling water in your brew pot; continue until only a trickle of wort leaves the spigot.

Pour about 4 quarts of your hot sparge water over the grain bag in the cooler. Gently lift the bag up and down to thoroughly re-wet the grains (but don't slosh). Cover and let sit about 5 minutes. Use the spigot and a pitcher to draw off all of the second wort and add it to your brew pot. You should have about 3 gallons of wort.

Dissolve the candi sugar in the hot wort, being careful to keep the sugar from scorching. You can do this easily by suspending the crystals in a strainer or chinois as you bring the liquid to a boil. When ready, add hops according to the schedule. With about 15 minutes remaining in the boil, begin adding the DME one cup at a time, stirring to dissolve. At time zero, continue adding DME off the heat until all has been added (if needed, return to low heat for a few minutes to help dissolve the extract). Stir in 1 tablet Whirlfloc. Cover and let sit 10-15 minutes.

Move brew pot to an ice bath and cool quickly to less than 80 degrees. Transfer wort to a primary fermenter, straining most of the hops. Add water to reach the 5 gallon mark. Swirl vigorously then pitch the yeast.

Ferment in primary for 1 week, then transfer to secondary. After seven days, dry hop with 1/2 oz Columbus and 1 oz Amarillo. Keg or bottle after fermentation is complete (2 to 3 weeks in secondary).

Thursday, September 17, 2009

Pulled Pork Sopes ("Masa Boats")

Pulled Pork Sopes

We did a smoked pork butt a while back and were faced with the inevitable bounty of leftovers. Pulled pork tacos are our go-to dish for this circumstance, but we wanted to try something new. We decided to see how pulled pork would do as a filling for sopes. I'm glad we did, because it turns out that pulled pork sopes are really, really good.

Sopes are a delightful Mexican antojito made by forming little "boats" of masa and filling them with your ingredient of choice. We use a Rick Bayless recipe from Mexico One Plate at a Time. Given how easy sopes are to make, it is really more of a simple technique than a recipe.

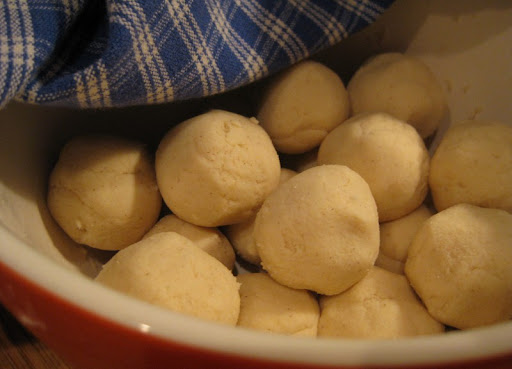
You start by preparing masa just as you would for corn tortillas: add warm water to dry masa harina until it has the consistency of soft cookie dough, add a little salt (a scant teaspoon of kosher salt per two cups masa harina) and then let the dough rest at least 15 minutes to fully hydrate. Just before cooking, shape into balls about the size of a golf ball.

Masa Balls for Sopes

Once you have your masa balls ready, flatten them in a tortilla press to a thickness about twice what you would do for a tortilla and pop them into a dry frying pan over medium-high heat.

Sopes

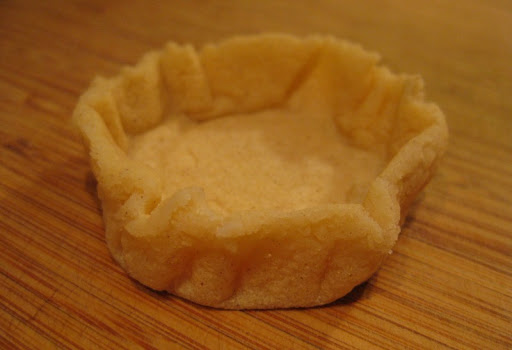
Once they have puffed up a bit but are not too browned on the bottom, you can take them out and crimp up the sides to mold them into the sope boat shape:

Forming a Sope

Then it is back into the frying pan - this time with some oil drizzled around. Add in your toppings and cook the masa the rest of the way through.

Pulled Pork Sopes

Sopes are best eaten when they are just out of the pan with the masa still hot and crispy. When we have sopes we generally make a few different kinds. We really like simple ones with just a bit of cheese topped with salsa (we like them with both red and green - you can find the the recipe we use for salsa verde here).

Sope with Salsa Verde and Cheese

This time we had some leftover pipián, a pumpkin seed dip/salsa we learned to make in Oaxaca. It made for a very satisfying filling:

Pipián Sope

Sopes are a perfect blank canvas just waiting to take on the character of whatever ingredient you choose to fill them with. The next time you're thinking of having some tacos, try something different and make sopes instead.

Friday, September 11, 2009

Fallbrook Syrah Harvest

Fallbrook Syrah Harvest

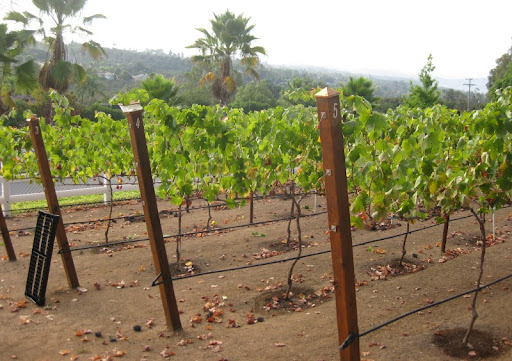
We have some friends who are way more serious about making wine than we are. Recently, they have been starting with whole grapes rather than using juice concentrate from wine kits. This year, they purchased Syrah grapes from a small vineyard in Fallbrook.

Last weekend, the timing was right and we were roped into providing free labor for given the opportunity to experience the grape harvest. We hauled ourselves out of bed at 5:00 (!) and groggily made the drive up I-15 to Fallbrook. The early hour and a bit of cloud cover provided a reasonably cool temperature. Given that the respite from the heat was temporary, we wasted no time getting to the grapes.

Fallbrook Syrah Harvest

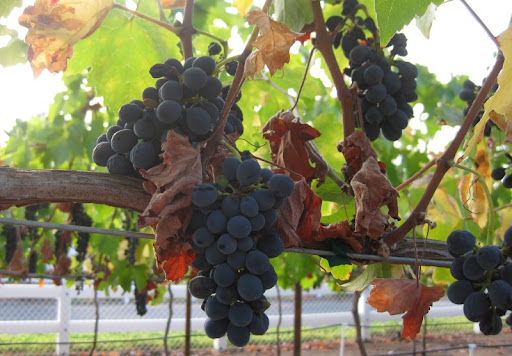
We were given a quick lesson on evaluating grape clusters (discard them if they are predominantly dried up and elongated rather than round) and then it was time to grab our buckets and shears and get to it.

Fallbrook Syrah Harvest

What our group of amateur harvesters lacked in talent, we made up for with numbers. A little over an hour after we began, there wasn't a grape to be seen on the vines.

Fallbrook Syrah Harvest

The total came to around 250 pounds of grapes. That was less than had been anticipated (the same vineyard produced four times that amount last year), but the hope is that the juice will be of a higher quality.

Fallbrook Syrah Harvest

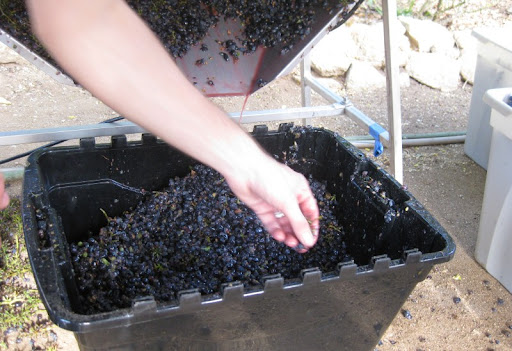
With harvesting finished, it was time to de-stem. Fortunately, modern equipment makes this a pretty painless process.

Fallbrook Syrah Harvest

The grapes go in the top:


The stems shoot out the side:

Fallbrook Syrah Harvest

And the grapes themselves funnel nicely out the front.

Fallbrook Syrah Harvest

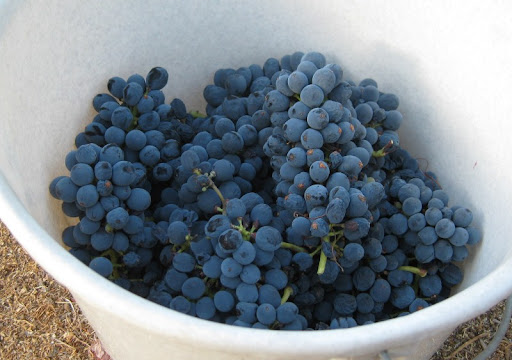
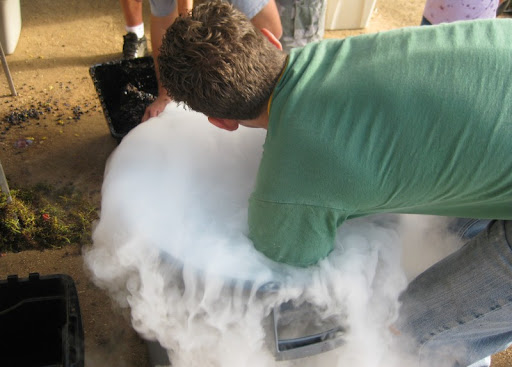
At this point the grapes were broken up a bit, but not fully crushed. To keep them cool for the trip back to San Diego, they were packed in big plastic buckets with dry ice (further crushing and yeast addition would happen back home).

Fallbrook Syrah Harvest

The freshly pressed grape juice had a very nice sweet, clean taste. We're looking forward to tasting the wine in a few years.

Thursday, September 3, 2009

Hot Chicken

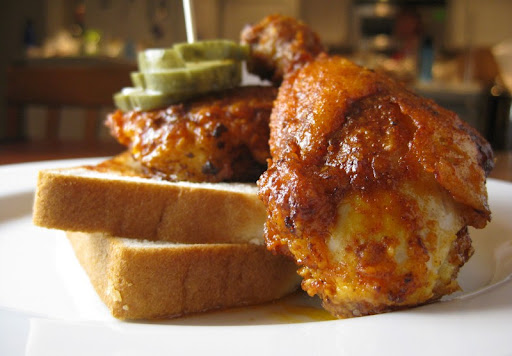
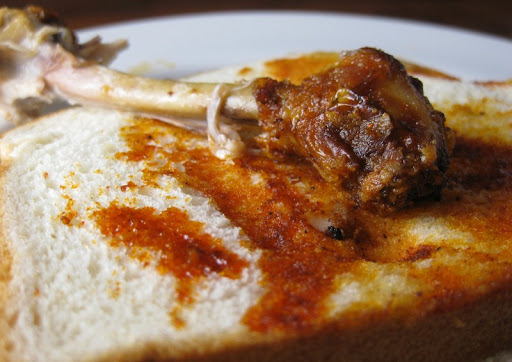
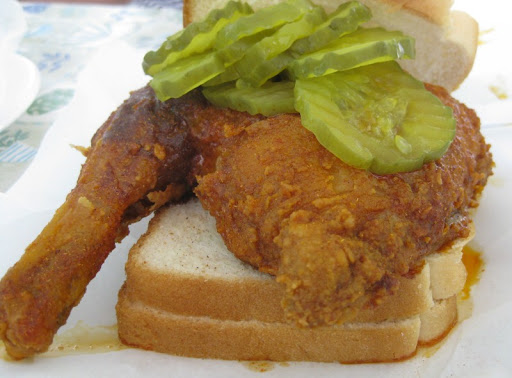
Hot Chicken Fried chicken? Check. Heat? Check. Pickle slices? Check. Sliced white bread? Check. Hot Chicken is in the house! A little over a year ago, on a sweltering July day in Nashville we made the pilgrimage to Prince's Hot Chicken. Having lunch in the heat of the day at a hole-in-the-wall joint with no AC, eating piping hot chicken straight out of the fryer, coated with burn-your-face-off fiery spices seems crazy. And it was crazy - crazy good! Here in San Diego, our heat wave continues and the conditions seemed right for attempting Hot Chicken at home. But how to make it? We decided that Justin Jones' contest-winning recipe from the 2008 Music City Hot Chicken Festival was a good place to start. His recipe is pretty simple - a paste predominantly of cayenne and lard that is applied to the chicken after frying. Adding the heat post-frying seems like the right thing to do logistically (keeping the spice out of the cooking oil and allowing different heat levels of paste to be used at the end to customize the hotness of the order on a piece-by-piece basis) and it rings true with anecdotes I've read about the method used at Prince's. It all starts, however, with good fried chicken: Hot Chicken We do an overnight buttermilk soak, then dredge in seasoned flour and fry until crisp. Fried chicken was one of Sherry's favorites growing up. Her chicken-frying skills have atrophied over the years, but they are starting to get back in form. The heat comes from the chile paste. This is what it looks like when you first mix it up: Hot Chicken After 10 seconds in the microwave on high, the lard loosens up nicely and it can be easily brushed onto the chicken. Hot Chicken How to serve it? That's pretty much established tradition - over a couple of slices of white bread, with several pickle slices skewered to the chicken with a toothpick. I will note, however, that these pickles were homemade - hence the lack of the characteristic fluorescent-green color. Don't get me wrong - I'm not saying fluorescent-green is bad in a pickle, we just haven't been able to achieve it yet... Hot Chicken Once everything is properly assembled, it's time to chow down. Biting into the chicken, the crust crunches nicely, its temperature and spice level challenging with their aggressiveness. The meat inside is savory and juicy, just as fried chicken should be, and temporarily diminishes the burn. But only temporarily - the burn is not to be denied, and builds with each bite. Until you're done, left only with bones and the remaining chile-stained bits of bread. Hot Chicken Now for the critique: Was it good? Absolutely. Very good indeed. Some of the best fried chicken I've had. How did it stand up to Prince's Hot Chicken? We've got a ways to go. First, the chicken we had there was extremely well cooked. Ours is good, and getting better, but not yet in the same league. That's on us, though, and not the recipe we used. Ok, how about the Hot Chicken recipe? I think it works well, but I'm not sure that it is quite what Prince's actually does. First off, the color is too dark. Have a look at the "medium-spicy" leg quarter I had at Prince's: Leg Quarter at Prince's Hot Chicken This was very hot - certainly hotter than the chicken that we made - but isn't very dark-colored at all (aside from the top of the drumstick, which is dark from cooking and not chile). Similarly, the oil on the bread was much more light-orange rather than the deep red we got. Another factor is the bitterness of the cayenne. I really like the complexity you get from powdered dried chile, but in large quantities on its own, you really taste and smell the bitterness. In summary: We definitely think that application of the "hot" after frying is the way to go. Exact composition of the "hot" merits further experimentation. Stay tuned!