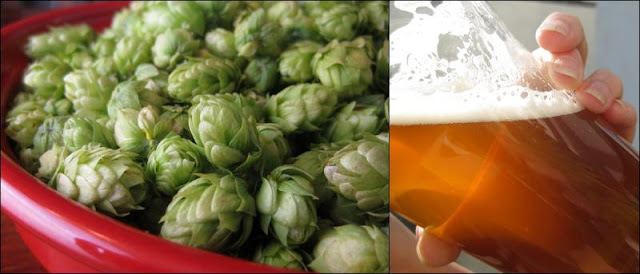
Back in August, we posted about picking fresh Cascade and Nugget hops at Star B Ranch. We've been drinking the beer we made from those hops for a month or so now, so I guess we are overdue on posting about brewing the beer itself.
Scouring the internet didn't turn up a whole lot of information on brewing with fresh hops, and what information we did find was often contradictory. Since our beer turned out well, hopefully this recipe will help the next person searching for information on the subject.

We used our standard west-coast IPA malt bill, so there were no variables to worry about there. With the hops, though, the questions were how much to use, and when? In terms of amounts, the general wisdom seems to be that you want to use about 4-5 times the weight of fresh hops as compared to what you would use with dried hops - this accounts for the extra weight from water in the fresh hop flowers.
Given that we normally use 6 oz of prepared hops, by that calculation we'd need 24-30 oz of fresh - nearly two pounds! But, since we only picked about 18 ounces, that would have to do...
Regarding timing, I had read that you can get too grassy a taste if you boil the hop flowers too long, so we decided to push most of the hop additions later than usual in the schedule.

By the time we had finished adding the hops, they were definitely starting to pile up - you definitely don't want to be using an undersized pot. Once they were saturated with wort, however, they became more manageable.
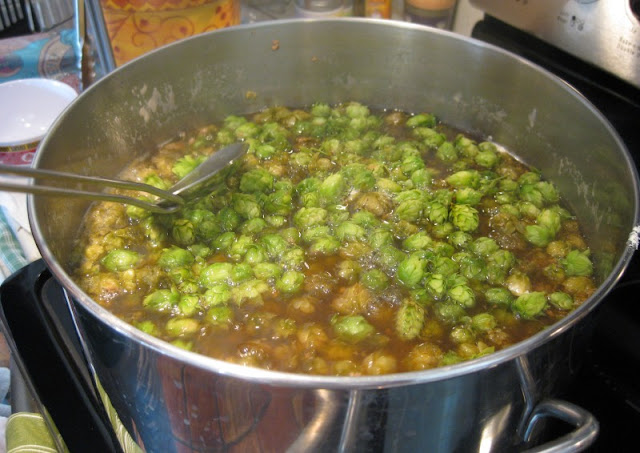
At the dry hopping stage, space becomes an issue again. We were barely able to get all of the hops into our secondary fermenter. Again, though, they shrunk down as they got wet.

We had also read that dry hopping for too long can cause problems, so we only dry hopped for a week rather than close to two like we usually do.
The result was a very pleasant, subtly hoppy beer. Given that the flavor was not at all overly grassy, I think if we do another fresh hop beer we would move the hop schedule up in the boil and and increase the dry hop time to both increase the bitterness and the aroma.
The recipe that follows is exactly what we did:
Cascade/Nugget Wet Hop IPA
Fresh Hops in the Boil and Wet-Hopped in Secondary; Total batch size = 5 gallons; Partial Mash in 3 gallon beverage cooler; ~3 gallon 60 minute stove-top boil; late malt extract addition; target abv of 7.5%. Note: Use the fresh hops as soon after picking as possible; store fresh hops for wet/dry hopping refrigerated in an air-tight container.
5 lb 2-Row Pale Malt
1/2 lb Wheat Malt
1/2 lb Carapils/Dextrin Malt
5 1/4 lb Briess Golden Light Dry Malt Extract (DME)
10 oz Whole, Fresh Cascade Hop Flowers (est. 8% AA)
7.5 oz Whole, Fresh Nugget Hop Flowers (est. 11% AA)
1 tablet Whirlfloc
White Labs WLP001 California Ale Yeast
Hop Schedule:
1 oz fresh Nugget - 60 minutes boil
1/2 oz fresh Nugget - 45 minutes boil
1 oz fresh Cascade - 30 minutes boil
1/2 oz fresh Cascade - 15 minutes boil
1 oz fresh Cascade - 10 minutes boil
1/2 oz fresh Nugget - 5 minutes boil
3 oz fresh Cascade - 0 minutes boil - flameout
3 oz fresh Nugget - 0 minutes boil - flameout
1 oz fresh Cascade - 5 minutes boil
3 1/2 oz fresh Cascade - Wet Hop in Secondary Fermenter
2 1/2 oz fresh Nugget - Wet Hop in Secondary Fermenter
Heat 8 quarts water to 165 degrees for a target mash temperature of 150 degrees. Place the 6 pounds of crushed grain (2-Row Pale, Wheat and Carapils) into a large mesh bag. Pour the hot water into the beverage cooler, then lower the grain bag into the water very slowly, pushing and prodding with a large spoon to ensure all the grain is wet (this can take several minutes). Put the lid on the cooler and allow to rest 60 minutes.
While the grains are mashing, heat another 5-6 quarts of water to 180-185 degrees for sparging (rinsing the grains). Near the end of the 60 minutes, heat 2 quarts of water to a boil in your brew pot.
After the first mash is complete, remove the cooler lid and open the spigot to draw off about 2 quarts of wort into a large pitcher. The first few draws will likely be cloudy with grain particles; pour it gently back into the cooler over the grain bag to help filter it. Draw off the remaining wort by the pitcher-full and carefully pour that wort into the boiling water in your brew pot; continue until only a trickle of wort leaves the spigot. Pour about 5 quarts of your hot sparge water over the grain bag in the cooler. Gently lift the bag up and down to thoroughly re-wet the grains (but don't slosh). Cover and let sit about 5 minutes. Use the spigot and a pitcher to draw off all of the second wort and add it to your brew pot. (Alternatively, heat the sparge water to 195 and carefully add it a pint at a time while you draw off the first wort. Keep the liquid level 1 inch over the grain bed until all sparge water has been added, then slowly draw off the remainder.)
You should have about 3 gallons of wort. Bring the wort to a boil, add 2-3 drops of anti-foam (optional) and add the whole, fresh hop flowers according to the schedule. With 20-25 minutes remaining in the boil, begin adding the DME one cup at a time, stirring to dissolve. Stir in 1 tablet Whirlfloc. At time zero, carefully stir in the last of the hops, remove from heat, cover and let sit 10-15 minutes.
Move brew pot to an ice bath and cool quickly to less than 80 degrees. Strain off the hops then transfer wort to a primary fermenter. Add water to reach the 5 gallon mark. Swirl vigorously then pitch the yeast.
Ferment in primary for 1 week, then transfer to secondary. After 3-7 days, add 3 1/2 oz whole, fresh Cascade hop flowers and 2 1/2 oz whole, fresh Nugget hop flowers. Bottle or keg after fermentation is complete (1 to 2 weeks in secondary).

 Rolled Turkey Leg Stuffed Thanksgiving-Style
 Thanksgiving Stuffing Croquettes with a Gravy Center
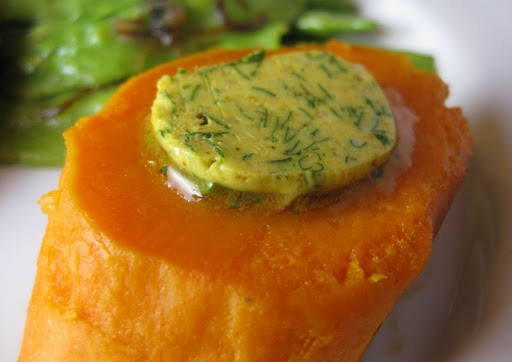
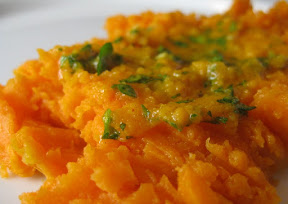 Roasted Yams with Moroccan-Spiced Compound Butter
 Smoked Turkey Breast


