Showing posts with label pizza. Show all posts

Wednesday, May 19, 2010

Pizza Port Ocean Beach is Open!
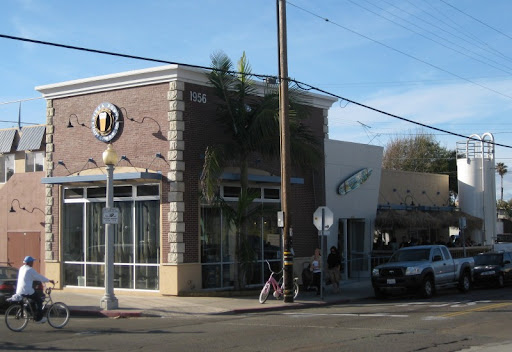
Pizza Port Ocean Beach

The long, painful wait is over - the Pizza Port Ocean Beach location finally opened its doors to the public last Friday. We weren't going to brave opening weekend crowds (I heard it was crazy), but Sherry had yesterday off and the weather turned unexpected beautiful, so we hopped on our beach cruisers and headed down to OB.

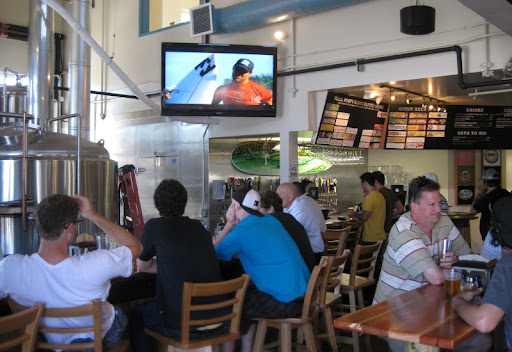
The place was pretty active for a Tuesday afternoon, but not at all crowded. The deal here is just like the other Port locations - one line for beer, and another for pizza. They have a good number of taps (not sure exactly how many) with beers brewed on premises, other Port beers and a selection of guest beers.

Pizza Port Ocean Beach

They have a tiny bar seating area:

Pizza Port Ocean Beach

And of course the expected rows of picnic tables:

Pizza Port Ocean Beach

The prime seating on a warm spring afternoon, however, is their outdoor patio, which is where we made a B line for after grabbing a couple pints of their house IPA - the Jetty IPA.
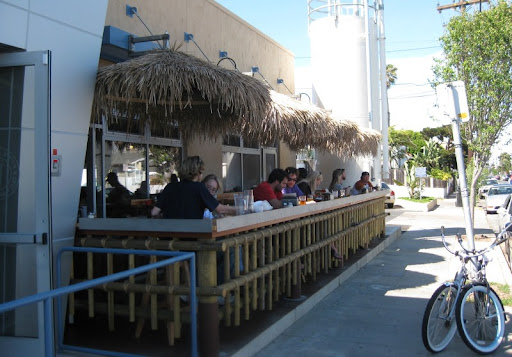
Pizza Port Ocean Beach

I liked the Jetty - it is a good west coast IPA. Maybe a bit heavy on the bittering hop versus aromatic for my taste, but still very nice.

Pizza Port Ocean Beach

Sherry tried their New Break Pale Ale, which is a slightly hoppy pale - a fine beer if that's what you are looking for. Their other current house offerings didn't grab me (Chronic Amber, a honey blonde, a brown and a hefe), so I opted for a Bizon Belgian IPA from Port San Clemente. I found it to be more IPA and less Belgian than is typical of the style, but I enjoyed it.

We didn't get any food, but I expect it is exactly like the other locations. I'm no pizza snob, and I will happily eat Port's, but their beer is the real draw for me. Instead, after lazily enjoying our beers, we walked the block distance to the Ocean Beach Mariscos German truck and split a shrimp quesadilla (basically the same filling as a gobernador taco, but easier to eat). Yum.

All in all, the new OB Port location is a great addition to the beach beer scene. We plan to visit often.

Thursday, April 30, 2009

Queso Fresco - Home Cheesemaking

Homemade Queso Fresco

This Queso Fresco was our very first attempt at a pressed cheese, and it came out very well. Pictured above the day after it was made, it is completely ready to use. How awesome is that?

Our first test was to use it how we normally use queso fresco when we have it on hand: crumbled atop something. In this case, it is gracing a simple breakfast of memelitas:

Memelitas

The cheese added a very nice lactic and salty element to the salsa atop freshly cooked corn tortillas.

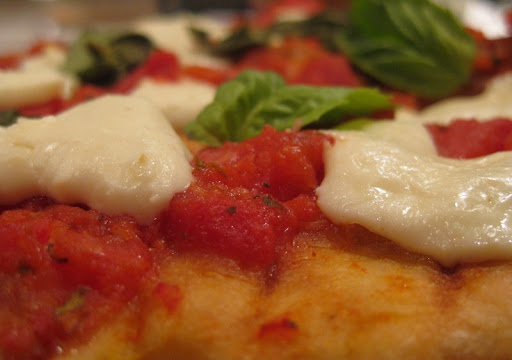
In addition to our traditional uses, this cheese has surprised us with its versatility. It melts much better than we expected, and makes for a very nice quesadilla. Given this, we decided to give it a shot as a pizza cheese. We made a simple Pizza "Margarita" (no, not Margherita - this a Mexican, not Italian cheese after all...)

Grilled Pizza with Queso Fresco

The result was quite nice indeed.

The cheese-making process is actually quite simple - like many artisanal products, it mostly takes time and a little attention to detail. For recipe guidance I've been using the book Home Cheese Making: Recipes for 75 Delicious Cheeses by Ricki Carroll. It's been a very helpful resource.

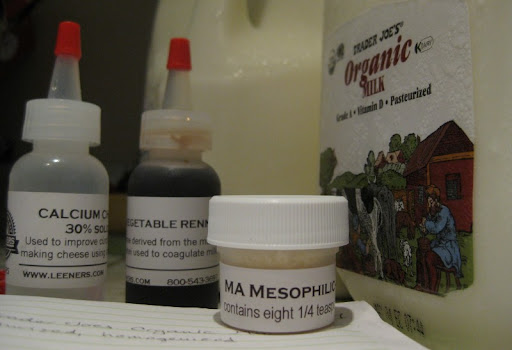
For my queso fresco I started with two gallons of organic whole milk. The thing that gives many cheeses their characteristic twang is an active culture that produces lactic acid. I used a freeze-dried version (Mesophilic A) from Leeners.com that you add directly to the milk. Since my milk was homogenized I also added a little calcium chloride to avoid an overly soft curd.

Queso Fresco

After letting the milk ripen at 90°F for 20 minutes, I stirred in some diluted rennet and let it form a reasonably solid curd - it sets up rather like a custard. Next the curd gets sliced into little cubes and the solids start to release a lot of liquid (the whey).

Queso Fresco

The cubes release even more whey and shrink significantly while you slowly increase the temperature to 95°F and gently stir them. I was surprised to learn that many cheeses use almost identical ingredients and preparation techniques, but that a few degrees of temperature variation makes the results quite different.

Queso Fresco

After pouring off as much whey as possible, it's time to salt the curd. The simplest method for ensuring an even distribution is to gently stir it and break up clumps using your fingers.

Queso Fresco

Because queso fresco is a "pressed cheese", you then need to press it. The compression requires weight, which I improvised like so:

Improvised Cheese Press

Upon reflection, I like to think of this press as representing my three careers thus far - Microbiology, Epidemiology, and now making good food. The press worked well, apart from a few loud, startling tumbles - one of which sent the cheese flying. Fortunately, no damage was done - we do need a real press, though...

Now that I'm comfortable with the cheese-making process I'm anxious to try my hand at some hard, aged cheeses like cheddar, gouda and maybe a parmesan. But since those take several months to mature, I'm sure we'll be eating lots of tasty queso fresco in the meantime.

Thursday, April 9, 2009

Lamb Meatball Tagine Pizza And Other Cross-Mediterranean Explorations

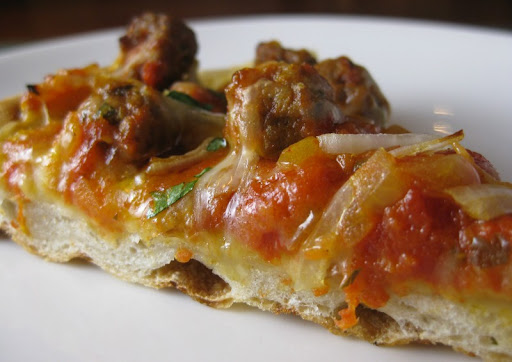
Meatball Tagine Pizza

I find myself endlessly fascinated by the various cuisines of the world. On the one hand I am intrigued by their diverse styles and flavors. On the other, I'm often also struck by things that they have in common.

Case in point - the similarities and differences among the foods of Southern Europe and North Africa - the "two sides of the Mediterranean", if you will.

One evening we made a Moroccan Lamb Meatball Tagine:

Moroccan Lamb Mini-Meatball Tagine

After my initial reaction (I love it!), I thought about how the tomato base in the tagine reminded me of an Italian pasta sauce (and an Indian curry sauce as well, but that is another story altogether). As is often the case, I was planning another dish while eating the current one (something Sherry finds frustrating).

In this case, the next dish was to use the leftover meatballs and sauce with pasta (taking it to the "North Side" of the Mediterranean). The pasta we used was Campanelle, which is named after its characteristic trumpet shape.

Campanelle with Moroccan Lamb Mini-Meatballs

The result was very nice indeed. Probably even more enjoyably than the original dish.

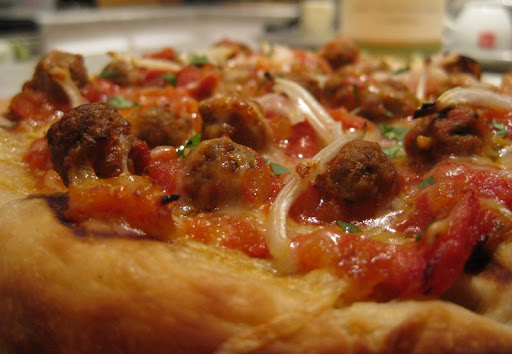
Bolstered by this success, we decided to try using the tagine as a pizza topping. It seemed fitting, since various forms of flatbread are a staple of cultures on both sides of the Mediterranean. Pictured at the top of this post, and below, the resulting pie was wonderful:

Meatball Tagine Pizza

We cooked the pizza on the grill, of course. Everything came together in a perfect conglomeration of flavors and textures. I just hope we can re-create it.

And we've got more Lamb "Tagineballs" safely stowed away for whatever other cross-cultural experiment we come up with next.

Campanelle with Moroccan Lamb Mini-Meatballs

Lamb Meatball Banh Mi, perhaps? Maybe some tacos? On a breakfast sandwich? In a soup?

We'll see...

Thursday, October 16, 2008

Pulled Pork Grilled Pizza

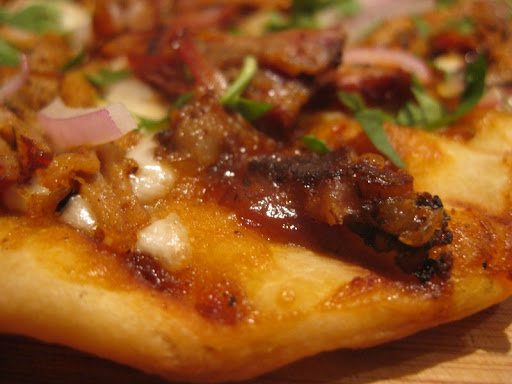
Pulled Pork Pizza

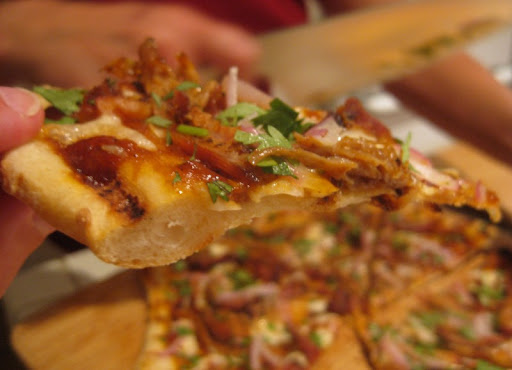
We recently added another use to our growing list of ways to use leftover pulled pork. We took some leftover pulled pork, mixed it with barbecue sauce and tossed on a pizza with some red onion, chopped cilantro and mozzarella.

A few minutes on the grill and we had a very tasty pulled pork pizza.

Pulled Pork Pizza

We do all of our pizza on an outdoor grill these days. I think it is the best way to cook pizza if you don't have your own brick pizza oven. For more information on grilling pizza, there is a detailed explanation in our post on Prosciutto and Arugula Grilled Pizza.

Sunday, August 5, 2007

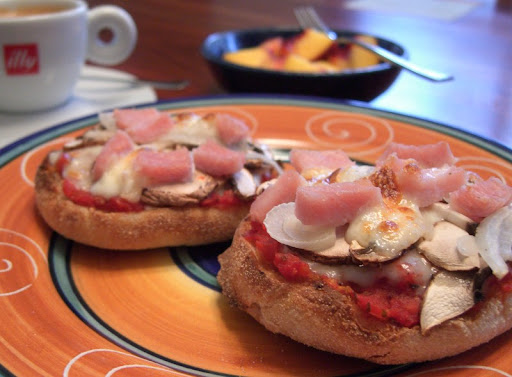
Breakfast Pizza


We started making breakfast pizza years ago, so long ago that I don't remember how it came about. Our normal weekday breakfast fare is pretty simple: bagel or toast, maybe a quesadilla, served with fresh fruit and a double espresso. But occasionally we do something special, and one of our favorites is quick, fresh, personalized breakfast pizza (or two).

We make a really tasty uncooked pizza sauce right on the cutting board with tomato, garlic, fennel, oregano, salt, pepper, a pinch of cayenne and a drizzle of olive oil. All that's needed is a sharp knife to chop it up and blend it together.


Toasted english muffins serve as a very satisfying pizza crusts, topped with an assortment of offerings then popped under the broiler until the cheese is melty and lightly browned.


This time we used goat gouda and mozzarella cheeses, crimini mushrooms, white onion and savory ham bits. Mmmmm, I'd eat breakfast pizza any day of the week...

Friday, July 13, 2007

Prosciutto and Arugula Grilled Pizza


One of our favorite things to do in the summer is barbecue, and one of our favorite things to barbecue is pizza. If you don't have a pizza oven or a tandoor oven (and I'm guessing you don't), the best way we have found to make good flatbread is on the barbecue. It works much better than using a conventional oven, even if you use a pizza stone.

Arugula and prosciutto is a classic combination. If you look at the photo closely however, you may notice that there's watercress, not arugula on the pizza. We were out of arugula, but the watercress worked nicely as would any slightly peppery green.

One of the best things about this pizza is that instead of a sauce, caramelized red onions form the base. They're savory, but slightly sweet, and sort of melt away when you take a bite.


When it comes to dough, we're usually lazy. Trader Joe's sells some very good plain pizza dough (they also sell an herbed version, which is useful if you are just making flatbread as a side). We generally make two pizzas with one batch of dough.


We use our gas grill since it's convenient and very easy to control. We heat up both sides to get it hot, hot, hot, but then turn off one side for perfect indirect cooking. The resulting crust has a tender, chewy interior with a lightly charred, toothsome exterior.

Prosciutto and Arugula Grilled Pizza

The ingredient list is enough for 1/2 a batch of prepared dough.

Pizza dough
1 (8 ounce) red onion, halved and cut into 1/4-inch half-moons
2 tablespoons olive oil, plus extra for brushing the dough
2 ounces mozzarella cheese, thinly sliced
2-3 thin prosciutto slices, torn into rough pieces
1 handful baby arugula
1/2 ounce shaved Parmigiano Reggiano
1-2 pinches Kosher salt


On a lightly floured surface, shape the dough into a ball and let rest 20 minutes.

Heat a saute pan over medium heat. Add the 2 tablespoons olive oil, onion and a pinch or two of salt. Cook, stirring occasionally until the onion is soft and lightly browned, about 30 minutes.

After the dough has rested, shape it into a thick disk, about 4 or 5 inches across. Let rest another 10-15 minutes.

Make sure the barbeque grill is very hot. When ready to grill, turn the heat off on one side. Stretch the dough gently and evenly into a rough round about 8 or 9 inches across, then brush with olive oil. Carefully lay the dough on the grill, oil side down, away from the flame. Bake covered for 5 minutes, then using tongs, rotate dough a quarter-turn and cover again.

After another 5 minutes, turn on all burners again. Brush the dough with olive oil and pat down any large bubbles. Flip the dough over onto the hotter side of the grill, then turn off the heat under the crust. Spread the onions and mozzarella around the crust and bake, covered for 5-8 minutes. Scatter the proscuitto, arugula and parmigiano over the pizza, then close the lid for another 2 minutes.

Slide the finished pizza onto a small cutting board. Let rest 3-5 minutes, then cut into wedges with a sharp knife. Serve hot or at room temperature.

Preparing the grill

When the bbq is hot and just before it's time to cook, make sure the grill grates are quite clean (scrub with a metal brush if necessary) and oiled. I normally grab a wadded-up paper towel with metal tongs, dip the paper into a small dish of canola oil and quickly rub it over the grates. Rotate the towel and dip again as needed. Work quickly to keep the paper from igniting.