Showing posts with label ipa. Show all posts

Tuesday, September 11, 2012

IPAison - A West Coast IPA with Saison Yeast
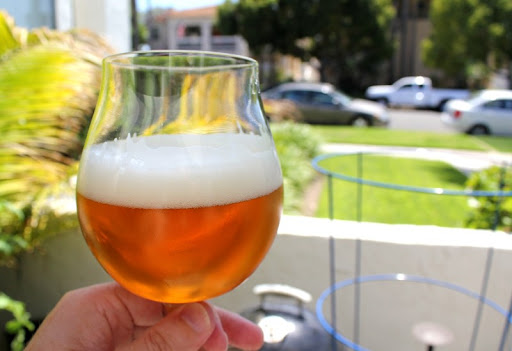
IPAison West Coast IPA with Saison Yeast

We like IPAs and we like Saisons, so what would we get if we tried combining the two styles?

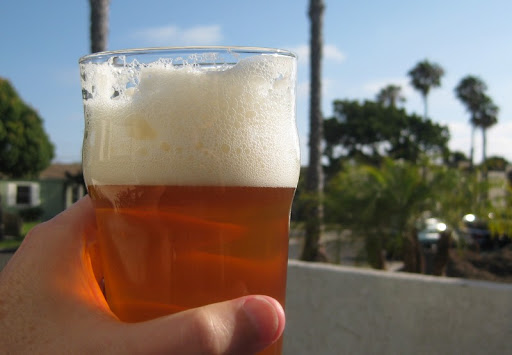
A very tasty beer, indeed.

We used a West Coast style IPA malt and hop profile, but rather than using our typical California ale yeast we used a Saison strain instead. The Saison yeast (we used White Labs WLP568) adds subtle spicy/fruity overtones that work really well with the hop profile.

We also experimented with some new (for us) hop varieties in this beer, since our go-to hops (Simcoe and Amarillo) were not available.

The "IPAison" has been a really nice summer beer. We'll definitely be putting this recipe (or variants of it) in our regular brewing rotation.

IPAison

A West Coast IPA brewed with a Saison Yeast.

Total batch size = 5 gallons; Partial Mash in 3 gallon beverage cooler; ~3 gallon 60 minute stove-top boil; late malt extract addition; dry hopped for aroma; target abv of 7%

Ingredients:
3 lb Briess Golden Light Dry Malt Extract (DME)
2 1/4 lb Briess Pilsen Dry Malt Extract (DME)
5 lb 2-Row Pale Malt
1/2 lb Carapils/Dextrin Malt
1/2 lb Wheat Malt
2 oz Centennial Hops
1 1/2 oz Zythos Hops
1 1/2 oz Summit Hops
1 1/2 oz Horizon Hops
1 tablet Whirlfloc
White Labs WLP568 Saison Ale Yeast Blend


Hop Schedule:
1 oz Centennial - 60 minutes boil
1/2 oz Horizon - 30 minutes boil
1/2 oz Zythos - 25 minutes boil
1/2 oz Summit - 15 minutes boil
1/2 oz Horizon - 2 minutes boil
1/2 oz Zythos - 2 minutes boil
1/4 oz Summit - 0 minutes boil
1 oz Centennial - Dry Hop in Secondary Fermenter
3/4 oz Summit - Dry Hop in Secondary Fermenter
1/2 oz Horizon - Dry Hop in Secondary Fermenter
1/2 oz Zythos - Dry Hop in Secondary Fermenter


Heat 8 quarts water to 165 degrees for a target mash temperature of 150 degrees. Place the 6 pounds of crushed grain (2-Row Pale, Wheat and Carapils) into a large mesh bag. Pour the hot water into the beverage cooler, then lower the grain bag into the water very slowly, pushing and prodding with a large spoon to ensure all the grain is wet (this can take several minutes). Put the lid on the cooler and allow to rest 60 minutes.

While the grains are mashing, heat another 5-6 quarts of water to 180-185 degrees for sparging (rinsing the grains). Near the end of the 60 minutes, heat 2 quarts of water to a boil in your brew pot.

After the first mash is complete, remove the cooler lid and open the spigot to draw off about 2 quarts of wort into a large pitcher. The first few draws will likely be cloudy with grain particles; pour it gently back into the cooler over the grain bag to help filter it. Draw off the remaining wort by the pitcher-full and carefully pour that wort into the boiling water in your brew pot; continue until only a trickle of wort leaves the spigot. Pour about 5 quarts of your hot sparge water over the grain bag in the cooler. Gently lift the bag up and down to thoroughly re-wet the grains (but don't slosh). Cover and let sit about 5 minutes. Use the spigot and a pitcher to draw off all of the second wort and add it to your brew pot. (Alternatively, heat the sparge water to 195 and carefully add it a pint at a time while you draw off the first wort. Keep the liquid level 1 inch over the grain bed until all sparge water has been added, then slowly draw off the remainder.)

You should have about 3 gallons of wort. Bring the wort to a boil and add hops according to the schedule. With 15-20 minutes remaining in the boil, begin adding the DME one cup at a time, stirring to dissolve. At time zero, continue adding DME off the heat until all has been added (if needed, return to low heat for a few minutes to help dissolve the extract). Stir in 1 tablet Whirlfloc. Cover and let sit 10-15 minutes.

Move brew pot to an ice bath and cool quickly to less than 80 degrees. Transfer wort to a primary fermenter (straining off the hops if desired). Add water to reach the 5 gallon mark. Swirl vigorously then pitch the yeast.

Ferment in primary for 1 week, then transfer to secondary. After 4 days, add dry hops from hop schedule. Bottle or keg after fermentation is complete (2 to 3 weeks in secondary).

Tuesday, July 17, 2012

Baja Beer Fest - Craft Beer in Tijuana and Tacos Kokopelli

Baja Beer Fest in Tijuana

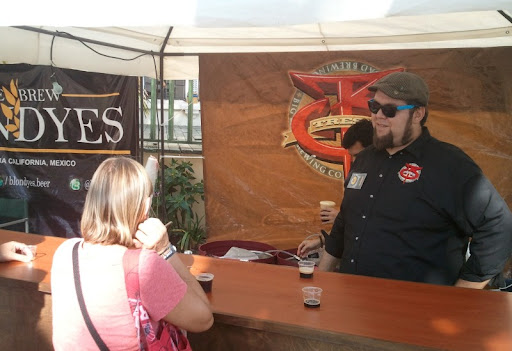
We hopped down to Tijuana last Friday to attend the Baja Beer Fest. Over the past few years, the craft beer scene has really been taking off with our neighbors to the South, and this was very much in evidence with the collection of great Baja beers available at the festival.

Old Mission Brewery at the Baja Beer Fest

We started out with Old Mission Brewery from Ensenada. We tried their two IPAs - Dos Pablos IPA and Red Agave IPA. The Red Agave was interesting - it is an amber colored IPA incorporating agave nectar, but I preferred the Dos Pablos - light and hoppy.

Cerveceria Inurgente at the Baja Beer Fest

Next up, we stopped at Cerveceria Insurgente. These guys were one of the first in Tijuana's emerging craft beer scene. We tasted their beers last year on Turista Libre's Tijuana craft beer tour, and they are still going strong. They had a number of beers at the fest, including a very nice Saison.

Cerveceria Kudos at the Baja Beer Fest

My favorite beers of the fest were the IPAs from Cerveceria Kudos. Their IPA, double IPA and extra dry hopped IPA were all fantastic, and would not be at all out of place here in San Diego.

Big Bad Brewing at the Baja Beer Fest

Cucapa from Mexicali was a no-show, but we did get to try some Mexicali beer. Big Bad Brewing was on hand with with stout and a strong ale, both of which we enjoyed.

Muñeca Prieta at the Baja Beer Fest

We also tasted some beers from another Tijuana brewery - Muñeca Prieta - who had a a very nice Tripel.

Tacos Kkopelli at the Baja Beer Fest

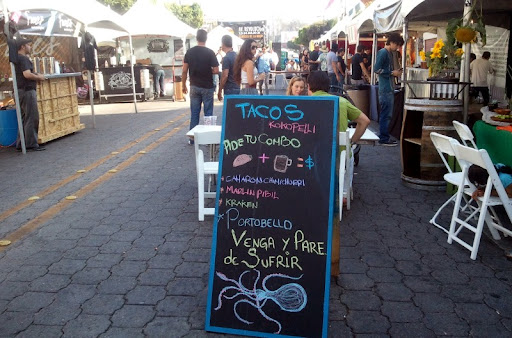
As the afternoon turned to evening, the fest started to get more and more active, and we started to get hungry. Fortunately, there were plenty of food options. We sat down at Tacos Kokopelli and grabbed something to eat.

Tacos Kokopelli Grilling Octopus

The "Kraken" taco is octopus that they were grilling up. Some of the pieces were a bit large and chewy, but overall the flavor was fantastic.

Kraken Octopus Taco from Tacos Kokopelli

We also had their portobello mushroom taco, which was very good, but our favorite was the marlin pibil:

Marlin Pibil Taco from Tacos Kokopelli

Super tasty. Doing a pibil with smoked marlin is a great idea.

Baja Beer Fest in Tijuana

Overall, the fest was a very nice way to spend the day. The quality of craft beer in Baja right now is really good, and seems to be getting better all the time. We look forward to returning to the festival next year!

Tuesday, June 26, 2012

Societe Brewing Company - A Tasting Room Visit

Societe Brewing Company

Last Friday, after a nice bowl of ramen at Yakyudori, we headed a few blocks down Clairemont Mesa Boulevard to stop in at Societe Brewing Company. They haven't officially opened yet (the grand opening is this weekend), but their tasting room is open Wednesday-Sunday and their beers have started popping up in the more respectable drinking establishments around town.

As soon as you step in the door, you can see that these guys aren't messing around - it is an impressive operation for a brand new brewery:

Societe Brewing Company

We bellied up to the nice wood bar and tasted a flight of the beers they currently have available. On the right are their three IPAs - The Dandy, The Apprentice and The Pupil. On the left are their Belgians - The Harlot and The Widow.

Societe Brewing Company

Societe's IPAs are solidly in the version of the west coast style I love - light in color and body and very hoppy, but emphasizing aroma over straight bitterness. They remind me of Alpine and Russian River. And that is a very good thing.

The Dandy, at 6.4%, has the lowest ABV of the three IPAs, but it still packs a nice flavor punch. The Apprentice is targeted at the center ABV spot, but it apparently came out stronger than expected. When we first had it at the Tap Room, I believe it was listed at 8.8%. They are gradually bringing the alcohol level down to where they want it.

The Pupil is the hoppiest of the IPAs - so much so that it has a bit of a green tinge and a touch of astringency. Very good beer, but I think I prefer the Apprentice.

Societe Brewing Company

On the Belgian side, The Harlot is a nice, drinkable Belgian Pale. We first had it at Cali Kebab's new Pacific Beach location and it was a perfect match for a sunny evening sitting outside.

The Widow, a Belgian Dark Strong Ale, is a very nice version of that style - nutty and raisiny without being too sweet or boozy.

We brought a growler of The Apprentice home with us:

Societe Brewing Company

We're looking forward to getting this guy refilled on a regular basis.

Societe Brewing Company
8262 Clairemont Mesa Blvd
San Diego, CA
858-495-5409

Wednesday, December 7, 2011

Lazy Days on Kauai

Lazy Man's Mai Tai

We just got back from two wonderful weeks of relaxing, swimming, eating, and yes, a wee bit of drinking in Hawaii.

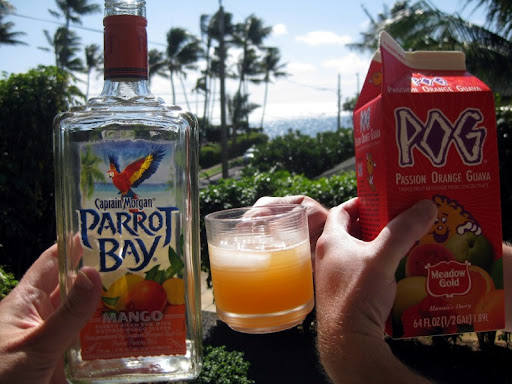
The first week was spent with friends, renting a house a block from the water in Poipu, Kauai. They picked us up from the airport, already provisioned with the key ingredients (pictured above) needed for our stay. A short while later, we each happily enjoying a "Lazy Man's Mai Tai" on our patio overlooking the ocean.

This blend of rum and the ubiquitous local mixture of passionfruit, orange and guava admittedly doesn't have much in common with a real Mai Tai other than rum and fruit. It is tasty, though and really easy to make. I suppose you could make it more Mai Tai-ish with a pour-over of dark rum. We didn't. We were being lazy.

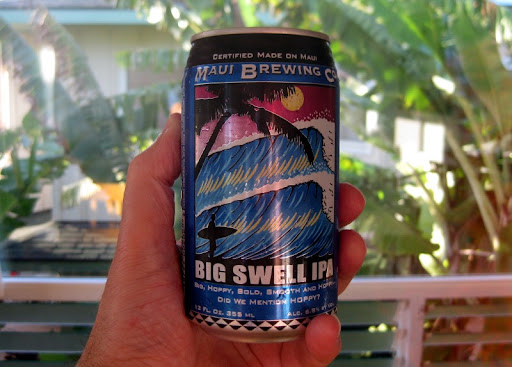
Also making an appearance was Maui Brewing Company's Big Swell IPA:

Maui Brewing Big Swell IPA

While the beer from the other Hawaiian breweries is pretty mediocre, Maui Brewing actually puts out some pretty decent stuff.

Kauai Sunset

Their IPA made a nice beverage for sunset.

Kauai Sunset

In addition to our diet of lazy libations, we did also manage to do a bit of eating during our stay on Kauai. More on that soon.

Friday, October 21, 2011

All Grain Brewing on the Stovetop, and a "Half Nelson" IPA Recipe

Half Nelson IPA

We've been wanting to try all grain brewing for quite some time now. Moving to partial mash brewing made a huge difference in the quality of our beers, and we were curious about how much more we could gain from going all grain.

But, every time we thought about taking the plunge, we always balked at the logistics. A 5-gallon brew pot wouldn't fit on our stove top, so we'd need to get a burner for the patio. Then the hassle of getting the three-tiered set up of hot sparge water above the grain bed to be drained into a huge brew pot. And finally, trying to cool the big 5-gallon pot of wort, then lugging it into the house to transfer to the carboy for fermentation... It just seemed like too much.

Then one day a simple solution occurred to us - we could just do a half batch! Essentially, doing a standard partial mash but omitting the extract and keeping the final batch size at 2.5 gallons gets you an all grain beer.

The obvious drawback is that you only get 2.5 gallons of beer, while doing almost the same amount of work as for a 5 gallon partial mash. But still, it is all-grain brewing on the stovetop with no more equipment than you need for partial mash.

We happened to have some Nelson Sauvin hops on hand, so we decided to brew a beer featuring them. The result was a very nice, light (both in color and body - it is lighter than it looks in the photo) and clean tasting beer. Was it better than what we get with partial mash? Hard to say, since we've never worked with the Nelson hops before. We will have to give the technique a try with one of our more standard IPA recipes.

Given the half batch, and the use of the Nelson, we couldn't possibly have named the beer anything other than "Half Nelson" IPA.

Half Nelson IPA

Total batch size = 2.5 gallons; All Grain Mash in 3 gallon beverage cooler; 2.5 to 3 gallon 60 minute stove-top boil; dry hopped for aroma; target abv of 6%.

Ingredients:
6 lb 2-Row Pale Malt
1/4 lb Wheat Malt
1/4 lb Carapils/Dextrin Malt
2 oz Nelson Hops (8.0% AA)
1/2 oz Centennial Hops (8.8% AA)
3/4 oz Simcoe Hops (12.3% AA)
1 tablet Whirlfloc
White Labs WLP051 California Ale V Yeast


Hop Schedule:
1/4 oz Centennial - 60 minutes boil
1/4 oz Centennial - 45 minutes boil
1/2 oz Nelson - 45 minutes boil
1/4 oz Nelson - 30 minutes boil
1/4 oz Simcoe - 30 minutes boil
1/4 oz Simcoe - 15 minutes boil
1/4 oz Nelson - 2 minutes boil
1 oz Nelson- Dry Hop in Secondary Fermenter
1/4 oz Simcoe - Dry Hop in Secondary Fermenter


Heat 8 quarts water to 167 degrees for a target mash temperature of about 152 degrees. Place the crushed grain (2-Row Pale, Wheat and Carapils) into a large mesh bag. Pour the hot water into the beverage cooler, then lower the grain bag into the water very slowly, pushing and prodding with a large spoon to ensure all the grain is wet (this can take several minutes). Put the lid on the cooler and allow to rest 60 minutes.

While the grains are mashing, heat another 5-6 quarts of water to 180-185 degrees for sparging (rinsing the grains). Near the end of the 60 minutes, heat 2 quarts of water to a boil in your brew pot.

After the first mash is complete, remove the cooler lid and open the spigot to draw off about 2 quarts of wort into a large pitcher. The first few draws will likely be cloudy with grain particles; pour it gently back into the cooler over the grain bag to help filter it. Draw off the remaining wort by the pitcher-full and carefully pour that wort into the boiling water in your brew pot; continue until only a trickle of wort leaves the spigot. Pour about 5 quarts of your hot sparge water over the grain bag in the cooler. Gently lift the bag up and down to thoroughly re-wet the grains (but don't slosh). Cover and let sit about 5 minutes. Use the spigot and a pitcher to draw off all of the second wort and add it to your brew pot.

You should have about 3 gallons of wort. Bring the wort to a boil and add hops according to the schedule. With 15 minutes remaining in the boil, stir in 1 tablet Whirlfloc. At time zero, remove the pot from the heat, cover and let sit 10-15 minutes.

Move brew pot to an ice bath and cool quickly to less than 80 degrees. Transfer wort to a primary fermenter (straining off the hops if desired). Add water to reach the 2.5 gallon mark if necessary. Swirl vigorously then pitch the yeast.

Ferment in primary for 1 week, then transfer to secondary. After seven days, dry hop with 1 oz Nelson and 1/4 oz Simcoe. Bottle or keg after fermentation is complete (2 to 3 weeks in secondary).

Friday, October 22, 2010

Brewing with Fresh Hops - A Wet Hop IPA Recipe

Cascade/Nugget Wet Hop IPA

Back in August, we posted about picking fresh Cascade and Nugget hops at Star B Ranch. We've been drinking the beer we made from those hops for a month or so now, so I guess we are overdue on posting about brewing the beer itself.

Scouring the internet didn't turn up a whole lot of information on brewing with fresh hops, and what information we did find was often contradictory. Since our beer turned out well, hopefully this recipe will help the next person searching for information on the subject.

Cascade/Nugget Wet Hop IPA

We used our standard west-coast IPA malt bill, so there were no variables to worry about there. With the hops, though, the questions were how much to use, and when? In terms of amounts, the general wisdom seems to be that you want to use about 4-5 times the weight of fresh hops as compared to what you would use with dried hops - this accounts for the extra weight from water in the fresh hop flowers.

Given that we normally use 6 oz of prepared hops, by that calculation we'd need 24-30 oz of fresh - nearly two pounds! But, since we only picked about 18 ounces, that would have to do...

Regarding timing, I had read that you can get too grassy a taste if you boil the hop flowers too long, so we decided to push most of the hop additions later than usual in the schedule.

Cascade/Nugget Wet Hop IPA

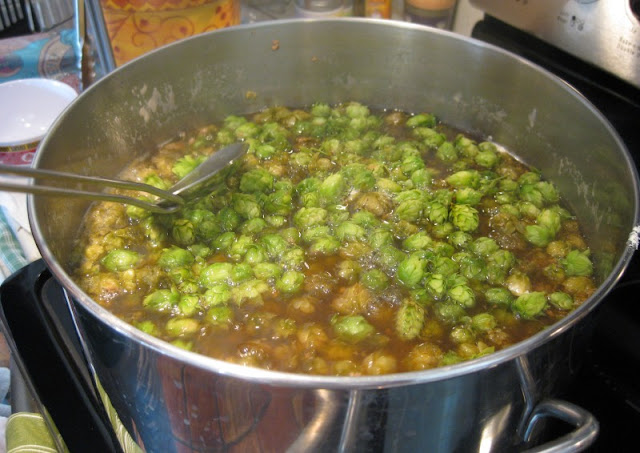
By the time we had finished adding the hops, they were definitely starting to pile up - you definitely don't want to be using an undersized pot. Once they were saturated with wort, however, they became more manageable.

Cascade/Nugget Wet Hop IPA

At the dry hopping stage, space becomes an issue again. We were barely able to get all of the hops into our secondary fermenter. Again, though, they shrunk down as they got wet.

Cascade/Nugget Wet Hop IPA

We had also read that dry hopping for too long can cause problems, so we only dry hopped for a week rather than close to two like we usually do.

The result was a very pleasant, subtly hoppy beer. Given that the flavor was not at all overly grassy, I think if we do another fresh hop beer we would move the hop schedule up in the boil and and increase the dry hop time to both increase the bitterness and the aroma.

The recipe that follows is exactly what we did:

Cascade/Nugget Wet Hop IPA

Fresh Hops in the Boil and Wet-Hopped in Secondary; Total batch size = 5 gallons; Partial Mash in 3 gallon beverage cooler; ~3 gallon 60 minute stove-top boil; late malt extract addition; target abv of 7.5%. Note: Use the fresh hops as soon after picking as possible; store fresh hops for wet/dry hopping refrigerated in an air-tight container.

5 lb 2-Row Pale Malt
1/2 lb Wheat Malt
1/2 lb Carapils/Dextrin Malt
5 1/4 lb Briess Golden Light Dry Malt Extract (DME)
10 oz Whole, Fresh Cascade Hop Flowers (est. 8% AA)
7.5 oz Whole, Fresh Nugget Hop Flowers (est. 11% AA)
1 tablet Whirlfloc
White Labs WLP001 California Ale Yeast


Hop Schedule:
1 oz fresh Nugget - 60 minutes boil
1/2 oz fresh Nugget - 45 minutes boil
1 oz fresh Cascade - 30 minutes boil
1/2 oz fresh Cascade - 15 minutes boil
1 oz fresh Cascade - 10 minutes boil
1/2 oz fresh Nugget - 5 minutes boil
3 oz fresh Cascade - 0 minutes boil - flameout
3 oz fresh Nugget - 0 minutes boil - flameout
1 oz fresh Cascade - 5 minutes boil
3 1/2 oz fresh Cascade - Wet Hop in Secondary Fermenter
2 1/2 oz fresh Nugget - Wet Hop in Secondary Fermenter


Heat 8 quarts water to 165 degrees for a target mash temperature of 150 degrees. Place the 6 pounds of crushed grain (2-Row Pale, Wheat and Carapils) into a large mesh bag. Pour the hot water into the beverage cooler, then lower the grain bag into the water very slowly, pushing and prodding with a large spoon to ensure all the grain is wet (this can take several minutes). Put the lid on the cooler and allow to rest 60 minutes.

While the grains are mashing, heat another 5-6 quarts of water to 180-185 degrees for sparging (rinsing the grains). Near the end of the 60 minutes, heat 2 quarts of water to a boil in your brew pot.

After the first mash is complete, remove the cooler lid and open the spigot to draw off about 2 quarts of wort into a large pitcher. The first few draws will likely be cloudy with grain particles; pour it gently back into the cooler over the grain bag to help filter it. Draw off the remaining wort by the pitcher-full and carefully pour that wort into the boiling water in your brew pot; continue until only a trickle of wort leaves the spigot. Pour about 5 quarts of your hot sparge water over the grain bag in the cooler. Gently lift the bag up and down to thoroughly re-wet the grains (but don't slosh). Cover and let sit about 5 minutes. Use the spigot and a pitcher to draw off all of the second wort and add it to your brew pot. (Alternatively, heat the sparge water to 195 and carefully add it a pint at a time while you draw off the first wort. Keep the liquid level 1 inch over the grain bed until all sparge water has been added, then slowly draw off the remainder.)

You should have about 3 gallons of wort. Bring the wort to a boil, add 2-3 drops of anti-foam (optional) and add the whole, fresh hop flowers according to the schedule. With 20-25 minutes remaining in the boil, begin adding the DME one cup at a time, stirring to dissolve. Stir in 1 tablet Whirlfloc. At time zero, carefully stir in the last of the hops, remove from heat, cover and let sit 10-15 minutes.

Move brew pot to an ice bath and cool quickly to less than 80 degrees. Strain off the hops then transfer wort to a primary fermenter. Add water to reach the 5 gallon mark. Swirl vigorously then pitch the yeast.

Ferment in primary for 1 week, then transfer to secondary. After 3-7 days, add 3 1/2 oz whole, fresh Cascade hop flowers and 2 1/2 oz whole, fresh Nugget hop flowers. Bottle or keg after fermentation is complete (1 to 2 weeks in secondary).

Wednesday, August 11, 2010

San Diego Session Ale

San Diego Session Ale

After a pretty dodgy July, summer seems finally to have arrived in August. Sunny days and warm temperatures call for refreshing adult beverages. For us, the solution is our latest beer - a San Diego Session Ale.

So, why do we call it a "San Diego Session Ale"? Well, first off, by ale we mean IPA - no self-respecting San Diego beer drinker would tolerate a pale ale without a big hop profile. And, as is typical of the style, the hops are more focused on the aromatic than bittering. Dry hop, dry hop, dry hop.

As for the "Session" part, it refers to a lower octane beer than you can have a few of without falling on your face. This beer came in at 6.4% abv, and while this might not be considered "sessionable" in most parts of the country, it definitely qualifies here in San Diego where it is not at all unusual for a run-of-the-mill IPA to be 7.5%.

The beer is nice and light in body and color. The picture above is a bit misleading - this shot gives a better representation of the color:

San Diego Session Ale

To achieve the light color and body, we used a partial mash and late extract addition as we have been doing with most all of our beers. In this case, however, we also increased the amount of wheat malt in the mash. We usually use a half pound of wheat to help yield a nice, frothy head. This time we upped it to a pound and a half.

The result was just what we were looking for. The extra wheat we used did a great job of lightening up the beer, without going so far as to turn it into a hefeweizen. Hoppy, refreshing and (at least somewhat) sessionable. A perfect summer beer.

If you don't brew your own, but live in the San Diego area, there are an increasing number of great session beers available. Two of my current favorites are from Alpine: Hoppy Birthday and Tuatara. Port's SPA is also quite nice. Those beers are likely going to be hard to find outside of San Diego, but Alesmith X and Stone Levitation are good too and should be available farther afield.

If you do brew your own, however, here is our recipe:

San Diego Session Ale

Total batch size = 5 gallons; Partial Mash in 3 gallon beverage cooler; ~3 gallon 60 minute stove-top boil; late malt extract addition; dry hopped for aroma; target abv of 6.5%.

Ingredients:
4 lb 2-Row Pale Malt
1 1/2 lb Wheat Malt
1/2 lb Carapils/Dextrin Malt
2 1/4 lb Briess Golden Light Dry Malt Extract (DME)
2 lb Briess Pilsen Dry Malt Extract (DME)
2 1/2 oz Centennial Hops (9.2% AA)
1 1/2 oz Amarillo Hops (7.5% AA)
2 oz Simcoe Hops (12.3% AA)
1 tablet Whirlfloc
White Labs WLP051 California Ale V Yeast

Hop Schedule:
1/4 oz Simcoe - 60 minutes boil
1/2 oz Amarillo - 60 minutes boil
1 oz Centennial - 50 minutes boil
1/2 oz Simcoe - 15 minutes boil
1/4 oz Simcoe - 5 minutes boil
1/4 oz Simcoe - 2 minutes boil
1/2 oz Amarillo - 2 minutes boil
1 1/2 oz Centennial - Dry Hop in Secondary Fermenter
3/4 oz Simcoe - Dry Hop in Secondary Fermenter
1/2 oz Amarillo - Dry Hop in Secondary Fermenter

Heat 8 quarts water to 165 degrees for a target mash temperature of 150 degrees. Place the 6 pounds of crushed grain (2-Row Pale, Wheat and Carapils) into a large mesh bag. Pour the hot water into the beverage cooler, then lower the grain bag into the water very slowly, pushing and prodding with a large spoon to ensure all the grain is wet (this can take several minutes). Put the lid on the cooler and allow to rest 60 minutes.

While the grains are mashing, heat another 5-6 quarts of water to 180-185 degrees for sparging (rinsing the grains). Near the end of the 60 minutes, heat 2 quarts of water to a boil in your brew pot.

After the first mash is complete, remove the cooler lid and open the spigot to draw off about 2 quarts of wort into a large pitcher. The first few draws will likely be cloudy with grain particles; pour it gently back into the cooler over the grain bag to help filter it. Draw off the remaining wort by the pitcher-full and carefully pour that wort into the boiling water in your brew pot; continue until only a trickle of wort leaves the spigot. Pour about 5 quarts of your hot sparge water over the grain bag in the cooler. Gently lift the bag up and down to thoroughly re-wet the grains (but don't slosh). Cover and let sit about 5 minutes. Use the spigot and a pitcher to draw off all of the second wort and add it to your brew pot. (Alternatively, heat the sparge water to 195 and carefully add it a pint at a time while you draw off the first wort. Keep the liquid level 1 inch over the grain bed until all sparge water has been added, then slowly draw off the remainder.)

You should have about 3 gallons of wort. Bring the wort to a boil and add hops according to the schedule. With 15-20 minutes remaining in the boil, begin adding the DME one cup at a time, stirring to dissolve. At time zero, continue adding DME off the heat until all has been added (if needed, return to low heat for a few minutes to help dissolve the extract). Stir in 1 tablet Whirlfloc. Cover and let sit 10-15 minutes.

Move brew pot to an ice bath and cool quickly to less than 80 degrees. Transfer wort to a primary fermenter (straining off the hops if desired). Add water to reach the 5 gallon mark. Swirl vigorously then pitch the yeast.

Ferment in primary for 1 week, then transfer to secondary. After seven days, dry hop with 1 1/2 oz Centennial, 3/4 oz Simcoe and 1/5 oz Amarillo. Bottle or keg after fermentation is complete (2 to 3 weeks in secondary).

Sunday, September 27, 2009

Belgian Tripel IPA Partial Mash Recipe

Belgian IPA Trippel

There is a long history of American brewers being influenced by their Belgian counterparts, but lately the flow of ideas has been going the other way as well. In 2005, Hildegard van Ostaden was inspired by American IPAs and decided to brew a Tripel with an American IPA hop profile. The result was Urthel Hop-It, and it was very good indeed.

Our first exposure to this style was a Houblon Chouffe Dobbelen IPA Tripel at the Liars' Club, and we were instantly fans. Two of our favorite beer styles are the IPA and the Belgian Tripel, so it is no surprise that a combination of the two is right up our alley.

In the past few years, American brewers have begun to adopt the style as well. Here in San Diego, Green Flash's excellent Le Freak has been getting better with each year they brew it. We decided it was time to get in the game and try to brew one of our own, so we scoured the internet for information and cobbled together a recipe.

Tripels are generally higher octane than IPAs (and most double-IPAs). For our Tripel IPA we were shooting for an original gravity of about 1.082, which a lot of fermentable sugars. Going with the Tripel style, we used Pilsner malt supplemented with clear candi sugar to get the high gravity while keeping a light color and body.

Candi sugar has very large, nearly half-inch crystals. This is what it looks like:

Belgian Candi Sugar

Given the amount of fermentables, we decided to get things going with a two-cup yeast starter culture to give things a kick-start. And man did it ever kick-start. The next morning the wort was moving around like crazy and bubbling so hard it sounded like a motor running.


Fortunately, it didn't quite overflow the air-lock, so we didn't have a mess to clean up.

The resulting ale turned out very well - golden in color and full of flavor. The distinctive Belgian yeast character is balanced very nicely by the aroma and bitterness of the hops. Apparently our yeast was very happy since we achieved a higher level of conversion than expected - with an ABV of 9.2%, it packs quite a punch. Definitely not a session beer...

Belgian IPA Trippel

Belgian Tripel IPA

Total batch size = 5 gallons; Partial Mash in 3 gallon beverage cooler; ~3 gallon 60 minute stove-top boil; late malt extract addition; dry hopped for aroma; target abv of 8.5%

Ingredients:

5 1/2 lb Pilsner Malt (Belgian)
1/2 lb Wheat Malt
5 lb Briess Pilsen Dry Malt Extract (DME)
1 1/2 lb Candi Sugar, Clear
2 oz Columbus Hops (12.3% AA)
1 1/2 oz Saaz Hops (4.0% AA)
1 oz Amarillo Hops (8.5%)
1 tablet Whirlfloc
White Labs WLP550 Belgian Ale Yeast
4 oz corn sugar (optional - for bottle priming)
2 1/2 oz light or pilsen DME, plus 1 T cane sugar (optional - for starter culture)

Hop Schedule:

1/2 oz Columbus - 60 minutes boil
1/4 oz Columbus - 45 minutes boil
1 1/2 oz Saaz - 15 minutes boil
1/4 oz Columbus - 10 minutes boil
1/2 oz Columbus - 0 minutes boil
1/2 oz Columbus - Dry Hop in Secondary Fermenter
1 oz Amarillo - Dry Hop in Secondary Fermenter

[Optional: Prepare a starter culture the day before brewing. Heat 2 cups water then add 2 1/2 oz DME and 1 tablespoon sugar. Boil 10 minutes, then cool quickly to room temperature. Put into a sanitized 1 quart jar or bottle, add yeast, seal and shake gently for 30 seconds. Loosen the lid or use an air-lock to allow gases to escape and let sit until time to pitch the following day.]

Heat 8.25 quarts water to 165 degrees for a target mash temperature of 150-153 degrees. Place the 6 pounds of crushed grain (Pilsner and Wheat) into a large mesh bag. Pour the hot water into the beverage cooler, then lower the grain bag into the water very slowly, pushing and prodding with a large spoon to ensure all the grain is wet (this can take several minutes). Put the lid on the cooler and allow to rest 60 minutes.

While the grains are mashing, heat another 4-5 quarts of water to 180-185 degrees for sparging (rinsing the grains). Near the end of the 60 minutes, heat 2 quarts of water to a boil in your brew pot.

After the first mash is complete, remove the cooler lid and open the spigot to draw off about 2 quarts of wort into a large pitcher. The first draw will likely be cloudy with grain particles; pour it gently back into the cooler over the grain bag to help filter it. Draw off the remaining wort by the pitcher-full and carefully pour that wort into the boiling water in your brew pot; continue until only a trickle of wort leaves the spigot.

Pour about 4 quarts of your hot sparge water over the grain bag in the cooler. Gently lift the bag up and down to thoroughly re-wet the grains (but don't slosh). Cover and let sit about 5 minutes. Use the spigot and a pitcher to draw off all of the second wort and add it to your brew pot. You should have about 3 gallons of wort.

Dissolve the candi sugar in the hot wort, being careful to keep the sugar from scorching. You can do this easily by suspending the crystals in a strainer or chinois as you bring the liquid to a boil. When ready, add hops according to the schedule. With about 15 minutes remaining in the boil, begin adding the DME one cup at a time, stirring to dissolve. At time zero, continue adding DME off the heat until all has been added (if needed, return to low heat for a few minutes to help dissolve the extract). Stir in 1 tablet Whirlfloc. Cover and let sit 10-15 minutes.

Move brew pot to an ice bath and cool quickly to less than 80 degrees. Transfer wort to a primary fermenter, straining most of the hops. Add water to reach the 5 gallon mark. Swirl vigorously then pitch the yeast.

Ferment in primary for 1 week, then transfer to secondary. After seven days, dry hop with 1/2 oz Columbus and 1 oz Amarillo. Keg or bottle after fermentation is complete (2 to 3 weeks in secondary).

Wednesday, July 8, 2009

Rye IPA - Partial Mash Recipe

Rye IPA

Ever since we first had a pint of Alpine Beer Company's Nelson Golden Rye IPA, we have been wanting to brew a "RyePA". Given that we didn't have any of the New Zealand Nelson Sauvin hops that Alpine's beer is named after, creating a Nelson clone was out of the question. Still, we figured we could take a shot at the "Golden Rye IPA" part.

The rye in our recipe is whole malted rye grain. Rye malt is not available in extract form, which was one of our motivations for moving to partial mash brewing.

This is what the rye looks like cracked:

Rye Grain

Definitely darker in color than malted barley - below you can see them together for comparison:

Piggish RyePA

Rye has twice the coloration potential as barley - about 3.7L vs 1.8L (the "L" stands for Lovibond, a unit of color measurement). Given this, we were a bit worried that we would not be able to achieve the bright, golden, "West Coast IPA" look that we wanted. Our standard IPA recipe uses a bit of crystal malt specialty grain, but to counter the increased color potential, we were careful to use a very light version (10L) - we even considered dropping it altogether.

Color wasn't a problem, though, as you can see here:

Rye IPA

Exactly what we were going for. Pretty much the same color as our Blind Pig ("Piggish") clone. We used very similar recipes for both beers, with exception of substituting rye for about 12% of the grain in the mash and increasing the hops in secondary.

Below, you can see the two beers side-by-side (the rye is on the right):

Rye IPA and Piggish IPA

Any perceived difference in color is mostly due to lighting - they looked virtually identical save for a difference in carbonation.

And the taste? Also similar, yet different. I would say that the rye added a more round and complex malt flavor. We've tasted them together a number of times now: sometimes I prefer one, sometimes the other. Depends on my mood. A little variety (even if subtle) is nice to have, though, and we'll definitely be making this beer again.

Piggish Rye IPA

Total batch size = 5 gallons; Partial Mash in 3 gallon beverage cooler; ~3 gallon 60 minute stove-top boil; very late malt extract addition; dry hopped for aroma; target abv of 6.5%.

3 3/4 lb 2-Row Pale Malt
3/4 lb Rye Malt
1/2 lb 10L Crystal Malt
1/2 lb Carapils/Dextrin Malt
1/2 lb Wheat Malt
4 1/4 lb Briess Golden Light Dry Malt Extract (DME)
2 oz Columbus Hops (12.3% AA)
2 oz Cascade Hops (6% AA)
1 1/2 oz Simcoe Hops (13.2% AA)
1 oz Centennial Hops (8% AA)
1 tablet Whirlfloc
White Labs WLP001 California Ale Yeast
4 oz corn sugar (for bottle priming)

Hop Schedule:

1 oz Columbus - 60 minutes boil
1/2 oz Cascade - 30 minutes boil
1 oz Cascade - 15 minutes boil
1/4 oz Columbus - 2 minutes boil
1/2 oz Simcoe - 2 minutes boil
1 oz Columbus - Dry Hop in Secondary Fermenter
1/2 oz Cascade - Dry Hop in Secondary Fermenter
1 oz Simcoe - Dry Hop in Secondary Fermenter
1 oz Centennial - Dry Hop in Secondary Fermenter

Heat 8.25 quarts water to 165 degrees for a target mash temperature of 150-153 degrees. Place the 6 pounds of crushed grain (2-Row Pale, Rye, 10L Crystal, Carapils and Wheat) into a large mesh bag. Pour the hot water into the beverage cooler, then lower the grain bag into the water very slowly, pushing and prodding with a large spoon to ensure all the grain is wet (this can take several minutes). Put the lid on the cooler and allow to rest 60 minutes.

While the grains are mashing, heat another 4-5 quarts of water to 180-185 degrees for sparging (rinsing the grains). Near the end of the 60 minutes, heat 2 quarts of water to a boil in your brew pot.

After the first mash is complete, remove the cooler lid and open the spigot to draw off about 2 quarts of wort into a large pitcher. The first few draws will likely be cloudy with grain particles; if so, pour it gently back into the cooler over the grain bag to help filter it. Draw off the remaining wort by the pitcher-full and carefully pour that wort into the boiling water in your brew pot; continue until only a trickle of wort leaves the spigot.

Pour about 4 quarts of your hot sparge water over the grain bag in the cooler. Gently lift the bag up and down to thoroughly re-wet the grains (but don't slosh). Cover and let sit about 5 minutes. Use the spigot and a pitcher to draw off all of the second wort and add it to your brew pot. You should have about 3 gallons of wort.

Bring the wort to a boil and add hops according to the schedule. At time zero, remove from heat and add the DME one pound at a time, stirring to dissolve (alternatively, with 15 minutes left, carefully begin adding DME by the cup-full, stirring well between each addition; at time zero, add the remaining DME off the heat). Stir in 1 tablet Whirlfloc. Cover and let sit 10-15 minutes.

Move brew pot to an ice bath and cool quickly to less than 80 degrees. Transfer wort to a primary fermenter, straining most of the hops. Add water to reach the 5 gallon mark. Swirl vigorously then pitch the yeast.

Ferment in primary for 1 week, then transfer to secondary and dry hop with 1 oz Columbus, 1/2 oz Cascade, 1 oz Simcoe and 1 oz Centennial. Bottle or keg after fermentation is complete (2 to 3 weeks in secondary).
Thursday, February 19, 2009

Partial Mash Brewing and an IPA Recipe Modeled After Blind Pig

Piggish IPA

Given that a year and a half has now passed since we brewed our last batch of beer, it was clearly time to get the wort boiling again. This time, in our ongoing quest for our perfect IPA, we took a step forward into the world of partial mash brewing.

Partial mash is a technique that allows you to get some of the flexibility and control of all-grain brewing, while still allowing for a kitchen-friendly stove-top boil. Basically, you are moving part way from extract brewing to all-grain by replacing roughly half of your extract with grain.

Piggish IPA

We bought the malted barley whole at our local brewing supply store, and used their barley crusher to mill it into the form you see above.

The cracked barley gets mixed together with the specialty grains you are using and it all goes into a big mesh bag.

Piggish IPA

The next step is the mash. For our mash vessel, we used a 3 gallon beverage cooler - perfect for keeping hot water at a reasonably stable temperature for the hour or so the grain is steeping. This size cooler can handle up to 6 pounds of crushed grains in about 8.25 quarts of water. Since the cooler and grains start out unheated, we used 165 degree water, shooting for a target mash temperature of 150-153 degrees.

Piggish IPA

It's important to lower the bag of cracked grains into the cooler very slowly and prod it with a spoon to ensure that no dry patches of grain are trapped in the center.

Piggish IPA

Another great thing about the cooler is that the spigot provides an easy way to get the wort out after the mash is complete.

Piggish IPA

After you've collected the first wort, it needs to be immediately heated to 168 degrees to stop enzymatic activity and keep the sugars fermentable. This is done by pouring the wort into a pot that already contains a small amount of boiling water. You then bring the wort to a boil on the stove top just like you would do for all-extract brewing.

Piggish IPA

While the first wort is heating, more hot water gets added to the wet grains in the cooler and allowed to sit for another 5 minutes before draining off every drop of this second wort to add to the boil pot.

After all the wort comes to a boil, the timer starts for hop additions.

Piggish IPA

Remember that only half of our malt bill was grain - the remaining is extract. We prefer to use dry malt extract (DME) for both flavor and color reasons. We use the late extract addition technique - adding the DME (all of it, in this case) at the end of the boil to avoid over-caramelization.

Piggish IPA

For this beer, we were inspired by Russian River's Blind Pig IPA, and Alpine Brewing Company's clone of it, O'Brien's IPA. Both are fantastically aromatic beers in the San Diego Pale Ale style - although at around 6%abv, they are bit lower octane.

The hops we chose were based on a combination of the sparse info about Blind Pig we were able to find on the web, our personal preferences, and what we had on hand. We used Columbus, Cascade and Simcoe in the boil, and then dry hopped in secondary with all three again, plus some Centennial.

Piggish IPA

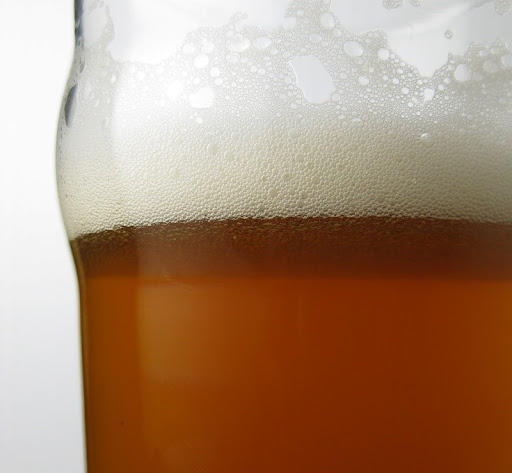
The result was easily one of the best beers we have made. It has a beautiful light-orange color, with a nice, white lacy head. Taste-wise, it is quite dry and hoppy, but with just enough malt sweetness for balance. At 6.3% abv, the alcohol content is right where we wanted it.

Doing a partial mash was not much more complicated than straight extract brewing and it made a big difference in the outcome. Add in the extra flexibility you get with regard to the grains you can use (we're thinking of adding some rye next time) and it has definitely become our brewing technique of choice. Until we go all-grain, that is...

Piggish IPA

This batch won't last long...

Update: also check out our Rye IPA version of this beer.

Piggish IPA

Total batch size = 5 gallons; Partial Mash in 3 gallon beverage cooler; ~3 gallon, 60 minute stove-top boil; very late malt extract addition; dry hopped for aroma; target abv of 6.4%.
Additional helpful procedural details can be found in "Countertop Partial Mashing" by Chris Colby in Brew Your Own magazine.

Ingredients:

4 1/2 lb 2-Row Pale Malt
1/2 lb 40L Crystal Malt
1/2 lb Carapils/Dextrin Malt
1/2 lb Wheat Malt
4 lb, 1 oz Briess Golden Light Dry Malt Extract (DME)
2 oz Columbus Hops (12.3% AA)
2 oz Cascade Hops (6% AA)
3/4 oz Simcoe Hops (13.2% AA)
1 oz Centennial Hops (8% AA)
1 tablet Whirlfloc
White Labs WLP001 California Ale Yeast
4 oz corn sugar (for bottle priming)

Hop Schedule:

1 oz Columbus - 60 minutes boil
1/2 oz Cascade - 30 minutes boil
1 oz Cascade - 15 minutes boil
1/4 oz Columbus - 2 minutes boil
1/2 oz Simcoe - 2 minutes boil
1/4 oz Columbus - Dry Hop in Secondary Fermenter
1/2 oz Cascade - Dry Hop in Secondary Fermenter
1/4 oz Simcoe - Dry Hop in Secondary Fermenter
1 oz Centennial - Dry Hop in Secondary Fermenter

Heat 8.25 quarts water to 165 degrees for a target mash temperature of 150-153 degrees. Place the 6 pounds of crushed grain (2-Row Pale, 40L Crystal, Carapils and Wheat) into a large mesh bag. Pour the hot water into the beverage cooler, then lower the grain bag into the water very slowly, pushing and prodding with a large spoon to ensure all the grain is wet (this can take several minutes). Put the lid on the cooler and allow to rest 60 minutes.

While the grains are mashing, heat another 4-5 quarts of water to 180-185 degrees for sparging (rinsing the grains). Near the end of the 60 minutes, heat 2 quarts of water to a boil in your brew pot.

After the first mash is complete, remove the cooler lid and open the spigot to draw off about 2 quarts of wort into a large pitcher. The first draw will likely be cloudy with grain particles; pour it gently back into the cooler over the grain bag to help filter it. Draw off the remaining wort by the pitcher-full and carefully pour that wort into the boiling water in your brew pot; continue until only a trickle of wort leaves the spigot.

Pour about 4 quarts of your hot sparge water over the grain bag in the cooler. Gently lift the bag up and down to thoroughly re-wet the grains (but don't slosh). Cover and let sit about 5 minutes. Use the spigot and a pitcher to draw off all of the second wort and add it to your brew pot. You should have about 3 gallons of wort.

Bring the wort to a boil and add hops according to the schedule. At time zero, remove from heat and add the DME one pound at a time, stirring to dissolve (if needed, return to low heat for a few minutes to help dissolve the extract). Stir in 1 tablet Whirlfloc. Cover and let sit 10-15 minutes.

Move brew pot to an ice bath and cool quickly to less than 80 degrees. Transfer wort to a primary fermenter, straining most of the hops. Add water to reach the 5 gallon mark. Swirl vigorously then pitch the yeast.

Ferment in primary for 1 week, then transfer to secondary and dry hop with 1/4 oz Columbus, 1/2 oz Cascade, 1/4 oz Simcoe and 1 oz Centennial. Bottle after fermentation is complete (2 to 3 weeks in secondary).

Friday, September 26, 2008

O'Brien's IPA, Alpine Brewing Company

O'Brien's IPA

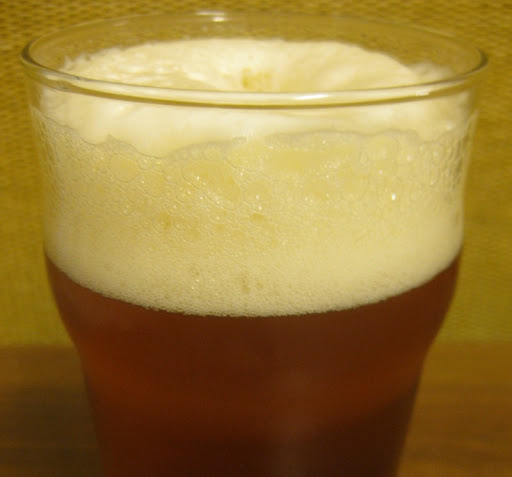
No, that's not a bad pour - that's what you want with a good San Diego Pale Ale. All of the fantastic aroma is up there in that white, lacy goodness. And since it was poured at home, there was no worry about getting maximum volume in the glass.

But enough about pouring - the beer is O'Brien's IPA from Alpine Brewing Company. Named for the fantastic San Diego pub of the same name, this beer is currently (in my opinion) the best offering from the best brewery in the best brewing county in the country.

The beer was reportedly inspired by Russian River's Blind Pig. I tasted them side-by-side yesterday (at, quite appropriately, O'Brien's), and I can definitely see the similarity - they both have an amazing citrusy hop aroma that carries over nicely into the taste. I think I like O'Brien's IPA just a bit better, though - it has just a touch more malt sweetness.

O'Brien's IPA

I've raved before about how reasonable Alpine's growler prices are. Our recent fills of O'Brien's IPA were only $8.59. Amazing. I just wish they had this beer available more often - they seem to be making it a couple of times a year and the generally sell out in just a few weeks.